


The closet is an ideal design solution for modern interiors, allowing the most rational use of free space in the room. The popularity of such a piece of furniture is explained by numerous advantages, among which - impeccable functionality and excellent capacity with compact dimensions, high quality of the finished structure and long service life, the use of environmentally friendly materials and reliable accessories, a variety of design and color solutions emphasizing the individuality of the style. All this allows you to harmoniously fit the wardrobe in any modern interior. About how to make an exclusive and functional closet with your own hands and calculate its parameters, we'll tell you in the article.
Content
- 1 Classification of sliding-door wardrobes
- 2 Selecting a sliding system
- 3 Tools for building a wardrobe
- 4 How to assemble a wardrobe: the main stages
- 4.1 step one: select the installation site and perform the markup
- 4.2 stage two: mount the anchorages
- 4.3 stage three: attach a vertical rack, mezzanine, side wall and shelves
- 4.4 stage Four: fix false panels on the floor, wall, ceiling and sides
- 4.5 stage five: installation of sliding and sliding doors
Classification of sliding-door wardrobes
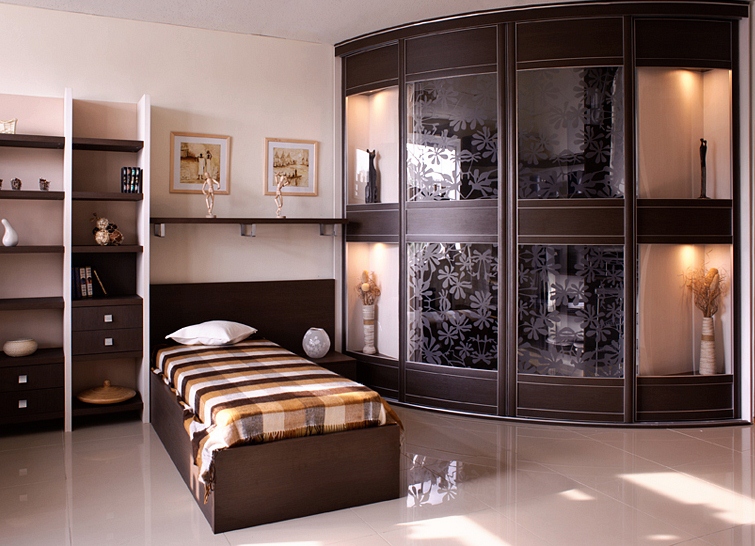
All cabinets, depending on the method of opening the facade, are divided into 2 types: classic models with swing doors that have already become classic and an innovative development in the sphere of manufacturing of furniture designs - wardrobes. Let's not dwell on the obvious advantages of such designs, let's just say that the closets are an unlimited field for the realization of design fantasy, the possibility of creating a variety of configurations and exclusive decorative design of individual elements, including sliding doors.
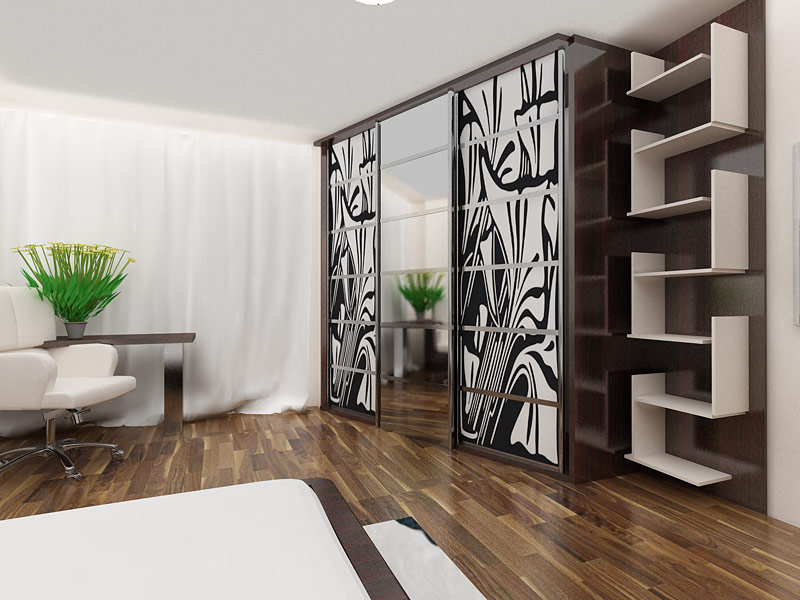
Depending on the chosen style and personal preferences, as filling of sliding doors you can use:
- an ordinary mirror;
- Particleboard;
- sandblasting, which is applied to the mirror with a special white paint;
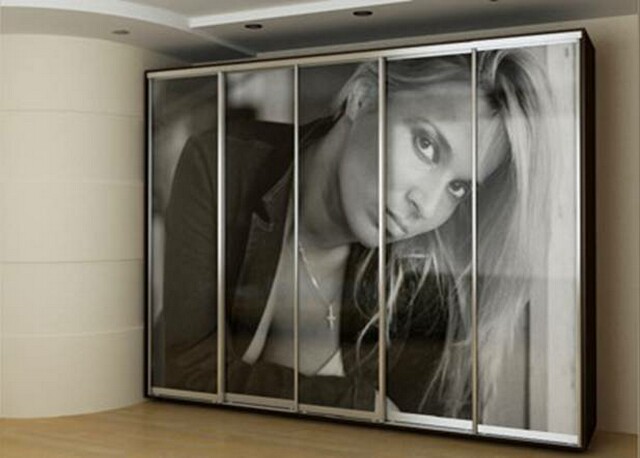
- drawing on the film. The peculiarity of this method consists in gluing a certain image or pattern on the self-adhesive film to the glass on the reverse side. Despite the high cost of this design, the result is spectacular and memorable;
- combined filling.
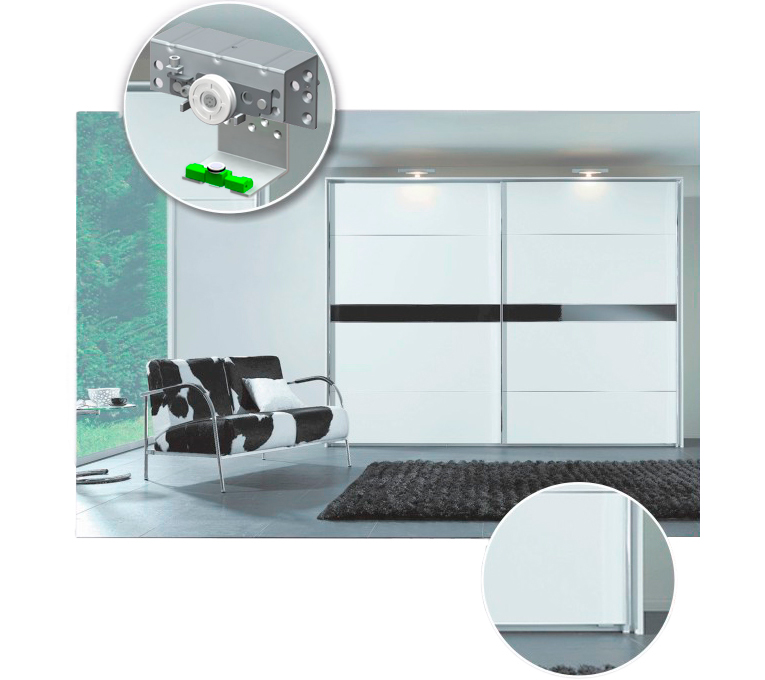
Selecting a sliding system
Having chosen the filling of the doors, pay attention to the selection of a suitable sliding system for your cabinet. The modern market of building materials and furniture accessories offers a huge assortment of quality and reliable sliding systems from the world's leading manufacturers, featuring operational characteristics and functionality, profile shape and color solutions, ease of assembly and service life. The best known brands are ADS, Sideco, Brain, Komandor, etc. A complete liner with formulas and build sequence is mandatory for any sliding system.
Tools for building a wardrobe
To build a closet with your own hands, you will need the following tools:
- a drill for twisting screws and making holes in the surface of a natural massif or gypsum board;
- perforator for making holes in a brick or concrete;
- hammer for clogging dowels;
- roulette and level for measurement;
- adhesive for fixing the pile;
- a hacksaw for wood and metal for fitting the details of the compartment compartment to the required dimensions;
- dowels and screws.
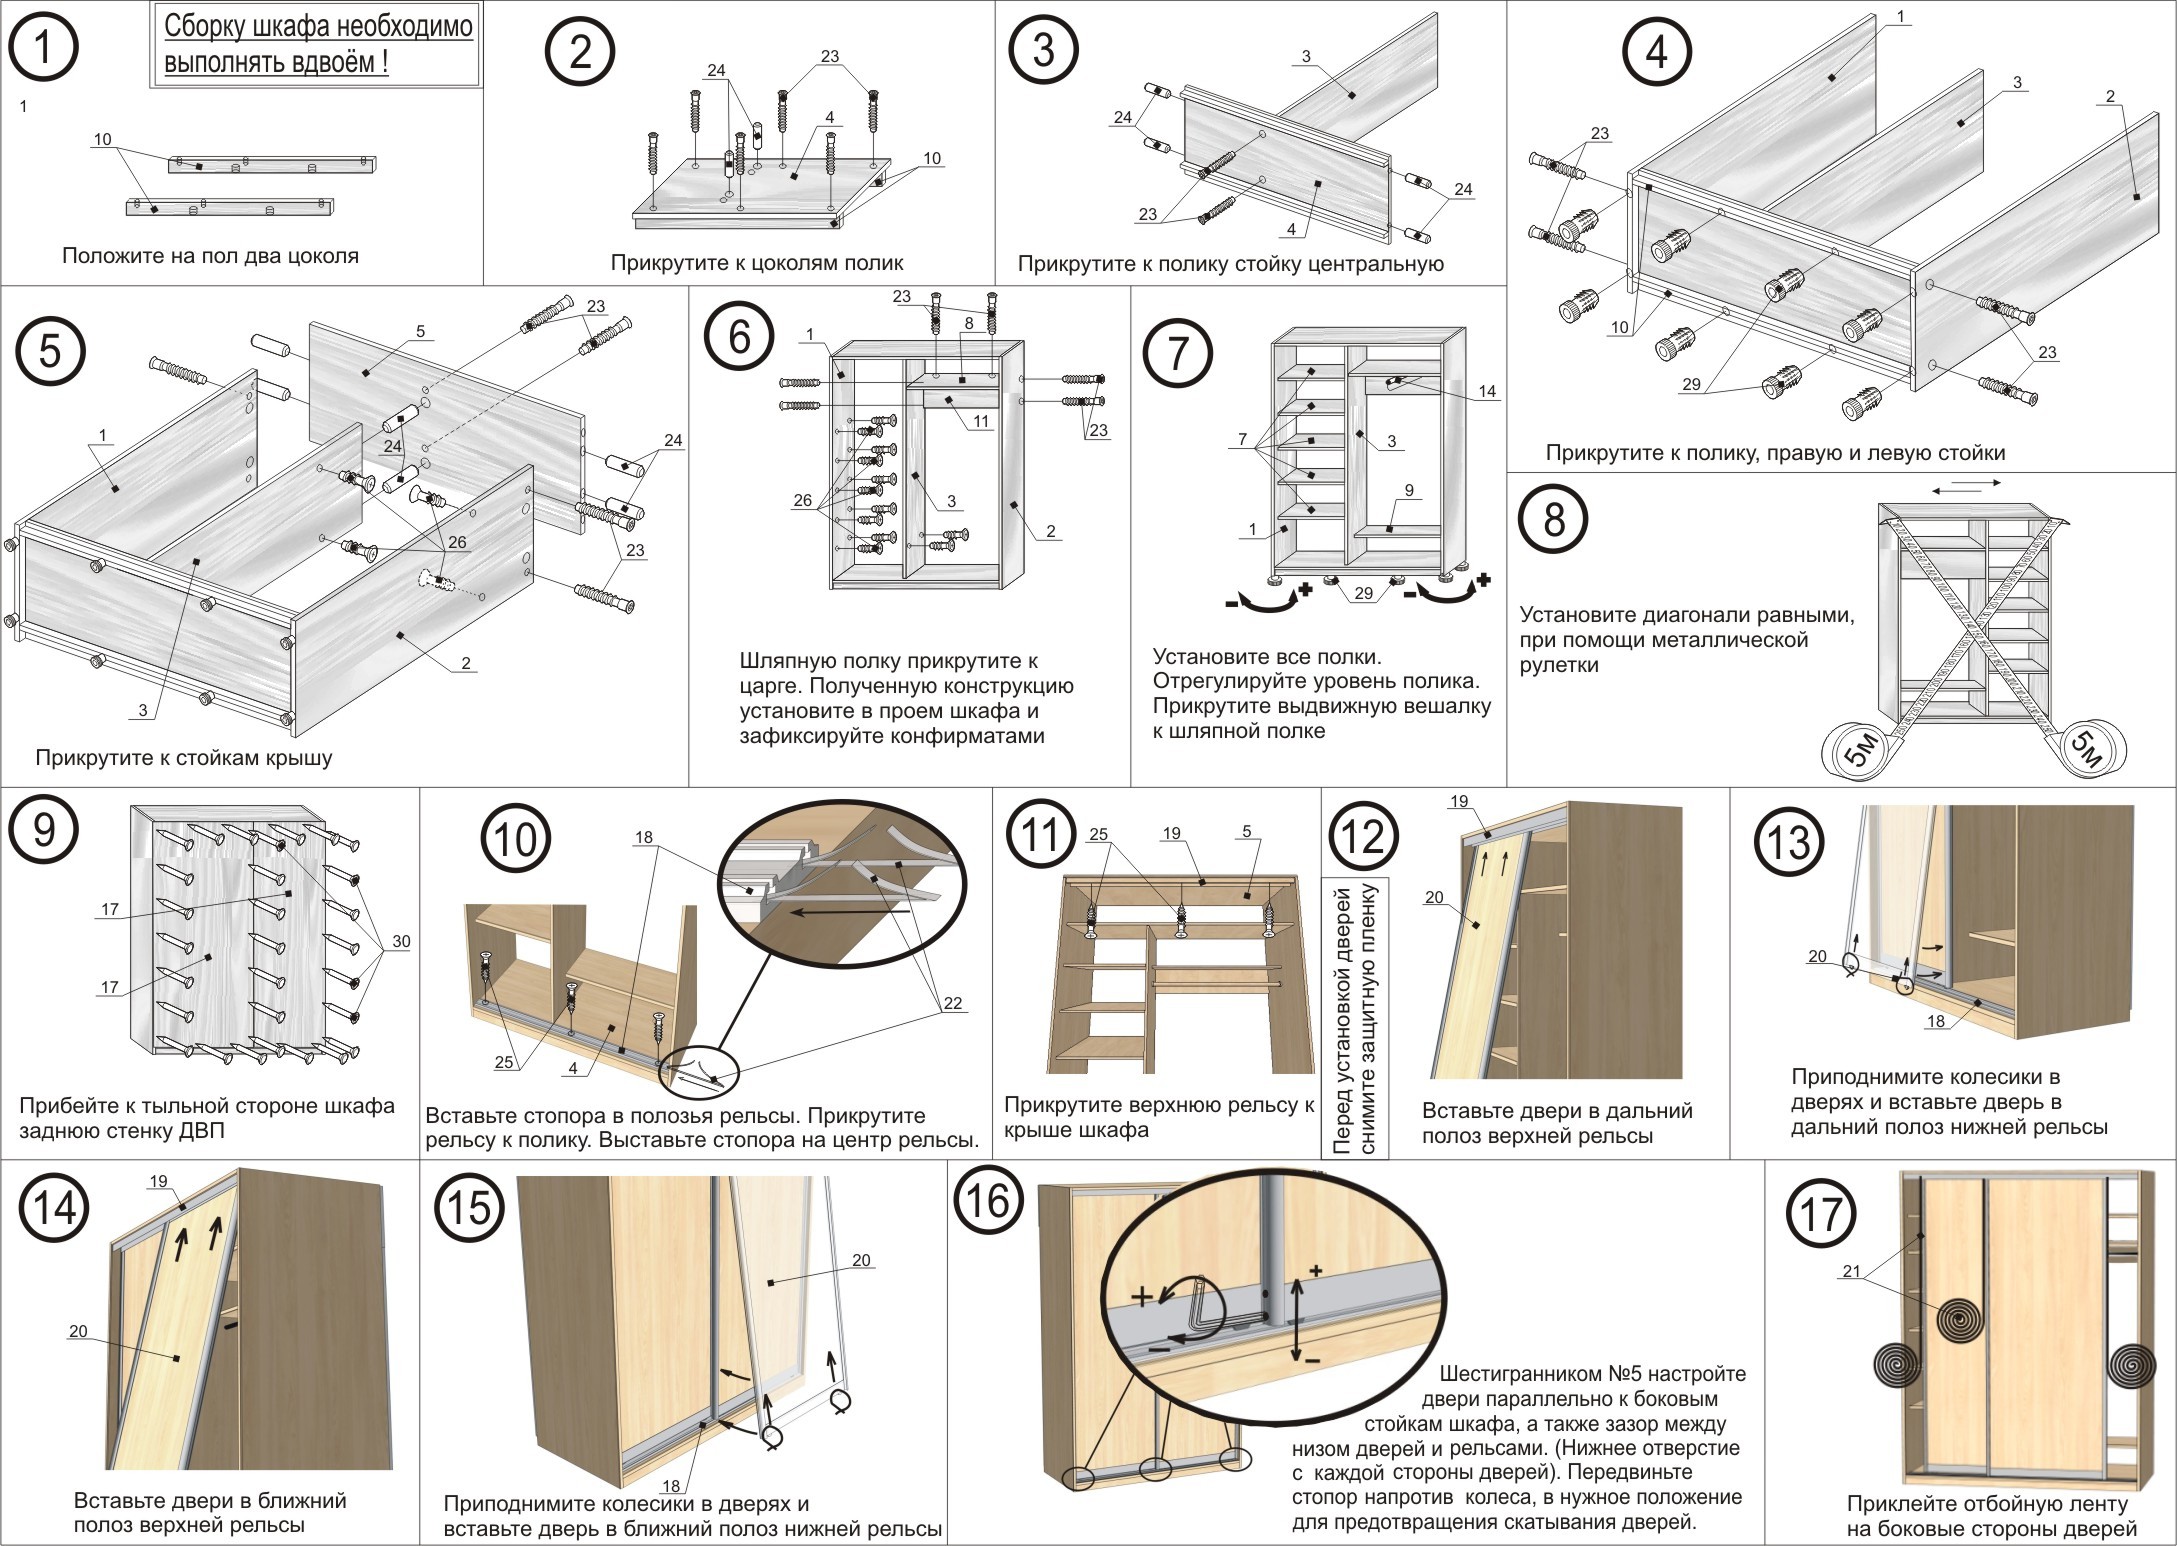
How to assemble a wardrobe: the main stages
Before you start assembling a wardrobe, you definitely need to buy it. It should be noted that it is easier and faster to orient you in this matter if the drawings of the closet are included in the complete set of the purchased piece of furniture. Check their availability.
Pay attention to the quality of each part and strip, make sure there are no swellings, cracks and other flaws. When transporting the kit, take precautions: fix the product firmly in the machine, and for transport choose a level road.
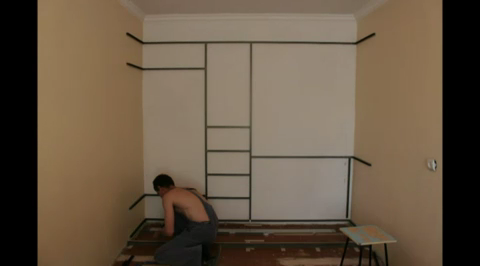
step one: select the installation site and perform the markup
- if your closet will occupy space near the corner of the room, then from the angle should measure the total length of the cabinet. For this you will have to measure the length of the mezzanine;
- draw a vertical line that will delineate the boundaries of the future design. To obtain an even line, it is better to make several marks;
- measure out a vertical line at the level of which the vertical bar separating the compartment from the horizontal shelves for things from the compartment with hangers will be placed. For this purpose, the length of the shelves is measured and the necessary distance is measured from the left or right border of the compartment cabinet (depending on the cabinet model);
- on two vertical lines measure the height of the shelves - 1 - the edge of the future design, 2 - the vertical stand.
stage two: mount the anchorages
- to the drawn lines, lean attachments and, using a pencil, mark on the wall points for future holes;
- in the holes hammer the dowels;
- firmly fasten the fasteners to the wall surface with self-tapping screws.
Since your main task is to properly assemble the sliding-door wardrobe, it should be remembered that if the profile 18 is used for finishing the edges of individual elements, then it is better to wear it before the next stage.
stage three: attach a vertical rack, mezzanine, side wall and shelves
1. Vertical stand.Leaning the vertical stand to the finished fastenings, securely fix with screws.
2. Entresol.
- pencil draw a horizontal line, where the mezzanine will be located;
- on this line, make holes to secure the individual parts;
- hammer into the holes self-tapping screws and dowels, mount the fasteners on the wall;
- on the fixings, install the mezzanine, fix it on the screws.
3. The side wall.
- with the greatest accuracy measure the distance from floor to ceiling, adjusting the resulting side wall;
- using self-tapping screws, secure the sidewall securely to the fasteners.
4. Shelves.
- on the vertical stand and the side wall of the cabinet make notes on where the shelves will be located;
- on the wall and on the sides, install two fasteners;
- place the shelves on top and secure them with screws.

In the other compartment, where the hangers will be, it is necessary to hang up the tube, fixing special fasteners for this. Trim the pipe to the correct dimensions, insert and fasten.
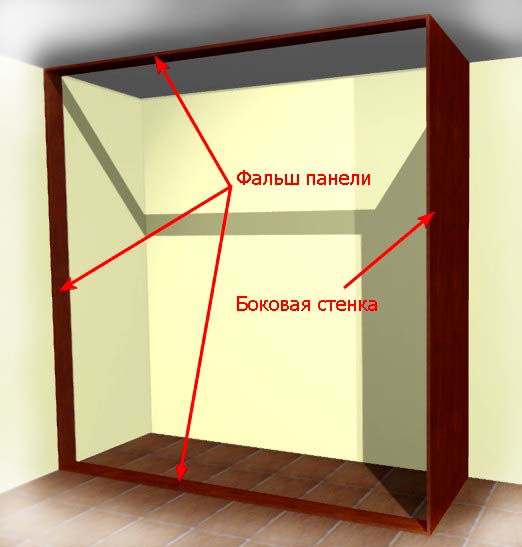
stage Four: fix false panels on the floor, wall, ceiling and sides
- drill holes in each panel;
- on the surface of the wall at the points of attachment, make pencil marks;
- in the finished holes, plug the dowels;
- false panels fix in the appointed places on samorezy.
stage five: installation of sliding and sliding doors
1. Guides.
- determine the length of the guides and adjust to the desired size;
- fasten the screws to the false panels on the floor and ceiling.
2. Doors.
After assembling the frame, you can proceed to install the doors. There are several sliding systems, each of which has its own features. Directly for your cabinet, try to select a system, the installation of which would not require special equipment from you. You can deprive yourself of the pleasure of sawing sheets, performing their fixing to the guides, adjusting the rail dimensions, ordering the door to a specializing firm. She also can order the filling material and the design variant.
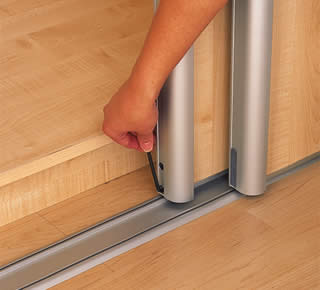
So, to install a sliding door you need:
- to fasten the door to fasten the rails. Do not tighten - the rollers must move;
- insert the door into the upper, and then into the lower guide;
- after adjusting for height and angle of inclination, glued to the sides of sliding doors pile - this will eliminate the unnecessary noise when opening / closing the cabinet.
Having installed the doors, make sure of their ease of operation and the absence of creaking, the strength of securing the shelves and the reliability of the fittings. And only after making sure of this, call your relatives and friends to evaluate the result!
A detailed study of the technology of assembling a wardrobe is possible by watching a video on youtube.


