


The modern choice of entrance doors is limited only by taste preferences and financial possibilities of buyers. However, neither the chosen style, nor the variant of execution does not influence the requirements of reliability, durability and safety of the entrance door, its main functional purpose.Each door structure is unique in its kind, it is a real work of art and a highly artistic decoration for an apartment, house or villa.
Entrance wooden doors: natural beauty and safety
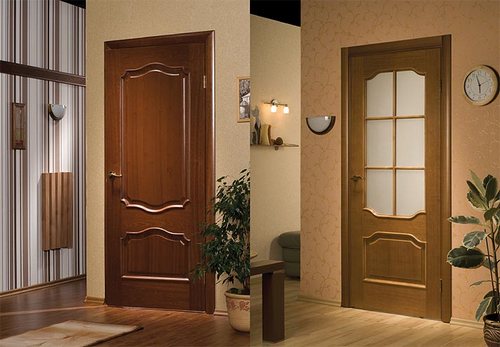
Despite the abundance of metal, polymer and synthetic materials, the demand for wooden entrance doors continues to grow. The natural nature of wood, the variety of textured and design solutions, excellent performance characteristics and exquisite fittings determine the incomparable success of wooden structures.
However, do not forget that the impeccable functionality of the input structure depends on the quality of its assembly and installation. Quality installation of the entrance wooden door from oak is a consistent performance of certain actions by using modern equipment and knowledge of process technology, which is detailed in the instructions to the purchased door kit.
How to install an entrance wooden door: step by step instruction
So, today we will install wooden doors for internal use. Installation includes 8 steps:
unpacking the kit
Installation of the entrance wooden door from the array begins with a neat unpacking of the purchased kit. Using a knife, open the packing of the door frame. At this stage it is important not to hurry up so as not to damage the structure. The canvas experts recommend to unpack before use, so as not to spoil the appearance before use.
preparation for the assembly of the door frame
We collect the unpacked door frame. The standard set includes 3 main parts and 1 additional set, which serves as a wooden connecting strip. This bar you will need for a temporary fixation.
In the ends of the panels of the box you will see inserts of durable plastic, hammered into special grooves.
Your task is to dislodge these inserts. Do it with a wooden peg extremely carefully, trying not to damage the surface of the new door frame. Do not use a hammer!
upper box assembly
Assemble the details of the door frame in the shape of the letter "P" groove in the groove. Watch for the correct geometry. Unevenness is not permissible! Secure the connected parts with plastic inserts that have been knocked out previously. To carry out the work you will need a hammer, and to finish the plank - peg, which completely excludes the possibility of damage to the wooden surface.
If, by clogging the insert, you find a displacement of the elements of the box, then their alignment is made by the same hammer. It is enough to hit a few times with a hammer on the bar attached to the body, and all the parts will be in place.
bottom box assembly
To successfully implement the subsequent stages, you will need to arm yourself with a special power tool:
- with a drill;
- a milling head;
- screwdriver.
After completing all the works of the previous paragraph, you can proceed to the connection of the bottom of the door frame. Here you can not do without that, an additional element of the kit - the fixing wooden bar (we mentioned it at the very beginning).
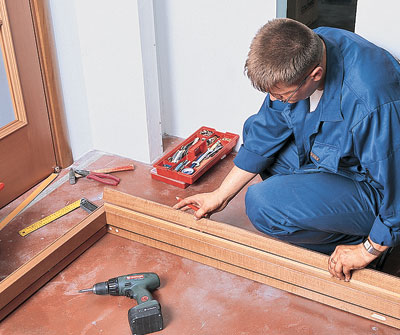
Measure the width of the box along the bottom line and fix it with a strap. Use the screws. It should be noted at once that the fixing points of the screws will be sealed with a solution in the wall.
It is important to pay attention to the features of screwing the screw: do not screw the edge of the bar at the edge, because the possibility of splitting it is too great. Hold the screwdriver at an angle of 75 °.
determination of door height
The work of this stage is related to measuring the height of your opening. Do not forget to take into account the height of the door or its absence. According to the results obtained, boldly cut the bottom of the door frame. Use the end saw.
installation of the door frame in the opening
Now you can try on the door leaf and the box prepared for installation. Recall that at this stage it can not be unpacked completely, but it is enough to drill the holes for the locking device and handles. We will tell you the installation technology a little later, and now you can do the installation of the door frame in the opening. The process begins with a perfectly flat door frame in the opening. The construction level will help you in this. Then, using conventional screws, dowel-nails and other fasteners, firmly screw the box to the opening.
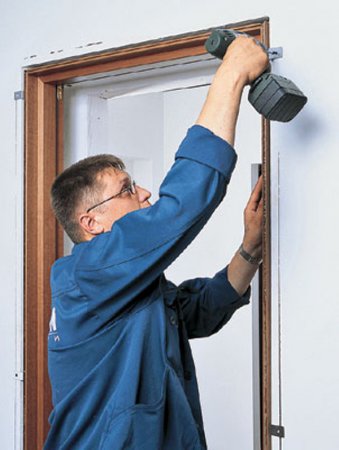
Remember that in those areas, which will later be fixed with mounting foam or finishing materials, the fixing elements are screwed at an angle. Through fastening through the front side of the frame will certainly spoil the appearance of the structure, will cause the door to work incorrectly, for example, it will make opening / closing difficult.
Using the mounting foam, carefully work the crevices between the doorway and the box. Later on, a slope will be constructed on this site.
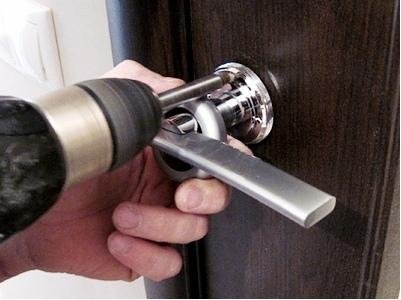
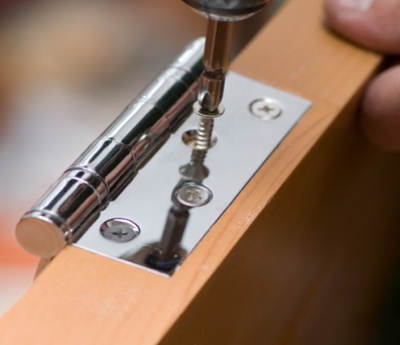
installation of accessories for wooden entrance doors
While the mounting foam dries, you can pay attention to the door leaf - you have to cut the lock, install the handles and fix the hinges.
Armed with measuring devices, designate the place where the lock will be placed in the end face of the door structure. Given the lock configuration, draw a contour along which you will remove the wood until the front part of the locking device is level with the surface of the blade. The modern milling saw effectively copes with the task of cutting wood.
Usually the working part of the lock assumes the presence of a deeper hole, which can be obtained by a conventional drill with a drill of the required diameter.
To install the handles with a drill, make holes on both sides of the door. Install and secure the lock. To do this, use a special fastener that comes with the kit. Carefully place the core of the lock in the hole in the canvas, on both sides, put the handles and clamp with suitable fasteners (screws and bolts).
The stage is completed with the installation of loops. In the places marked in advance at the ends, secure the hinges.
door installation on hinges
Now you can do the door frame. Draw the layout of the places where the loops will be screwed. As in similar cases, it is convenient to remove the wood with a milling saw.
Mark the entry area of the door lock in the case of the box. Use a chisel to drill a hole of the required depth and fasten the plug, which you can find complete with hinges, handles and a lock. And, finally, hang the door frame on the hinges.
It remains to unpack the door, check the quality of its work and deservedly praise yourself.
For more information on fixing the hardware and installing the canvas in the opening, you can learn from the video on youtube.


