Metal tile recently came to our market from Europe, and in a short time became very popular among owners of private housing. Beautiful appearance, practicality and a democratic price are just a small part of the advantages of this roofing material, thanks to which the metal tile successfully competes in the market. Make the roof of the metal tile yourself is quite possible, even if the roof construction is quite complicated. How to do it - we will briefly consider this article.
Content
Calculating the amount of material
First, you need to calculate the number of sheets you need to install the roof. As a rule, this is done even during the development of the project, long before the start of construction.
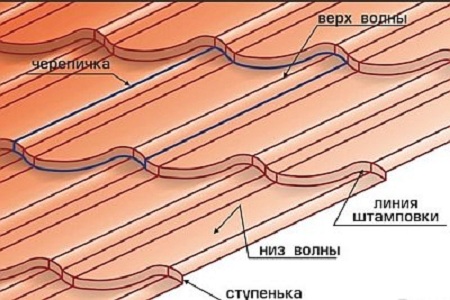
In advance, calculate the amount of material is also needed in order to prevent a large amount of waste, and once again do not cut the sheets. Metal tile has a wavy surface, imitating ceramic tiles. Each wave represents a step that must be taken into account when calculating the required amount of material.
For example, for a simple roof with a small angle of inclination, one metal sheet is considered by area, and the rest - by the number of waves in the sheet. Making calculations, it is necessary to take into account the overhang of sheets, because it depends on the length of the rafters, and the crate, and the drainpipe system.
With the help of special programs, for example, like AutoCad, you can not only design the future house, but also calculate the required amount of building materials.
It should be noted that with metal roofing in the process of transportation and loading-unloading should be handled carefully. Although it is metal, but rather thin, and to deform it or damage the coating in inaccurate handling is simple enough.
Mounting of metal tile - stages of work
The construction of a roof of metal roofing on a complex roof (a complex roof is considered to be a complex one, having more than two ramps, valleys and adjoining walls), especially if you do it yourself, and for the first time, it takes a lot of time and requires strict compliance with the technology.
All work on the installation of a complex roof metal can be divided into the following stages:
- Preparation.
- Assembling the rafters system.
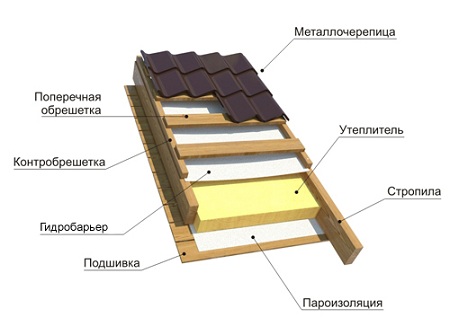
- Laying the waterproofing layer.
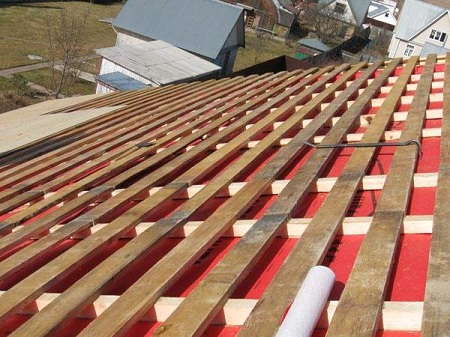
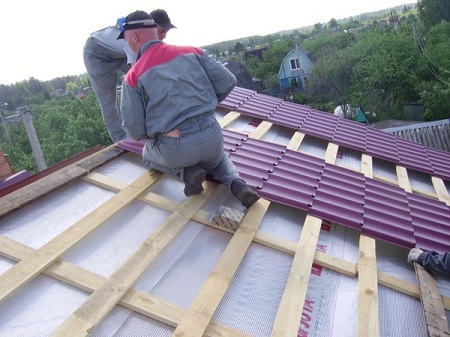
- Installation of the battens.
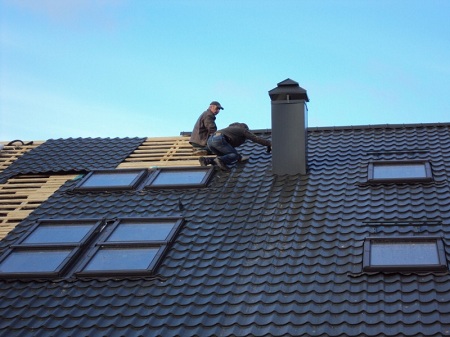
- Laying of sheets of metal tile.
- Installation of the drainage system.
At the preparatory stage, check whether the geometry of the roof is broken, by measuring the skate diagonal. But, as practice shows, the ideal roof in terms of geometry has not yet been able to do to anyone. There is nothing terrible here - insignificant distortions are quite simple to fix with the help of the crate, and also to hide using additional elements of the roof.
If the roof slope has a length of less than 6 meters, then the roof slope is recommended to do no more than 12 degrees. If the roof has a hard surface, it must be removed. Before starting installation work, all chimneys and ventilation ducts are led outward.
Roof rafters
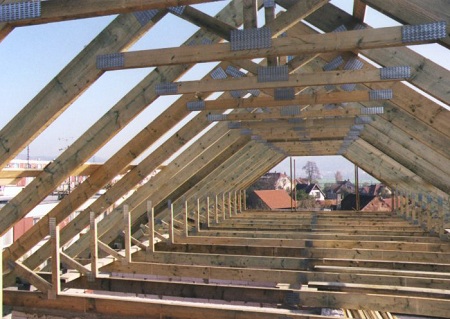
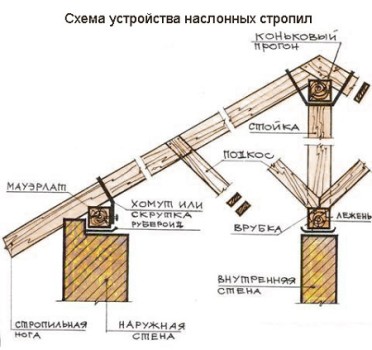
The triangle was taken as the basis for the classical truss construction, as the most reliable, stable and economical design.
The triangle in the rafter structure consists of the tightening and rafter legs - the upper and lower belt of the truss. The endings of the rafter legs of the lower belt are on the roof and are fastened there.
Waterproofing of roofing
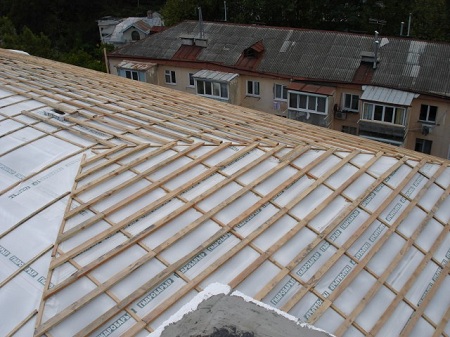
Before the installation of roofing roofs, waterproofing materials are installed. As a waterproofing under the metal tile, the under-roof steam-proof film is most often used. It well protects the attic space from water, dust dirt, and also protects the insulation layer from moisture penetration.
The moisture-proof film has a micro perforation, thanks to which water vapor from the inside of the house is not retained in the attic space. The waterproofing film consists of several layers and a reinforcing lattice made of polyethylene fibers. On both sides the waterproofing is laminated with polyethylene.
Roof under the roof of metal
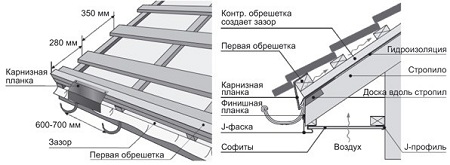
First of all, a cornice overhang is mounted. This is a kind of starting and basic point for installation works. The curb is made of a board measuring 10x2.5 cm. The truss for rafters must have dimensions of at least 15x5 cm. When nailing the first board, it should be neat - it "dances" the entire crate. The first board is beaten along the eaves, controlling that it does not protrude beyond its limits and does not deviate from the horizontal. The first board should be thicker than the others by about 1-1.5 cm. This is necessary in order to compensate for the difference in the levels of the support points of the first and subsequent tile sheets.
The step from the board that goes to the cornice should be 5 cm smaller than the step between the remaining boards of the crate. The distance between the remaining boards of the battens should correspond to the step of the profile of the metal tile, that is 35 or 45 cm.
To check whether the distance from the first to the second board is calculated correctly, two trimmed boards are placed on the ground parallel to each other (at a distance from the first to the second board of the crate), they mount a tile element and install it on the crate. Thus, it is determined whether metal tile is sufficient for normal water flow. If the ledge is too large, the water will pour over the gutter, if too small - it will be blown between the gutter and the frontal board.
The layout of the remaining boards is done with the help of a tape measure, from the first board that goes to the cornice. After that, end and skate straps are fixed. To the roof of the roof was securely fastened, in the place of its fastening, additional boards are beaten. This greatly simplifies the installation of the skate of metal. The windshield is installed above the crate to the height of the sheet of metal.
Important point: if there is a valley on the roof, the crate is counted, marked and mounted from the top down, taking into account the length of the tail of the roofing material.
Installation of metal tile instructions
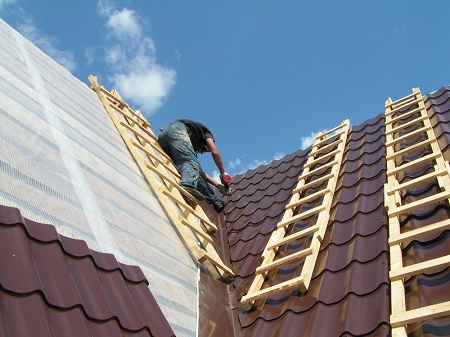
The first sheet of metal is laid in the lower left corner of the ramp. The next sheet is not slipped under the previous one, but cover it. Thus, the sheets are not scratched. All the sheets are laid strictly parallel to the cornice. The metal tile can be mounted in several ways: lay all sheets of the first row horizontally, and stack the second row in the same way, or you can make the sheets mounted vertically. The way of laying depends on the complexity of the roof, the location of observation windows, communications, chimneys, etc.
It is necessary to take into account that at the corners of the roof, most likely, there will be a discrepancy between the elements of the metal tile. To avoid this, each sheet is twisted slightly anticlockwise during installation (when laying occurs from the left corner). When installing, you must constantly monitor the line of sheets to the right.
Metal tiles to the crate are attached with screws, while the lower part of the roof must be secured as tightly as possible, since it is subjected to the greatest load in strong winds. In places where the sheets are joined, an enhanced fastening is also necessary.
Ends: one of the main elements of a complex roof
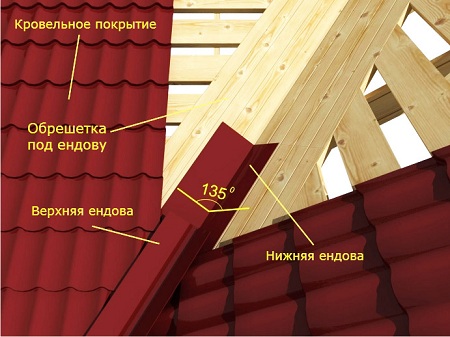
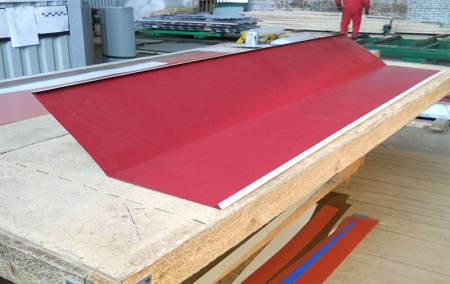
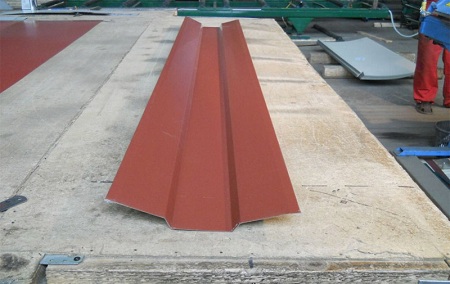
The Endowa is an element by which two planes of a complex roof join at the point of its fracture. The purpose of the valley is very simple - to protect the under-roof space from the penetration of moisture and debris. Endova is subject to intensive workload, so it is very serious to install the laths under the valley and to install it.
Distinguish between the upper and lower valleys. The top element has, for the most part, decorative purpose, and serves as an element of the decoration of the roof. In addition, it plays the role of a protective element for all internal inflections. The edges of the false (other name of the upper element) have bends to prevent water overflow. The lower edge of the false face is located under the cornice.
The main protective function is performed by the lower end.
It is made of a strip of strong galvanized steel. The upper and lower element of the valley is selected according to the color corresponding to the material of the roof.
Plank and junction points on a complex roof
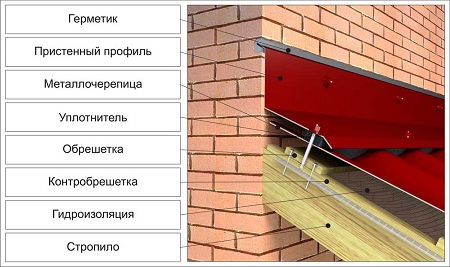
Plank contiguity is designed for reliable connection in places where the roof joins the walls. The bar is fixed in two places: in the upper part of the wave and to the adjoining wall. For additional sealing of the joint use silicone mastic. To the chimney bar, the abutments are attached in a similar way.
As you can see, the metal tile, the installation technology of which is outlined above, is a practical, beautiful and relatively uncomplicated material. But if you do not have the appropriate experience and the opportunity to work under the guidance of an experienced master, then it's better to refrain from self-activity, and not to spare money for the services of an experienced construction team.


