


When choosing a floor covering, most try to give preference to natural materials that keep the heat well and are pleasant to the touch. All these qualities are well combined in a laminate. About how to choose and lay the laminate floor on the floor in this article.
Content
How to choose the right laminate
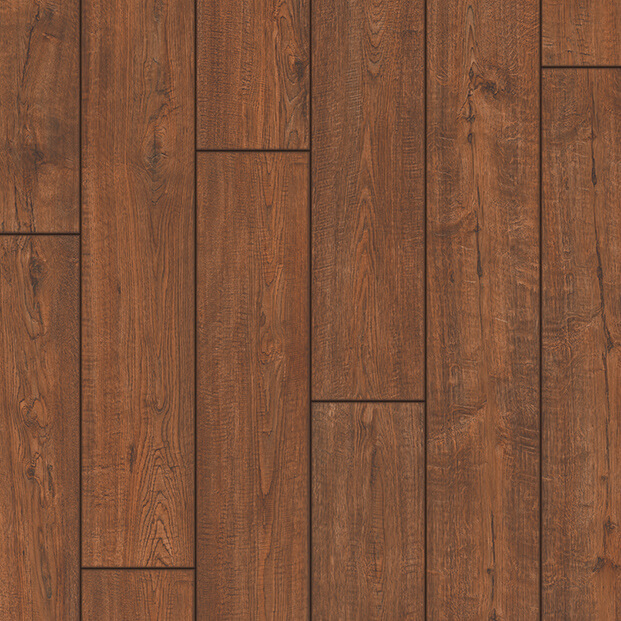
Laminate is a very popular floor covering.
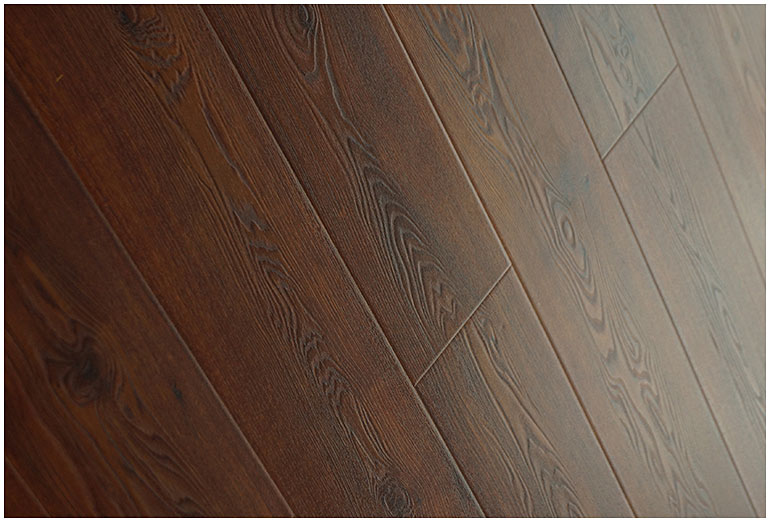
It is reliable and environmentally friendly. To choose a cover for a dwelling is not difficult and not only in the stores of building materials, but also on the Internet. For example, a large selection of flooring in the online store ligapol laminate. Quality laminate in its structure is similar to a natural tree. To look after a laminate it is simple, for frequent it is enough to wipe it with a damp cloth.
According to the resistance of the external coating, the laminate is divided into classes, which are designated by numbers from 31 to 34.
Let us consider in more detail what they mean:
- 31 - 32 - this laminate is suitable for living rooms and the service life is 12 to 15 years;
- 33 - 34 - are used mainly in premises with large traffic (cafes, shops, polyclinics) and their service life is 20 - 25 years.
Which class of sustainability to choose is up to you. But it must be taken into account that in the bedrooms it is fashionable to lay the material of a lower class. For the corridor, living room and other entrance areas, a higher resistance to damage should be selected. Another important criterion for choosing a coating is its thickness.
It can be the following:
- 5 mm;
- 8 mm;
- 10 mm;
- 12 mm.
A thicker material can be used in rooms with poor quality rough floors. All defects will be invisible due to the strength of thick laminate. If the floor is perfectly flat or there is a heating system, it is best to purchase a less thick material. So the floor will quickly warm up and do not have to increase the heating capacity. When selecting a cover, it is also necessary to take into account the purpose of the room. About how to choose the right laminate for different rooms, let's talk in more detail.
Kitchen. This coating is the most optimal solution.
It is best to choose a material with a wear-resistance class of at least 33, because in the kitchen there is a big load on the coating. To ensure that the various spots on the floor are not conspicuous, it is best to choose a textured laminate. Also, the coating should be moisture resistant (they are cleaned frequently in the kitchen), and when laying it is possible to process the edges of the slats with a special mastic. This will give strength and will additionally protect against moisture.
Living rooms. For bedrooms and living room, you can choose a low-grade laminate of durability, Passability in these rooms is small. It is also necessary to pay attention to the quality of the tree, it will serve as additional noise insulation in the room.
Hallway and corridor. These rooms are among the most passable. Therefore, it is best to put in them a coating 33 and 34 strength classes. Also the laminate should be moisture resistant due to frequent cleaning in these rooms.
Bathroom. For this room it is best to use a waterproof laminate. Its main difference from moisture-resistant models is the presence of a base of PVC plates. This ensures high reliability of the material along with ceramic tiles. Many manufacturers of this material provide a sealing strip of rubber on the longitudinal surface of the strips. Due to this, a high tightness is achieved.
Which laminate to choose for your home is up to you. But be sure to follow the appointment of the room at the same time. So the coating will last you longer.

Substrate preparation for laminate flooring
You have decided on the type of flooring and are ready to install it. But before that, you should carefully look at the cover, because all the irregularities and holes will directly affect the quality and durability of the coating itself. In an uneven field, the locking of the strips is the first to suffer, as a result of which the material can swell. If the surface for the flooring is wooden and there are rotten planks in it, this will lead to damage to the laminate and the formation of an unfavorable microflora in the structure of the laminate. Therefore, it is necessary to carefully prepare the floor for the floor covering. Consider in more detail how to prepare the wooden and concrete surfaces.
Preparation of a wooden floor. First of all, you need to carefully inspect the surface to identify weaknesses (cracked, rotten boards). If the damaged elements can be partially replaced, without restating the floor, this greatly simplifies the task. In the case of large elevation differences, they should be aligned as follows:
- we make replacement of the damaged sites of a floor;
- draw the floorboards to the lags and eliminate all the protruding nails;
- we top the plywood on top of the boards and fix it.
In addition to plywood, it is possible to use cement chipboards, the technology is similar to working with plywood. After leveling, the surface must be treated with protective compounds, for this purpose a drying oil is suitable. Also, the floor can be polished, and the gap between the sheets can be putty or putty on wood. After that, you can cover the laminate.
Preparation of concrete floor. If in your house the base is made of concrete and has unevenness it should be leveled. The best alignment for this is the mixture. All preparation is as follows:
- the floor is cleaned of dust and dirt;
- all the mounds should be brought down, and the pits are best covered with tile glue;
- we ground the surface with a solution of deep penetration;
- prepare the mixture according to the instructions on the package and fill it with the surface of the floor, leveling it with a spatula;
- after pouring the mixture must be rolled in with a roller to remove air;
- the mixture dries in a day, but the coating is best after a couple of days.
Thus, you can quickly bring the surface into an ideal state and lay the laminate.
Step-by-step instruction for laying laminate
The installation of a floor covering is a laborious process, consisting of several stages. Let us consider them in more detail.
calculation of laminate laying
One of the most important stages in the installation of flooring is the calculation and purchase of material. It is not easy to do this, but there are some nuances that can facilitate the task.
- The area of the room is easy, just multiply its length by the width and get its value in meters.
- When calculating, one should also take into account the method of laying. With the direct it is necessary to add about 5%, and for a diagonal 10-15% of the material.
- You should buy laminate packages, for their accurate calculation, you need to divide the total area by the yardage of one package.
- After purchasing the material, remove one strap from the package and attach it to the wall several times. After that, multiply the length and width of the bar between each other and add 5% to the undercut.
These are the basic rules for calculating the laminate, following which there will be no problems with purchasing the right amount of material.

tools, consumables
Of course, laying a laminate only on its own can not do. I'll have to use the tools. To install the floor covering you will need:
- roulette;
- pencil;
- hammer or mallet;
- jigsaw or hacksaw on wood with small teeth;
- knife building;
- square for marking.
Using these tools you can quickly and effectively lay laminate flooring.

types of laying laminate
To date, there are two main types of laminate installation:
- glutinous;
- without glue.
Adhesive stitching conduct in rooms with high humidity. In this case, the edge of each strip is smeared with a special glue and pressed hard against the previous one. Due to this, a strong connection is ensured and moisture will not enter the gap between the laminate fragments.

Without glue the method is most common. Laminate is laid on a special substrate, connecting with each other by a locking system. This method of installation is very fast and easy. Both methods are good in their own way, of course, installation with glue serves as an additional protection for the coating.

types of laminate joints
Modern laminate manufacturers offer the following locking systems:
- Click;
- Lock;
- 5G.
Click The system is the most common and is very easy and convenient to install. The board of the next row is inserted into the lock of the previous one at an angle of 45 degrees. After this, it tilts to the floor until a characteristic click is made, then it is pushed with a hammer for a tight fit.
Lock system, or as it is also called pile. The subsequent bars are driven at right angles into the locking connection of the previous row. Such a coating is very difficult to disassemble without consequences for the material. Slots are also formed between the slats of the coating after the lapse of time.

5G this is the so-called automatic connection. It is possible thanks to a special tongue at the end of the bar. Thanks to which the boards are literally fastened to each other.

Among these species, it is best to give preference to the first and third. They are more reliable and easy to install. The method of joining the laminate is indicated by the manufacturer on the packaging, just select the laminate more carefully.
ways of laying laminate
There are three main ways of laying a laminate:
- classical;
- brick or chess;
- diagonal.
All of them can change the geometry of the room, or visually expand the space. To choose this or that way of packing is the matter of each person's taste. Let us consider them in more detail.
Classic styling most often used in both residential and office buildings. In this case, the laminate is mounted in parallel to the incident light from the nearest light wall. Each next row begins with a cropped piece of the previous board. In terms of cost, this is one of the most accessible ways of laying. Also, the percentage of waste less than five is small.
Brick or chess laying looks like brickwork. This is one of the most durable and reliable. Each successive row is mounted with an offset. The only drawback is a large percentage of waste of about 15%. It is best to choose a monophonic material for these purposes, the displacement of the picture will look ugly.
Diagonal laying is a kind of classical. In this case, the material is laid at an angle of 45 degrees from the entrance door. Very often this technique is used by designers for visual expansion of space. The percentage of waste does not exceed fifteen percent.
Which of the ways to choose is up to you based on the characteristics of the room.

laying laminate with their own hands step by step
All the preparatory stages have been completed and you can proceed with the installation of the coating. All works are carried out in several stages:
- We put the laminate in the room in which we will lay it for acclimatization.
- We lay a layer of waterproofing, for this we can use a polyethylene film.
- The substrate is covered with waterproofing, and the joints of the sheets can be fashionably bonded together with adhesive tape.
- We lay the first board. It is best to move from left to right. Between the wall and the first row of material, we insert the wedges for the gap. After that, we collect the second row and at an angle of 30 degrees we wind it into the lock of the previous row. Then we lower it to the floor until it clicks, which informs about fixing the material.
- When laying the last row, it often becomes necessary to cut the strips. It is best to do this with the opposite side lock. After that, the last row is mounted.
When all the cover is laid, you can remove the pegs and fix the plinth. That's all, the floor is ready.

This article describes the laminate and how it is laid. A detailed description of the preparatory stage and the installation of the coating itself is given. Using the advice of the article, you can easily calculate the necessary amount of material and put it in your home. Successful work.


