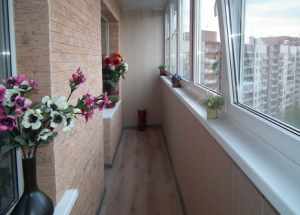
In many apartments there are loggias. This is a fairly spacious, glazed balcony. This room can be successfully converted into a small room. For this, the loggia needs to be insulated. About what ways it can be implemented and what materials can be used in this article.
Content
Ways of warming the loggia
Loggia can significantly increase the area of the apartment or become an independent room. In order to be comfortable in any season, warming is necessary.
This can be done in the following ways:
- thermal insulation;
- installation of a warm floor system;
- installation of heating elements.
Thermal insulation is the insulation of the room with special materials. For these purposes, you can use:
- penoplex;
- mineral wool;
- styrofoam.
The choice of material depends on your preferences and financial possibilities. Whichever material you choose, if properly installed, each of them will perfectly cope with their tasks.
All warm floors can be divided into three types:
- electric;
- water;
- heating mats.
Electric Floors are the most popular version of the warm floor. For their installation around the perimeter of the room, the heating cable is laid. They work from the electrical network.
Water-based floors can be done with a heating boiler supporting this technology. Outwardly they represent a pipeline through which warm water flows, heated by the system. Suitable for large areas.
Heating mats easy to install, and most importantly do not require the creation of a screed over them. It is enough to put the finishing coat on top of the mats.
Since you can not take out the batteries on the loggia, you can use convectors for heating. They warm up the room well and maintain the optimum temperature. How to warm your loggia to choose you. The main thing to remember is that each method will serve as a good thermal insulation for the room.
Penoplex for the loggia
Penoplex is a building material that is in great demand for the insulation of walls of buildings, balconies and loggias. It is excellent for external and internal works. It is fire-safe, practically not subject to burning. Some grades of material contain special refractory additives. Also, the material tolerates sudden changes in temperature from -50 to +75 degrees Celsius. The service life of the penoplex is 50 years. It does not crumble, which is very convenient when working with material. Penoplex has good quality indicators:
- low thermal conductivity;
- strength;
- low weight;
- absolute water resistance.
Thanks to these qualities, foam foam serves as an excellent means for warming the loggia.
warming the loggia with penoplex by one's own hands
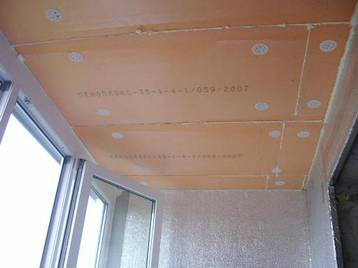
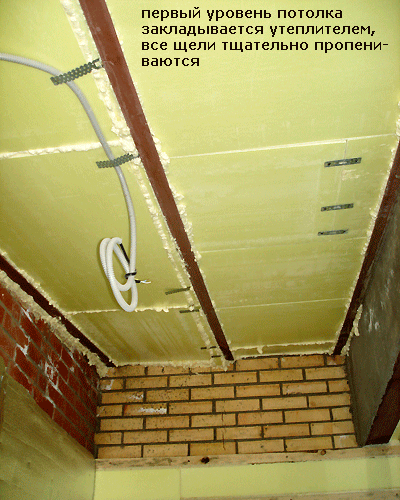
Before starting work, the loggia must be fully prepared for warming. Seal the seams and level the surfaces. After that, you can proceed with the installation of thermal insulation. Begin work is necessary from the ceiling of the room. The material must be laid from the corner of the loggia. After attaching the first sheet to the groove, the next sheet is firmly inserted into the groove. If the surface will be trimmed with decorative panels or upholstered with plasterboard it can be fastened directly to the slab with dowels with a wide bonnet. If the surface needs to be plastered, the foam is best planted on the tile glue, after which the dowels are fixed. If necessary, the material can be easily cut with a knife, after which it can be broken by hand.
After the ceiling comes the turn of the floor. Warming it is quite simple. It is necessary to tightly lay the slabs of the material by fixing them with dowels or gluing the tile composition. After stacking the material, the slots need to be stopped. Remember that the foam in the composition of which toluene can not be used. It can dissolve penplex, adversely affecting its heat-insulating properties. Wooden floor can be laid directly on the heater. If you have planned to put tiles on the floor, you need to pour a screed about 4 cm thick.
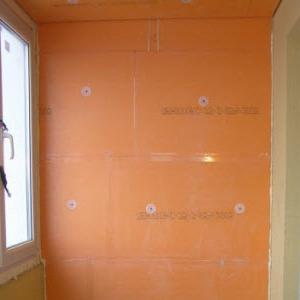
After it is necessary to proceed to the insulation of the walls. It must be done quickly, until the mounting foam on the floor has risen. The first slab must be mounted face-to-face with foam. This achieves the effect of a monolithic wall. It is desirable to put all the slabs in a descent so that the vertical seams do not coincide with each other. To the wall the material is fastened as well as during the warming of the ceiling and walls.
After installing the peno-plex, you can go to the cosmetic decoration of the loggia room. To warm the loggia with your own hand is very simple. It is necessary to comply with the order of work and tighten the material to the surfaces.
Insulation for the loggia
The loggia can be used for various purposes:
- as a pantry;
- as a dryer;
- as a dwelling.
In any case, it requires warming. Before warming it is necessary to understand what material is best suited for warming the loggia in each specific case. To date, the market offers a wide selection of insulation materials, so they need to be evaluated according to the quality criteria. For this, it is necessary to consider the following characteristics:
Thermal conductivity of the material. This indicator determines how much heat will give the material of their heated room to the outside. Therefore, the lower this index, the better the thermal insulation. A heater serves as a kind of barrier between a warm and cold environment.
Moisture absorption. This is the ability of the material to absorb moisture from the surrounding space. If the material is able to absorb a lot of moisture, this negatively affects its thermal insulation properties.
Fire safety. It can be attributed to the ignition temperature of the material. He is flammable or not. This criterion refers to very important indicators on which the safety of people depends.
Ecological compatibility - the material can emit toxic fumes or not.
Durability - the service life declared by the manufacturer. The more it is, the better.
Easy installation. A very important indicator, especially if you plan to conduct insulation yourself.
The following materials are in great demand for warming of loggias:
- Penoplex - has low thermal conductivity, low degree of water absorption (0.5% per day in water), service life is quite long, up to 50 years. Also, the material is easily mounted.
- Polyfoam - water absorption is 1 - 4% per day, average thermal conductivity, service life of more than 50 years.
- Mineral wool - low thermal conductivity, water absorption 0.5%, service life about 40 years.
All these materials will be good insulation for the room. Each of them has a number of advantages and disadvantages. But among them can be singled out penokleks. This kind of the most practical and convenient to work with, and also has good characteristics. The rest of the materials are a bit inferior to it. What kind of heat-insulating material should you choose to decide already for you.
Warming up the loggias with your own hands step-by-step instruction
Warming the loggia yourself is not as difficult as it might seem at first. It is necessary to strictly follow the sequence of actions and for a couple of days you can get a warmed room.
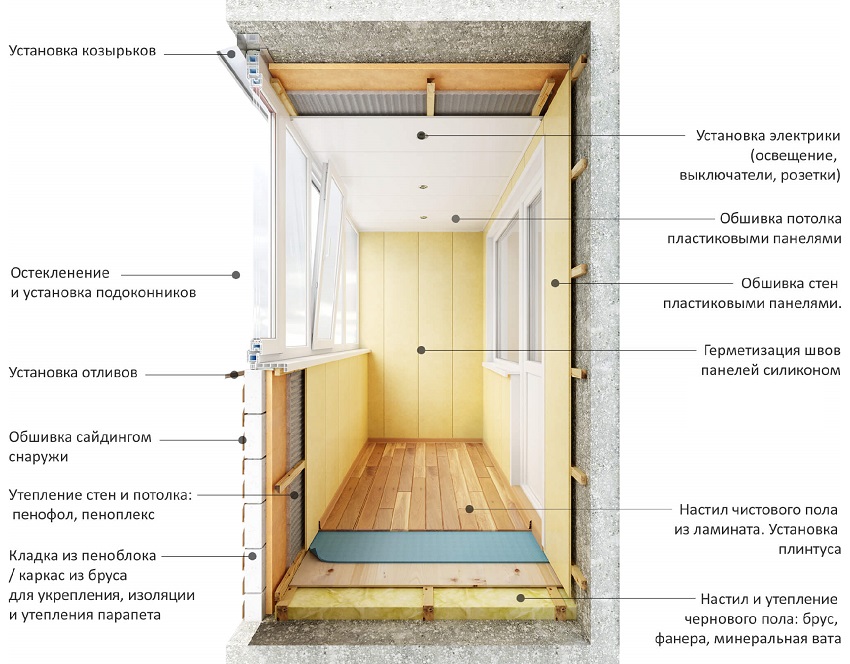
Step one. We remove all unnecessary from the loggia. We plan a laying of wires and shtrobim under them apertures in a wall. After this, walls, floor and ceiling must be treated with antiseptics, to prevent the development of fungi and mold. It remains to wait about a day, so that the solution is absorbed in the surface.
Step Two. We pass the surface with a primer and lay a layer of foiled insulation, it is best to fix it on a double-sided adhesive tape. Joints also need to be well fixed with a metallized tape. After that it is possible to stack expanded polystyrene on all surfaces, fixing it with special nails, with the calculation of five pieces per sheet of material. After laying the material on the floor, it must be poured with cement mortar 2 - 3 cm thick.
Step Three. After laying the heater, the walls and ceiling can be sewn with sheets of plasterboard. Then you can start installing the window sill. On the floor you can lay a wooden board or ceramic tile. The only thing to consider is that in a non-heated room it is best to use frost-resistant models. Then you can putty the seams between the sheets of drywall and proceed to the final finish. Here already to your taste. Walls can be painted or wallpapered. If the loggia is small or goes to the shady side, it is better to give preference to light tones.
Step Four. Now you can install switches and sockets, and also mount the lighting system. All the warming can be done in a few days, without putting much financial and physical costs.
Warming of the floor on the loggia
It is necessary to approach the insulation of the floor carefully. After all, in the cold season it should be comfortable walking along it. For the insulation of the floor, you can choose the following materials:
- Pefonol - this material refers to the "new generation" of heaters. It is made of foamed polyethylene and foil. This material serves not only as a good heat insulator, but also plays the role of noise insulation. In the market you can find one-sided and bilateral samples of material. On average, a one-side pephonol roll 120 cm wide will have to pay 1200 rubles. The price of bilateral material comes to 2400 rubles per roll.
- Polyfoam - has long been used for insulation of premises. It is produced in sheets with a thickness of 2 to 10 cm. It is popular because of the affordable price. So a package of 10 sheets of 5 cm thick can be purchased for 792 rubles.
- Penoplex - this material has excellent thermal insulation properties, very easy to use. For this and has gained great popularity among other heaters. The average price per sheet is about 185 rubles.
- Mineral wool is a material produced from basalt and fiberglass by melting and stretching into fibers. This material contributes to good moisture and air exchange, it perfectly keeps the heat in the room. Work with him should be cautious, it is desirable to wear gloves and a respirator. Packing of mineral wool from 12 plates can be bought for 410 rubles.
So, with a heater is chosen and you can start work. For this we need the following tools and materials:
- drill;
- perforator;
- a jigsaw;
- mounting foam;
- self-tapping screws;
- knife;
- roulette;
- wood bars;
- plywood or chipboard.
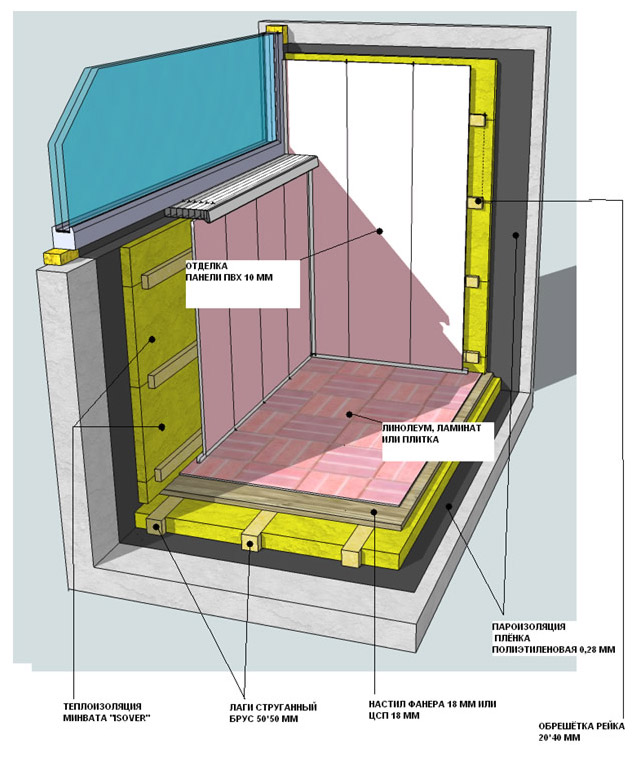
In the beginning, we clean the surface of the floor. After that, we lay on it a thin heater and we light the entire loggia along the perimeter. After we lay the second layer. Now you need to measure the width of the room and saw the size bars. We lay the uneven bars on the floor with a step of 50 cm and fix it with screws. Now the gaps between the beams are filled with the heater chosen by you. Next, install the cross bars, leveling them with a level. After that, you can lay plywood or chipboard on the floor and proceed with decorative finishing.
Warming of the loggia walls
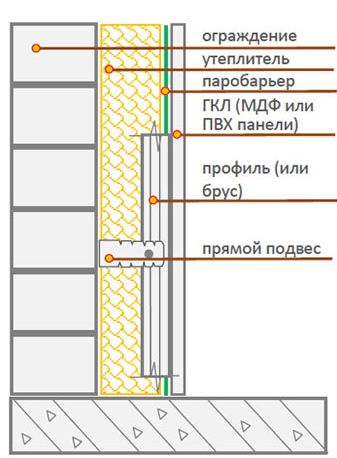
To warming the walls is best to proceed after working with the ceiling. For the conduct of thermal insulation, the same materials with which the floor is insulated are suitable. If you do not want to do the crate, you can simply insulate the walls with foam, gluing it with a tile glue to the wall. For additional fixing, you can use special nails with a wide bonnet. The main thing is to mount the material in a runaway. After installing the heater, the surface can be puttyped and painted or trimmed with decorative panels.
Warming of the ceiling on the loggia
To insulate the ceiling in the loggia is also necessary, as well as the floor. For this, the same materials can be used:
- styrofoam;
- mineral wool;
- pephonol;
- penoplex.
Each of these materials is excellent to cope with its task. They can be combined. For example, first lay a layer of thin peconol, and then another insulation material. The first will play a role both heat and noise insulation. After carrying out the thermal insulation, you can proceed to the decorative finish. There are several options:
- putty and painting;
- to finish PVC panels (it is easy to wash);
- paneling with MDF panels (imitation of natural material);
- lining (beautiful appearance and ease of care);
- gypsum cardboard (in the future you can paint or paper over wallpaper).
Whichever material of warming and finishing you choose, you will end up with a warm and beautiful loggia.
This article describes how to insulate the loggia yourself. Examples of materials and their average cost are given. Using the advice of the article, you can easily insulate your loggia and make it not only practical, but also beautiful. Successful work.


