


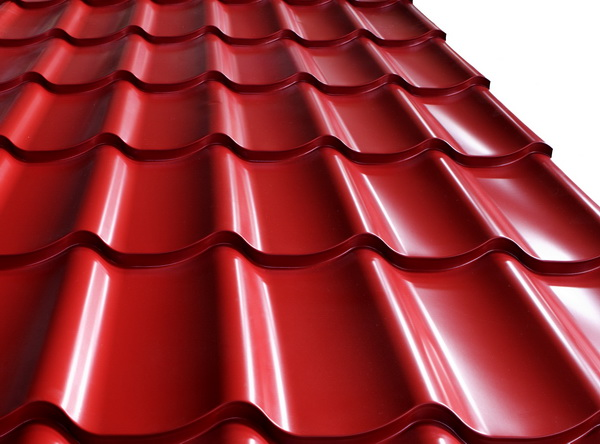
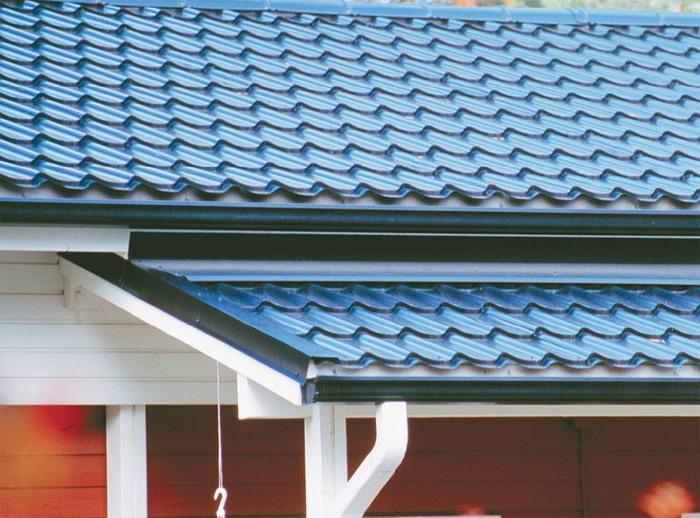
Metal roofing in our construction market is in the lead. And not only because the roofs covered with metal tile look very beautiful, besides the colors are very diverse, for every taste, but also because technology of roofing from metal roofing not very complicated. Lovers can build, you can advise to perform their own hands and installation of metal.
Content
- 1 Pros of roofing material - metal
- 2 Where to start? Let's start with calculations
- 3 Tools and equipment required for working with metal
- 4 What additional materials are required for the installation of the roof
- 5 We prepare the basis (crate) for laying metal
- 6 Thermal insulation under the metal tile
- 7 Rules for the installation of metal
- 8 Installation of additional elements
- 9 Mounting of the valley
Pros of roofing material - metal
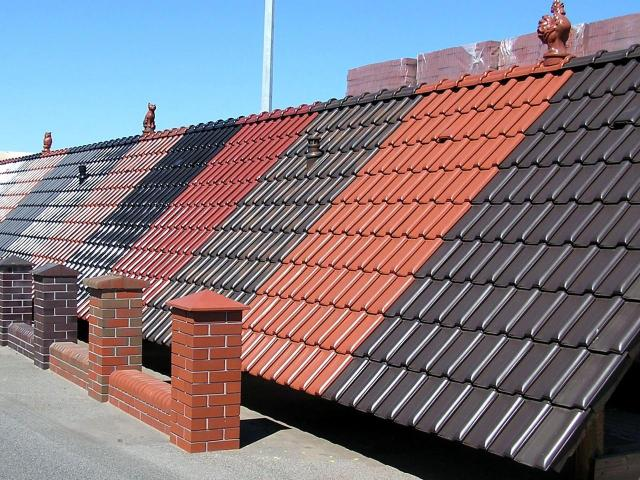
Roof covering of metal tiles not only looks beautiful and elegant, has not particularly complicated styling technology, but also considerable advantages in the form of:
-small weight of a sheet of metal, the square meter of which weighs about 4-6 kg;
-a huge color choice;
-not only simple installation, but also easily produced repair work;
-ecological nature of the metal tile, since the structure does not include harmful substances;
- As the metal tile consists of a huge number of stiffeners, on a flat surface without deflections, it has high strength. For example, if you lay a 0.5 mm thick sheet of metal (according to the correct laying technique) - this sheet will withstand a load of more than 200 kg / m2;
- The roofing in the form of metal tiles is very resistant to ultraviolet radiation, capable of preserving the original color for dozens of years;
-high resistance to temperature changes;
Due to the undulating shape of the roofing material, the metal tile has minimal thermal expansion;
- the lack of roofing material - metal roofing - is only one, if you like silence, (especially at night) and do not lay noise insulation under the roof - you will not be able to sleep peacefully because of noise in the rain.
Where to start? Let's start with calculations
Initially, measure the linear dimensions of your roof.
Each section of the roof is depicted in the form of a diagram (rectangular shape, in the form of a triangle, etc.).
On the diagram, indicate all linear dimensions.
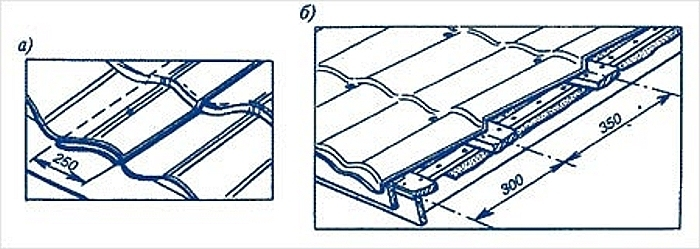
Sheet metal consists of a number of rows and waves.
The wave is a bulge going from top to bottom in the form of a crest, and the series runs perpendicular to the crest, or across the ramp.
The distance between the rows is called the step.
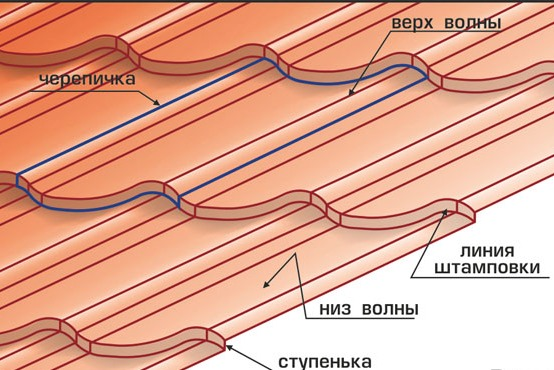
The tile sheet has a certain number of steps and waves and is called a module.
In the modern construction market, in addition to the sheet, which has a step of 35 cm and six waves - module one, there are sheets of three, six and ten modules.
how to count the number of rows of your roof
Any sheet of metal has a full or overall width, or a working (useful) width.
The overall width is always more useful, because at the joints of the sheets there is a lock in the form of an overlap, the difference between the full and useful width, is the width of the lock.
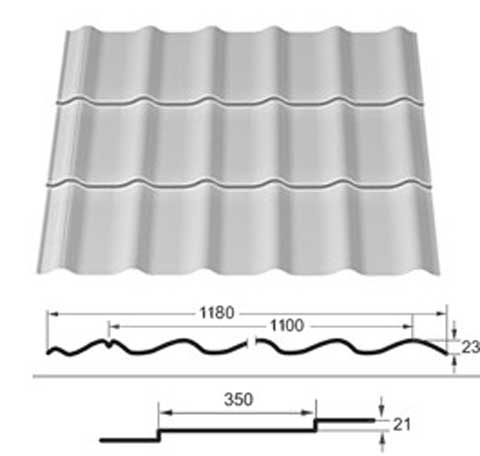
For example: in front of you a sheet of metal, having a total width of 1180 mm, and a working width of 1100 mm.
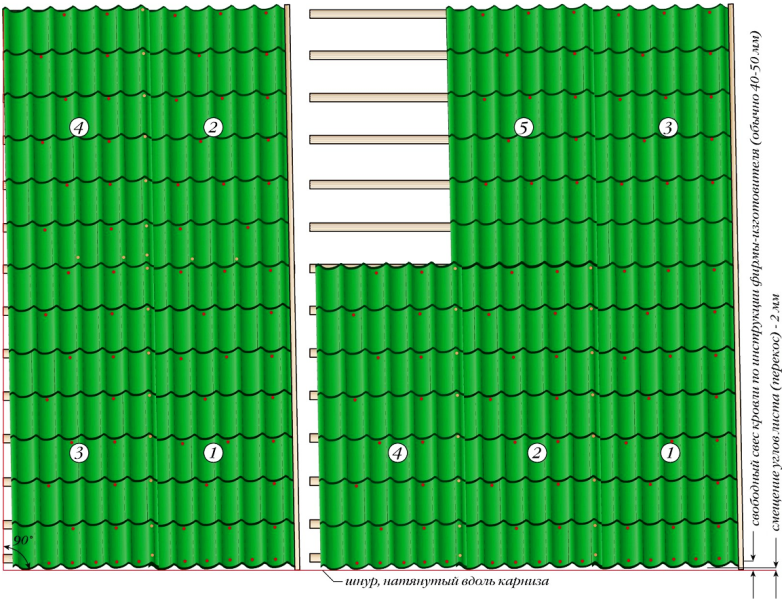
To calculate the number of sheets, you need to measure the length of your roof (it can be measured on the cornice or on the ridge), this length divided by the working width of the sheet metal.
The result must be rounded upwards.
Those. if the length of the roof is 5000 mm, divide by 1100 mm and we get five rows when rounding.
Of course, you can order the shingles according to your individual sizes, but the cost of the roof will increase significantly.
Based on experience, the length of one sheet of metal, should be no more than 7000 mm.
Counting the number of modules along the length of the roof, you can calculate the total amount of metal, which must be ordered. If necessary, when ordering, qualified specialists will help to make the calculation.
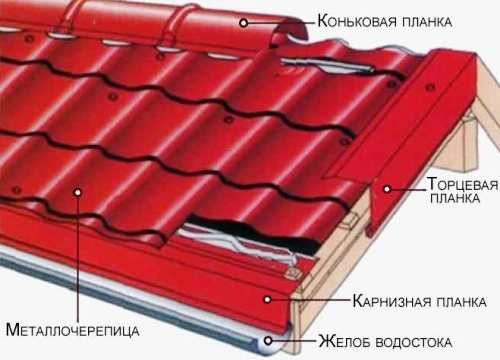
In addition to the metal tile modules, you will need to purchase additional elements:
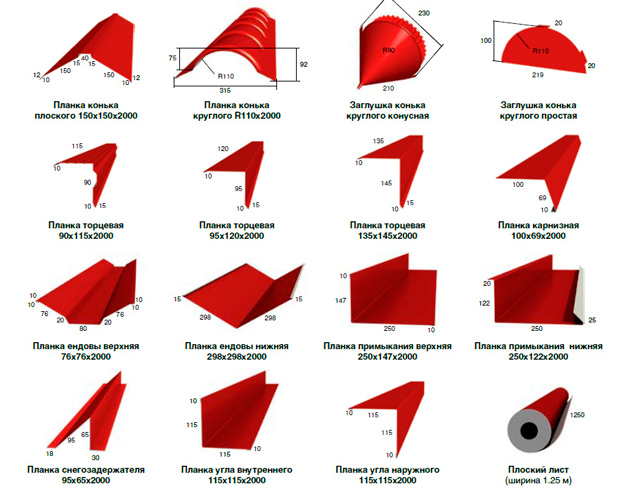
-In accordance with the length of the roof, you need to purchase the bar of the ridge (it can be of different shapes and sizes);
- Skate stub (depending on the shape of the ridge);
- The end plate, the length depends on the length of the roof slope (there are different shapes);
- in the case where the roof has joints, it is necessary to purchase the bottom, upper and lower (length depends on the length of the joint);
- abutment strips, upper and lower;
- The snow carrier bracket;
- Plane of the inner corner and the bar of the outer corner.
Additional elements will help to find a qualified specialist. In addition to melalo-tile, you may need steel bars (standard length 2000 mm) and steel sheets (size 200x125 cm).
All additional elements must be the same color as the metal tile.
You should understand that the metal tile does not fit the strict horizontal to the ground, the minimum inclination angle is 11 *.
Tools and equipment required for working with metal
You may need:
- protective gloves, plastic goggles and outer clothing;
-the staircase-the step-ladder;
- sharp metal scissors;
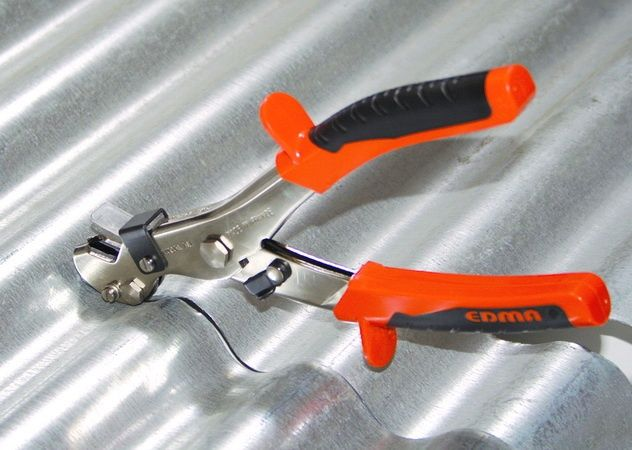
- a Bulgarian and a drill, as well as a screwdriver;
yardstick;
-long rake of wood or metal;
-a hammer;
-marker;
screwdrivers;
What additional materials are required for the installation of the roof
In the work may be needed in addition to metal:
roofing shamorez;
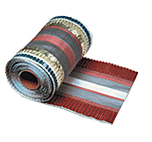
- waterproofing;
- aerial;
-decorative linings and fasteners;
-polishing board
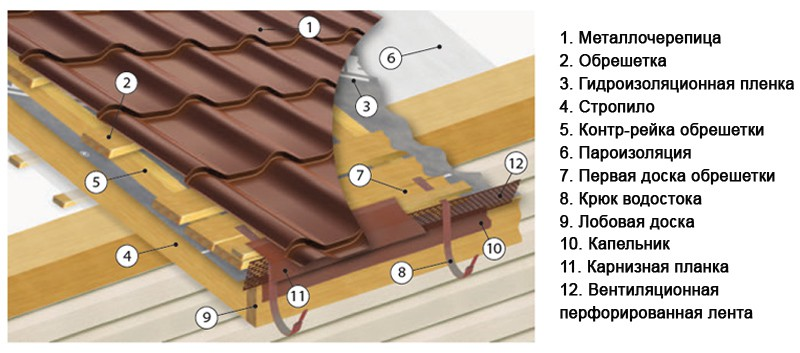
We prepare the basis (crate) for laying metal
Since the roofing in the form of metal roofing has a low weight, it does not require a reinforced base.
The usual crate is made from wooden racks, but the step of the crate is done depending on the size of the row, so that the screws do not fall into the void.
Thermal insulation under the metal tile
Thermal insulation, as well as noise insulation - will help to keep the heat and protect it from noise. The first layer is covered with a vapor barrier material (isospan, yutafol). Everything fits with the overlap. On top of the insulation is applied, its thickness can reach up to 25 cm. An antioxidant film is laid on top of the insulation, which is fastened with wooden bars to the rafters.
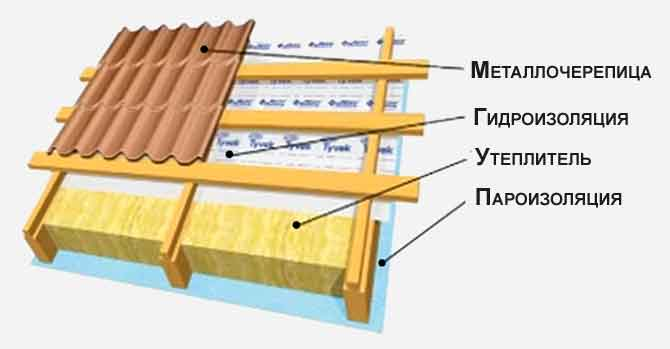
Tip - each layer should be shifted relative to the other, so that the joints do not overlap each other.
Thermal insulation material is not strengthened in the tightness, it must hang slightly, so that the condensate drains only into the drain.
Rules for the installation of metal
Follow the basic rules:
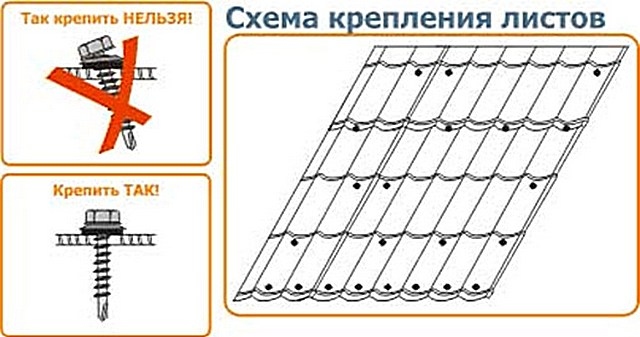
-if the roofing sheets are stacked on the right, then the next one is laid on the previous one, and if the first sheet is placed on the left, then the second sheet is slipped under the first one;
-to be able to adjust the laying of sheets of shingles, first grab the sheets, align them and then fasten with a screwdriver;
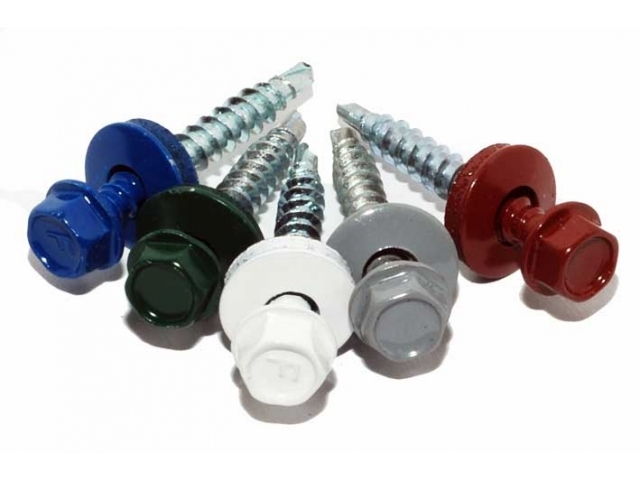
-take quality self-cuts, it is advisable to purchase there where you bought metal roofing;
-if there is a connection of four sheets, a thickening may appear in the place of this connection. To get rid of this thickening, you can cut off part of the angle or straighten the capillary ditch.
Installation of additional elements
Adjust the wave size to the width of the ramp so that the crest does not hit the pediment. The end plates are attached with an overlap of about 2 cm.
Fix the curtain rod with nails to the lower bar of the crate, also with an overlap of 100 mm.
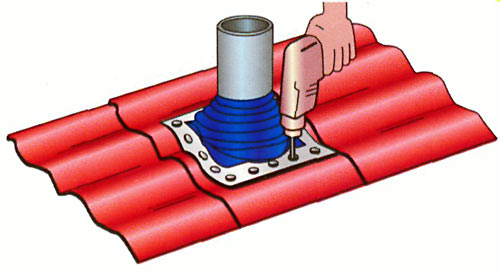
If there is a pipe or a window on the roof, if they are below the ridge - take the sheets in an amount of 2 pieces, the size of one module.
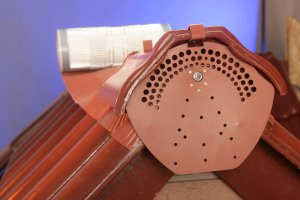
If the roof is sloping, under the hitch can get precipitation, to prevent their entry, install the aerobics.
The horsecloth should protrude 2-3 cm. If the blade is flat, it is lapped.
If semicircular, fastened in accordance with the profile lines.
The slats of the skates can be bent and unbent in accordance with the slope of the roof.
Mounting of the valley
Each valley is attached to an additional board.
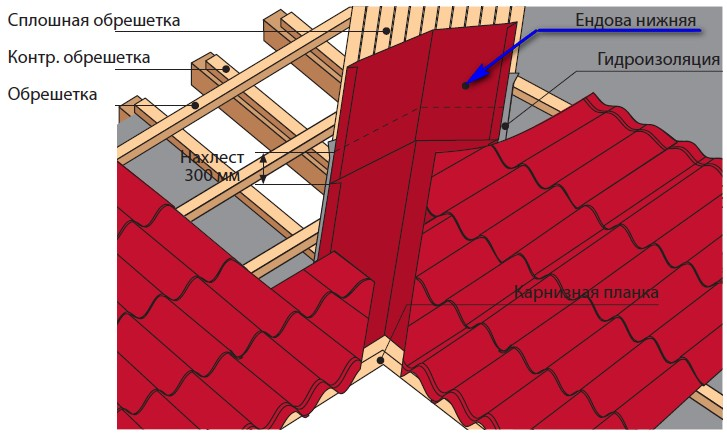
The setting of the valley begins from the bottom, the overlap is done on the order of 20-30 cm. The roofing of the valley is not closer than 25 cm from the valley axis.


