


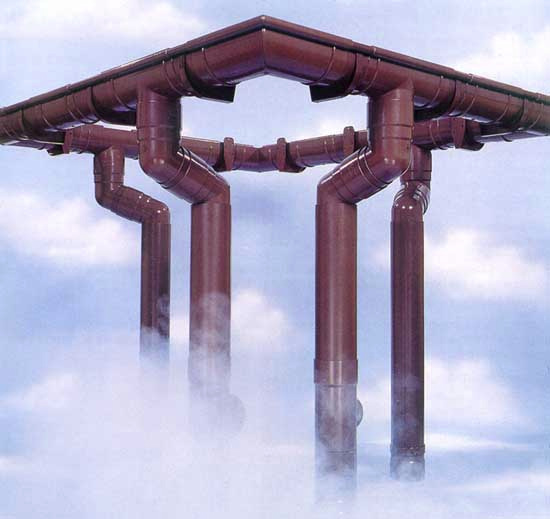
A beautiful house implies a beautiful drainage system from the roof. In addition to beauty, drainage system helps to fight high humidity in the house. In the article below, consider the process self-drains installation and tell you how to care for this system.
Content
Cornice drains
Cornice gutters are installed in private homes to remove all the water from the roof surface.

Gutters are widely used, which are installed on the drain board over the entire length of the eaves.

The material can be diverse: galvanized steel, cast or sheet aluminum, PVC and even cast iron.
Basically, the whole gutter system, except for the drainage from sheet aluminum, is mounted from the sections of the gutter and the pipe. Connect parts using fasteners.
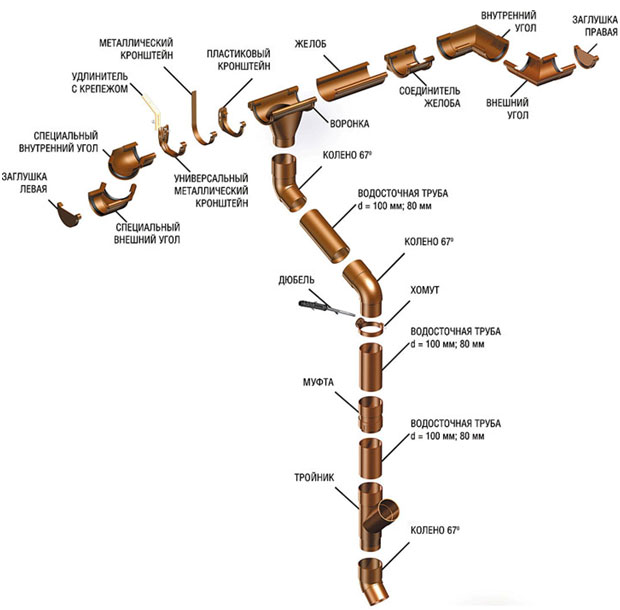
The drainage connection parts are stamped with expansion at the ends in the form of couplings. When joining two parts, insert a smooth end of the subsequent element into the coupling.
If the drain has a non-symmetrical cross-section, then when ordering the drainage system, it is necessary to specify the right-hand and left-hand elements.

Modern aluminum and cast iron structures are connected by means of an adapter.
It should be noted, when repairing and replacing the drainage system from PVC, the plastic parts are not always interchangeable.
Cornice drainage made of cast iron
Drains made of cast iron, in modern construction, are extremely rare. But, often found on old houses and have an S-shaped profile.
Part of the drain is attached to the drain board using a screw with a round head.

Standard sections have a length of 180 cm, at the end there is a coupling - this sleeve inserts the smooth end of the next link.
When two surfaces come into contact, a seal is put on the joint, the connection is tightened with a screw or bolt.
Take into account when installing that the material is heavy and brittle, But cut with a hacksaw for metal and drilled with a drill.
To protect against corrosion, cast iron drainage from the inside must be painted with bituminous paint.
Drain from cast aluminum
The drain from cast aluminum can have different cross-section profiles (round, square, etc.).
The assembly of such a system is similar to the assembly of a cast-iron system, but plastic mastic is used as a sealant in the junctions.
Mounting is made to the drain board using a bracket, or with a screw through the rear wall.

Cast aluminum, as a material, is lighter and can do without painting.
If a part of the cast iron gutter is replaced with a part of cast aluminum, then aluminum should be painted with bituminous paint.
Drain from aluminum sheet
Pre-painted aluminum sheet creates a stamped, lightweight system.
On the spot, with the help of a bending machine, the gutter system is given the desired shape.
Specialists, on site, cut the drain on the section of the required length. angular and end elements, are separate, they are crimped at the ends of drainage sections.

The lower part of the gutter has a hole for draining the water.
Mounting is done using metal brackets to the drain board.
Drain from PVC
Plastic drains are the most popular.
Such gutters have different profiles, different sizes, a variety of colors, painting is not needed.
The sections can be connected by means of a clamp, or by means of gaskets made of artificial rubber.
The joints can be flared, they contain sections, can be glued with a solvent, or with a sealing ring.
The drainage system is fixed with the help of a bracket, sometimes, plums are fastened with screws directly to the drain board - this adds rigidity to the structure.
Gutter care and repair
It is clear that the drainage system is located at the top of the structure, therefore a staircase is required to care for them.

If the ladder can be supported on a drainage of cast iron or aluminum, since this material is rather hard, you can never support a ladder on gutters made of PVC and stamped aluminum.
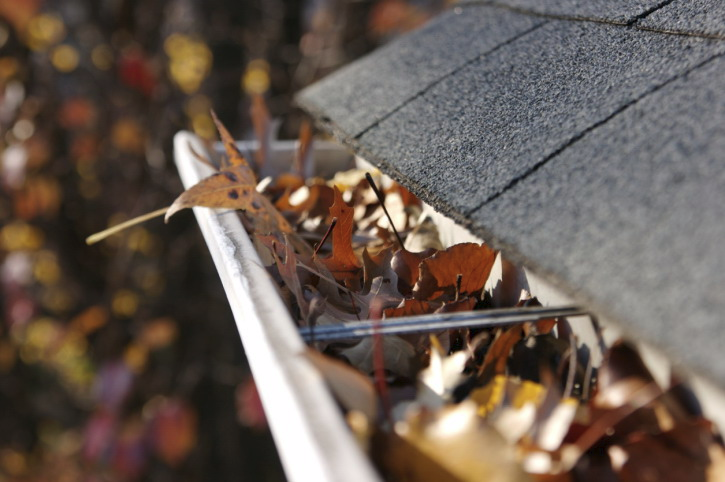
Since after the rain, in the drainage is going to dirt - drains must be regularly cleaned of dirt and sand.
If cleaning is not done, the water will overflow, and this can lead to the wetting of the walls.
Before cleaning the garbage, it is necessary to plug the drain with a rag, otherwise the drain may clog. Using a working tool or a normal rag, put the dirt in a heap and remove it from the gutter.
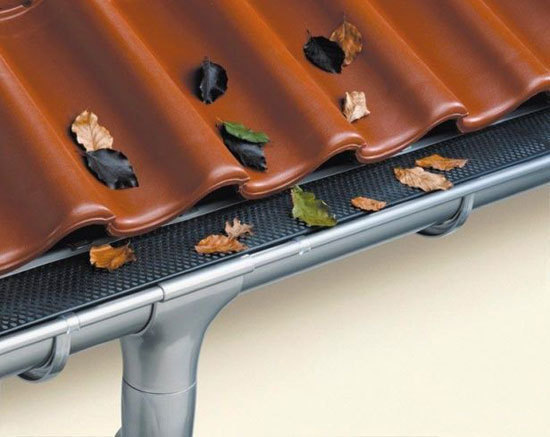
To prevent vertical waste from plugging in with debris, you can install a protective mesh or filter.
If the drain connection is leaking, they can be repaired with a sealant.
If the connection is made using a gasket, and in this place leaks - remove the old gasket, replacing it with a new one.
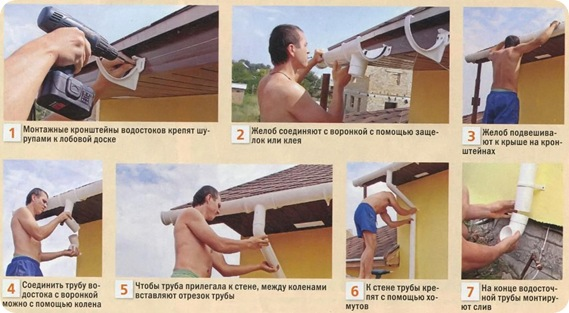
Installation of the drainage system by one's own hands
Before buying elements of the drainage system, perform the calculation of the required number of elements, determine the material of the gutter.

Usually, the size of the gutter is 3 meters, drainpipes are 2.5 meters long.
In accordance with this, calculate the number of sections of the chute and pipes.
Next, calculate the number of brackets and other fasteners, taking into account the fixing in 1 meter.
With the help of a plumb-line (level), just above the water intake, note the intended discharge. In the drain board, just below the curtain rod, drive in the nail.
At the second end of the run, drive in the second nail.

The slope must be at least 25 mm. at 15 meters.
Tie and pull the cord between the nails.
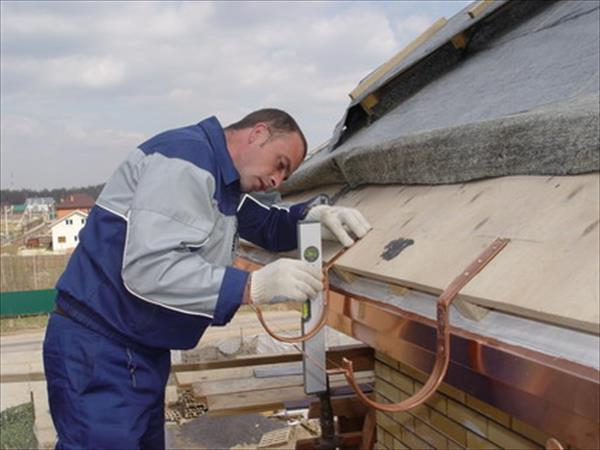
Fix the drains drain or its bracket to the drain board just above the water intake, fix the gutter bracket at the upper and lower end of the run.
The remaining brackets along the length of the run are fastened 1 meter along the length of the cord in accordance with the slope.
The chute itself is installed from the upper end of the run.
The edge of the first section of the gutter (trailing edge) is inserted under the roofing material and inserted into the bends of the bracket, snapping in turn the bends, the entire system is hung.
Rubber seals are tightly compressed, leaving 6 mm left. between the end of the trough and the shoulder of the bracket is the gap for deformation.
At the end, the last section of the chute may require trimming.

The section can be cut with a hacksaw with a small tooth, the edge is processed by a file and put in place.
Obligatory condition - compliance with the bias.
After installation of the gutter, a drain pipe is installed.
Work begins from the top.

If the cornice overhang appears, use a bypass, it can be made from the corners of sections and short pipe segments.
All parts are glued using a solvent based adhesive.

Install on the top of the drainpipe clamp, attach the bypass to the drain, connect to the drainpipe, fix the drain pipe with clamps.


