


The door handle-latch is useful, practical and beautiful. To establish it by own strength does not represent much effort, this requires the presence of tools and desire. Detailed instructions will help to quickly and qualitatively cope with this work.
Content
Types of latches
The construction market offers a wide variety of handle-latches of various shapes and styles, but these handles differ only in mechanisms. The mechanism of the latching handle is a falovy, that is, a movable one, - the latch is triggered by turning or pressing the handle. Consequently, there are two types of mechanisms:
- The push mechanism. It is driven by pressing the lever of the handle.
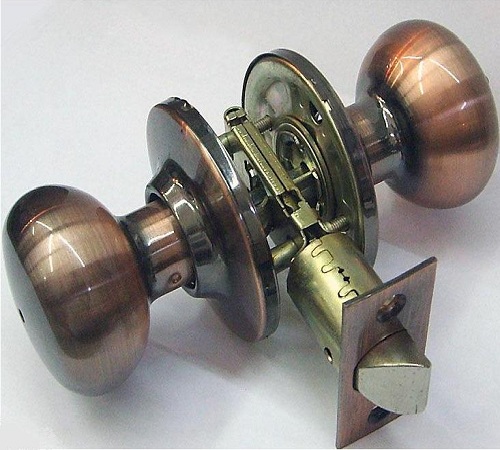
- Swivel mechanism. It is put in motion by turning the knob-knob (ball or knob).
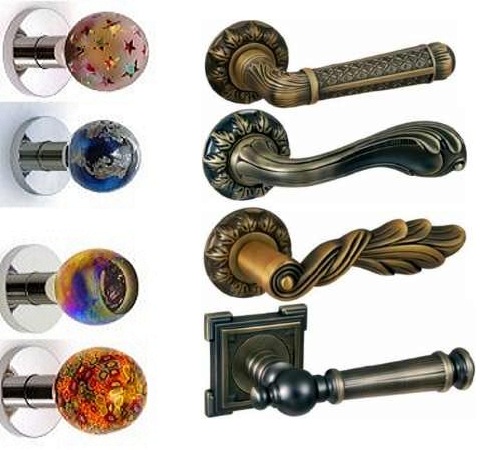
The material of the handles can be different: aluminum, brass, steel, various alloys, stainless steel. Each of the parts is covered with a special protective layer to improve performance and extend the life of the product. Latch handles are released simply with a latch, with a latch and a latch, or with a latch, a latch and a simple simple lock.
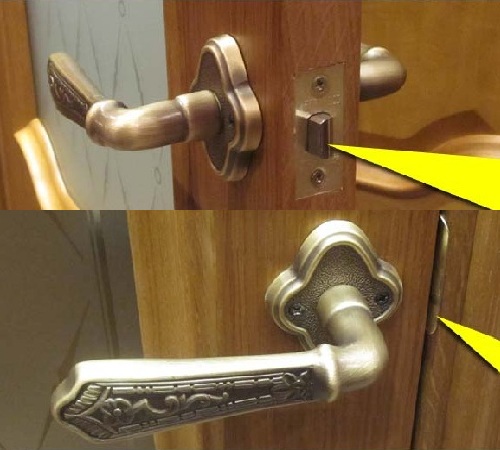
What to look for when buying
- You need to know exactly which way the doors open - there are handles with different turns - right or left.
- It is necessary to know the thickness of the door (door leaf). This is necessary when selecting a set of handles.
- Be sure to make sure the operation of the mechanism is working properly: it should work silently. When the knob is pressed, the tongue must fully enter the body. The appearance of the products should be impeccable and pleasant to the touch.
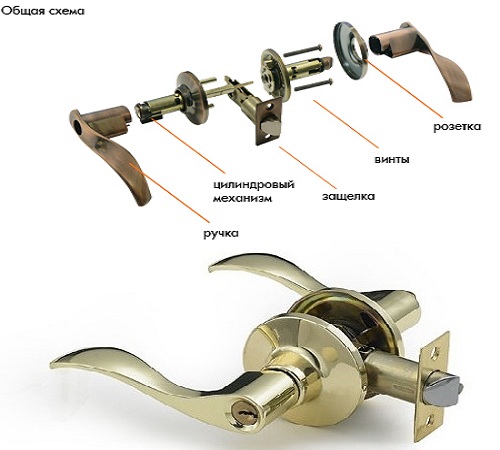
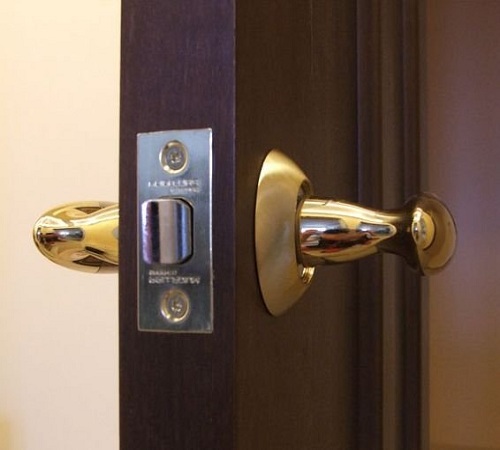
What does the latch handle consist of?
It should be noted that the device of the door handle with the latch, both with the push mechanism and with the pivot mechanism, is the same:
- Internal mechanism
- Two handles
- Clamp
- Decorative overlays
The internal mechanism of the handle-latch is called a fade, that is, open by turning the handle, there is nothing complicated in it. The basis of such a locking device is an oblique tongue held by a spring.
When the door is open, the latch of the latch is in the extended state. Thanks to the latch, the door can be slammed without using the handle. When the door is closed, the tongue enters the locking bar in the door jamb. To open the latch, turn the handle, this removes the tongue inside the lock.
Handles with a latch are the best option for interior doors. The most popular are the latches with the lock. On the one hand, they are equipped with a rotary button (lock), which makes it possible to lock the door from inside the room. In a house where there are small children, it is best to install knobs, or they are often installed on the doors of bathrooms or bathrooms.
How to Install the Latch Knob
The process of installing the handle on the door is divided into three stages:
- Markup
- Drilling holes in the door
- Mounting and fastening
Regardless of the choice of mechanism, the latch handle is set equally in each of the cases. Depending on the manufacturer's firm, the assembly / disassembly of the handle itself may be slightly different. For this, an instruction is attached to each mechanism. If several doors exit into one zone, it is advisable to purchase the same handles and make sure that they are at the same height from the floor. Usually experts say that the interior door handle with a latch should be installed at the level of the person's belt, so that when the door is opened, the hand is bent under 90 0 in the elbow. But the growth of all living in the house is not the same. That is why, door handles are installed at an average height of 80 - 120 cm from the floor. On the new door leaf (on the end) there is usually a mark for setting the handle or lock - the painted key.
what you need to install
What design and type of mechanism will be at the handle, everyone decides for himself. Naturally, any pen should be comfortable and beautifully fit into the overall interior of the room. A clear instruction on how to install the door handle will help you quickly and qualitatively handle this task yourself. The standard basic set for door installation includes:
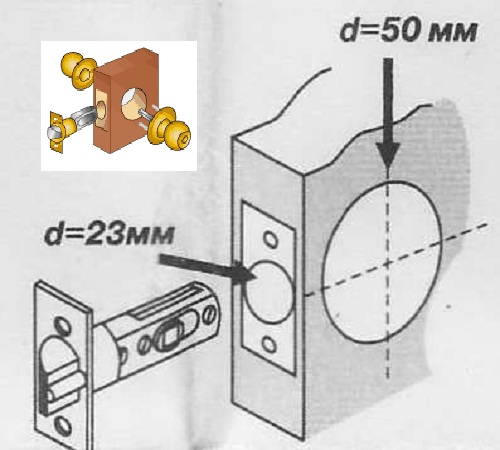
- The guide drill is spiral in wood. Diameter 6 mm;
- Fountain bit. Diameter 23-24 mm;
- Crown on wood. Diameter 50 mm;
- Chisel.
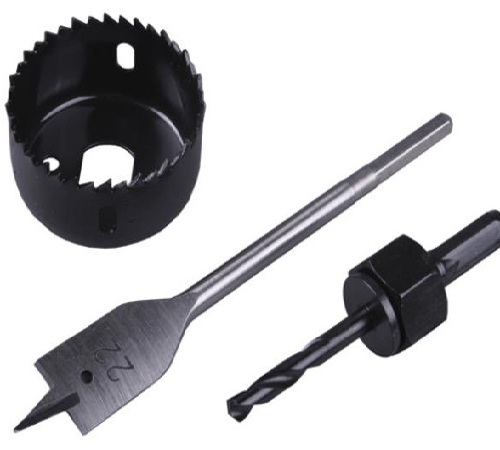
Also, you will definitely need: a screwdriver, a drill, a tape measure, a square, a hammer, a pencil. In the building store can be purchased in the form of a set of basic "Kit for installation of mortise locks and handles."
stage One: Markup
At this stage, it is necessary to correctly mark out all necessary holes. It is best to remove the door, so it will be more convenient to work. Sometimes door manufacturers clearly indicate the place for mounting the handle (depending on the texture of the door). You should follow this rule. It is also quite natural that if there are kids in the house, the handles on the door to the nursery and bathroom should be set somewhat below the usual height.
Attention! The installation of the latch response plate on the box is performed after mounting the latch on the door.
The height of the handle is planned according to the selected parameter, within 80-120 mm from the floor. In this case, it should be remembered that if several doors are located nearby, then all the handles should be positioned aesthetically at the same height. After determining the required height, the center of the handle is marked. To the edge of the door a square is applied and a horizontal line 60 cm long is made. At this point, a clear mark should be placed.
Next, you need to make a markup for the latch tongue. The center of the thickness of the door is marked on the end of the door leaf along the horizontal line. Now we need to apply the mechanism relative to the center so that the tongue completely protrudes beyond the borders of the canvas, just as it will look in the finished form. It is necessary to delineate the tongue from two sides - in this place the place under the mechanism will be drilled.
stage two: drilling holes
The hole for the mechanism of the handle in the door leaf is made by a crown on a tree. Drilling should always not be through, but first on one side of the door, then on the other half of the thickness of the door. To better see the depth of the crown in the door leaf, you can mark it with a marker.
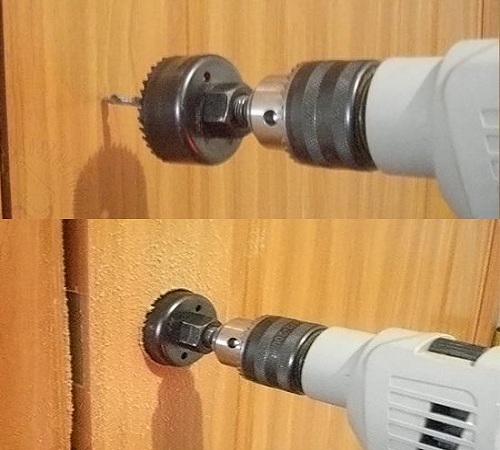
When drilling through, the crown at the outlet on the other side will damage the door leaf or may go to the side. The drill needs to be held at an angle of 90 0, not allowing deviations. The hole under the tongue of the mechanism is drilled with a guide and a pen drill. The guide drill clearly identifies the hole for subsequent reaming with a feather drill. Such a drill is selected according to the diameter of the tongue (a little more), usually a 22 mm drill is suitable.
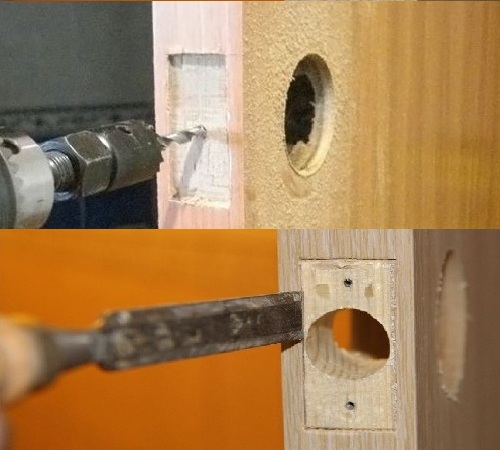
The work in this place must be done very carefully at a low speed drill, since only about 6 mm remains to the brim. A latch mechanism is inserted into the boring hole and a place under the tongue plate is marked. The extra tree is selected by the chisel clearly along the marking lines. Periodically, a plate should be applied. Correctly buried in the tree plate should lie in the same plane with the end of the door.
stage three: attachment of the latch
The mechanism is inserted into the hole and the plate is fastened by screws under the latch. For the convenience of a thin drill, you can specify the screwing points for the screws, so they will enter clearly in the right place, without any distortion.
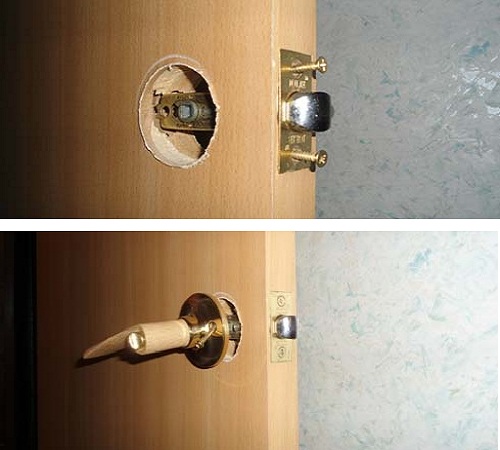
Next, the mechanism is fitted with a rod and the handle itself is assembled.
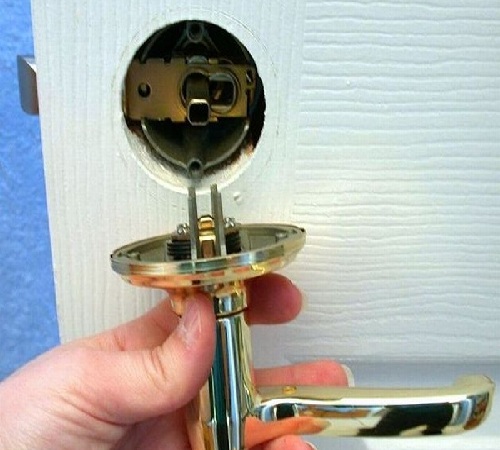
When the bolts are visible, one handle is first inserted (it is necessary to get into the holes of the latch with two guides), then the second handle is applied from the other side and the entire structure is tightened with bolts.
If the bolt fixing points are not visible, the handle should be disassembled and the cover plate removed. For this purpose, a special key comes in the kit, on the handle it is necessary to find a stupor, to press it with a key and pull the handle - the design will understand.
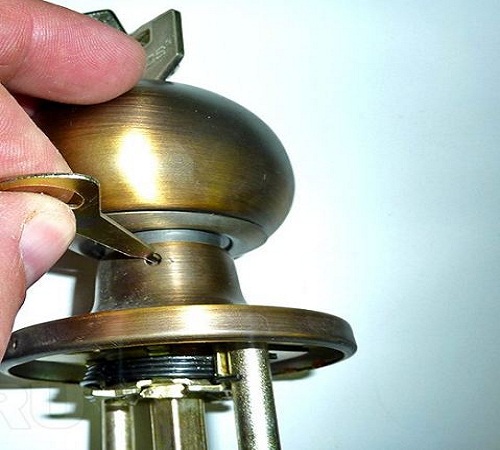
Next, it is necessary to install a collapsible structure and bolt as well. Then snap on the hood and press the stopper, secure the handle. To make this easy, it is necessary to find exactly where the hole is located. If everything is correctly positioned, the flat tip easily enters the hole.
installation of a metal plate on a box
Marking under the metal plate is carried out in two ways. At the first method it is possible to smear the tab of the latch with oil or, for example, toothpaste. Press the handle and close the door. Then several times gently close and open the latch, while on the box will be made marks. In the second method, the door closes, a metal ruler is inserted between the box and the door first above the tongue, then under it, with pencils being made with marks.
A hole under the tongue is drilled with a feather drill. If after checking, the tongue, when entering the box, completely exits the latch, then a contour under the plate is marked and cut by a chisel.
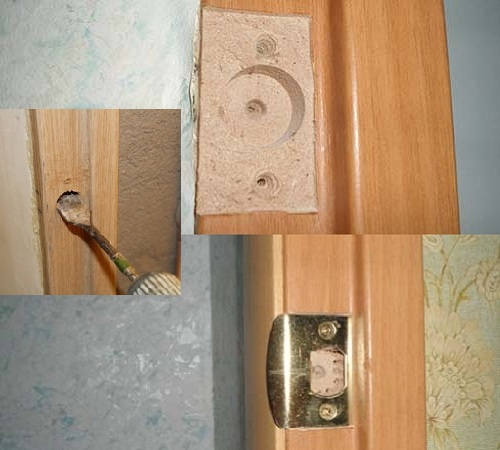
The plate must be level with the door frame, it is recessed into the door frame and screwed with screws. Now you can close the door, admire your work and check how the door handle works with the latch, - the installation is finished at this stage.
The stroke of the latch should be free, the handle should work with a slight pressure, and the door is easy to close.
There is nothing particularly complicated in the installation of the door handle. It is possible to install the door handle with the latch. More details about all the nuances can be found from the video presented.


