


Bath - a favorite place of the Russian people; A hot oasis for restoring vitality and emotional relaxation. How lucky in this regard, the villagers, and what to do to people living in noisy and stuffy megacities? What are the difficulties faced by citizens in the construction of a sauna in their own homes, and what is the process of erecting such an unconventional design? This is our article today!
Content
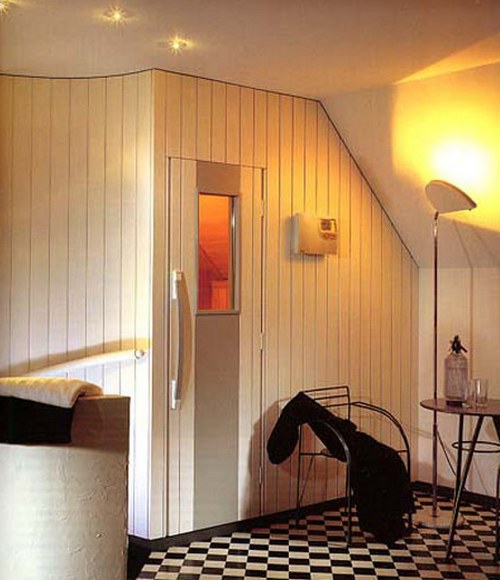
We set a goal - the construction of a sauna in an apartment
It would seem that the city apartment is completely unsuitable for the construction of a traditional sauna, because in our minds there already exists a stereotype of a harmonious combination of a village hut and a wooden bathhouse that boasts a natural heat. Today we will try to radically change your ideas and convince you that a cozy sauna in the apartment is quite possible, and its neat design can serve as an excellent functional element of any modern interior.
So, to create a comfortable sauna in the apartment conditions you will need a minimum of tools, maximum patience, dedication and accuracy. Having carefully studied our step-by-step instructions, you will understand that it is easy to build a beautiful sauna with your own hands in a limited space, it is important only to know the technology of the process and remember that the final result depends only on your efforts and imagination - whether it is a convectional bath or a unique infrared sauna.
Well, let's get started!
Building the frame
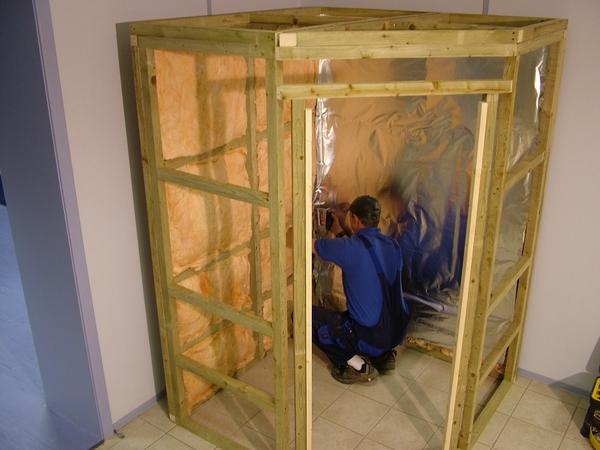
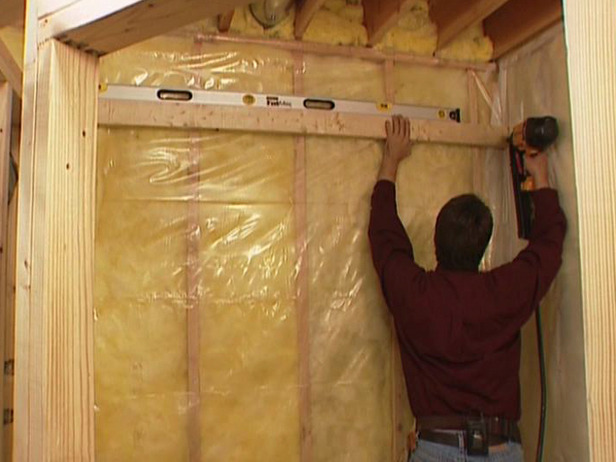
In order to personally equip the sauna will need three ready-made wall structures. Here you can go for architectural tricks and allocate for construction the smallest room in the apartment: for example, a small dryer or a dressing room. If you do not have this opportunity, you can build a bath near the bearing wall of one of the available rooms. The truth should be noted at once one "but": we do not recommend the use of external walls, because they are considered cold and in winter the ill-fated condensate can form on them. However, in this situation, you can use the usual ventilation grille, reliably placing it between the apartment wall and the future steam room. For this, small wooden bars should be attached to the wall. The distance between them should not exceed 50 - 70 cm. Then the lath is sheathed. The received design will continue to perform the functional load of the bearing wall.
The binding involves the creation of 5 levels of arrangement, for this purpose it is enough to draw 5 horizontal lines with foil paper using conventional chalk.
The first line will be located 3-5 cm from the floor, the second - at a height of 60 cm, the third - 100 cm, the last fifth line will be located about 3-5 cm from the ceiling.
The frame is fixed by means of holes through a special thermal insulation material. The drilling step is 50 cm, for filling it can be used as nylon dowels, as well as cork from wood.
Once again, we remind that it is better to erect a sauna construction in the smallest room, and if its dimensions are ideal for a steam room, the piping is performed directly on the walls of this room. Otherwise, it is recommended to fix vertical wooden racks in the corners. Their height should be 5-8 cm above the placement of the upper strapping.
Racks are attached to the surface of the floor on the dowels, and for reliability of the construction, two additional 12-centimeter nails without hats are additionally used.
As for the work on the erection of the ceiling, the technology is as follows: the upper ends are firmly fixed with boards laid flat. They are considered to be the main elements of the ceiling frame, made of massive, wide boards. The bars are not used in this case. Have the boards strictly parallel to each other.
Carrying the frame, do not forget to provide a traditional place for the future doorway. The process involves the installation of two racks and the installation of a horizontal lintel for further lining with a finishing material. The door box is fixed to the screws, but this is already done at one of the final stages, so as not to damage the door during construction work.
Since a healthy microclimate of the sauna can not be created without exhaust or forced ventilation, then for their installation, store in advance two frames of wooden blocks.
Doing work on the manufacture of floor, remember that natural wood should not be used, it is strictly forbidden to use and varnishes. Specialists insist on the use of tiles, and the floor must be made before the erection of the wooden structure.
We mount electroconducting
Installation of electrical wiring must be preceded by planning the location of all electric heaters and appliances. Light sources can be placed in absolutely any place, the main thing remember, the light should be relaxing, soft and even. In the wiring process, use decorative wooden grilles.
When carrying out the work, do not forget that the laying of the wires must pass at the bottom of the outside of the frame. To protect the electrical cable and ensure the fire safety of the entire structure, use a metal hose. And finally, we recall that the connection of electrical appliances must be parallel and pass through the switch.
Thermal insulation
To conduct thermal insulation work, you will need foil and insulation, which is rolled over the surface of the wall overlapping up to 10 cm. Works are done from the top down. The heater is fixed on the nails, then the strapping is performed.
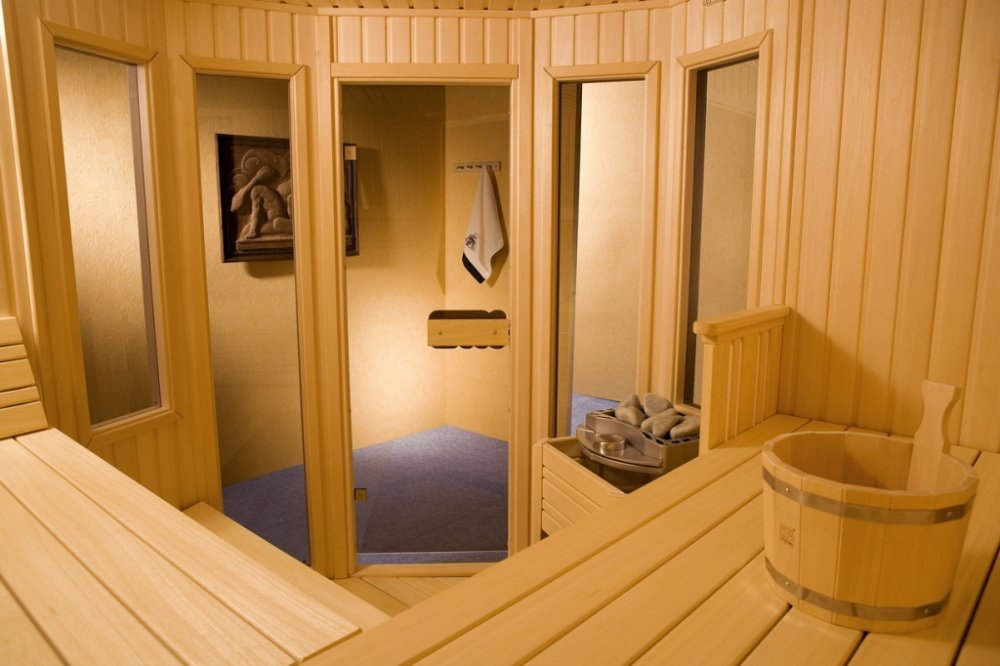
We sew the sauna with a lining
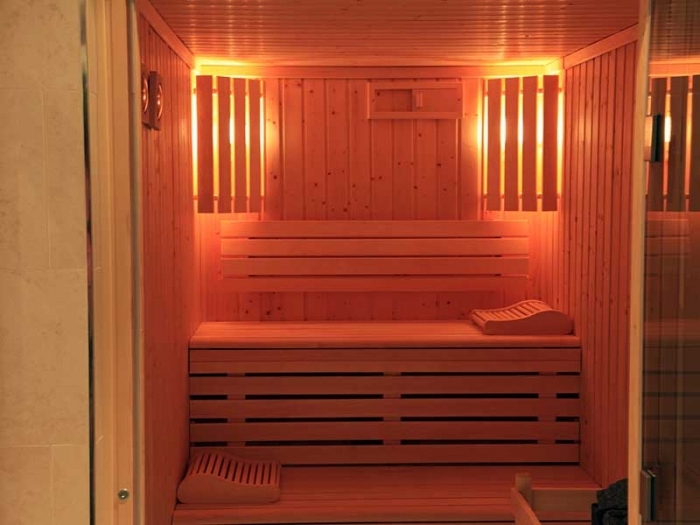
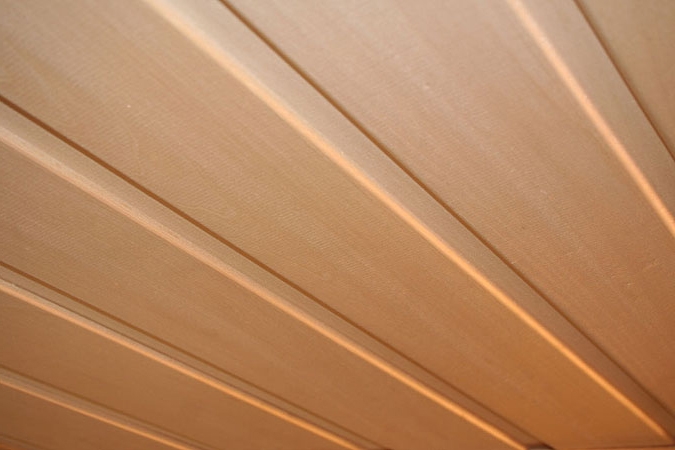
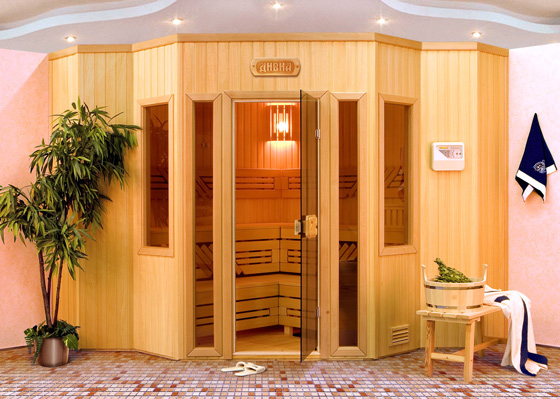
Russian bath, like a Finnish sauna, is certainly associated with interior trim from linden or aspen. And let this material is not the strongest, but it is famous for its unique healing qualities. It is for this reason that wood is today considered the leader among the materials for finishing baths. However, you can successfully complete the apartment sauna from the usual lining.
Interior finishing begins with the ceiling works. If the ceiling of the room is the ceiling for the steam room, then it is covered with foil from the side of the sauna. To fix the foil, use the buttons. It fits in a lap. For the accurate fastening of the lining, blind nails are used. To fix the extreme laths use conventional nails without hats. On top of the foil coating is laid insulation: it can be mineral wool, which does not ignite and does not breathe. And one more tip from specialists: refrain from foam - under the influence of high temperatures, it releases harmful and even poisonous substances into the surrounding air.
At the top of the mineral wool is fixed the parchment, and then with a clear conscience proceed to the lining of the lining.
By analogy with the work already done, the walls are being built. However, here it is necessary to remember the sections of the output of the electrical wiring. For this purpose, a hole for the metal hose is pre-drilled in the board. If the sauna project does not provide skirting, then the lining between the ceiling and the walls is fixed "in the rust," and the plinth in the lower plane is fixed on nails without hats.
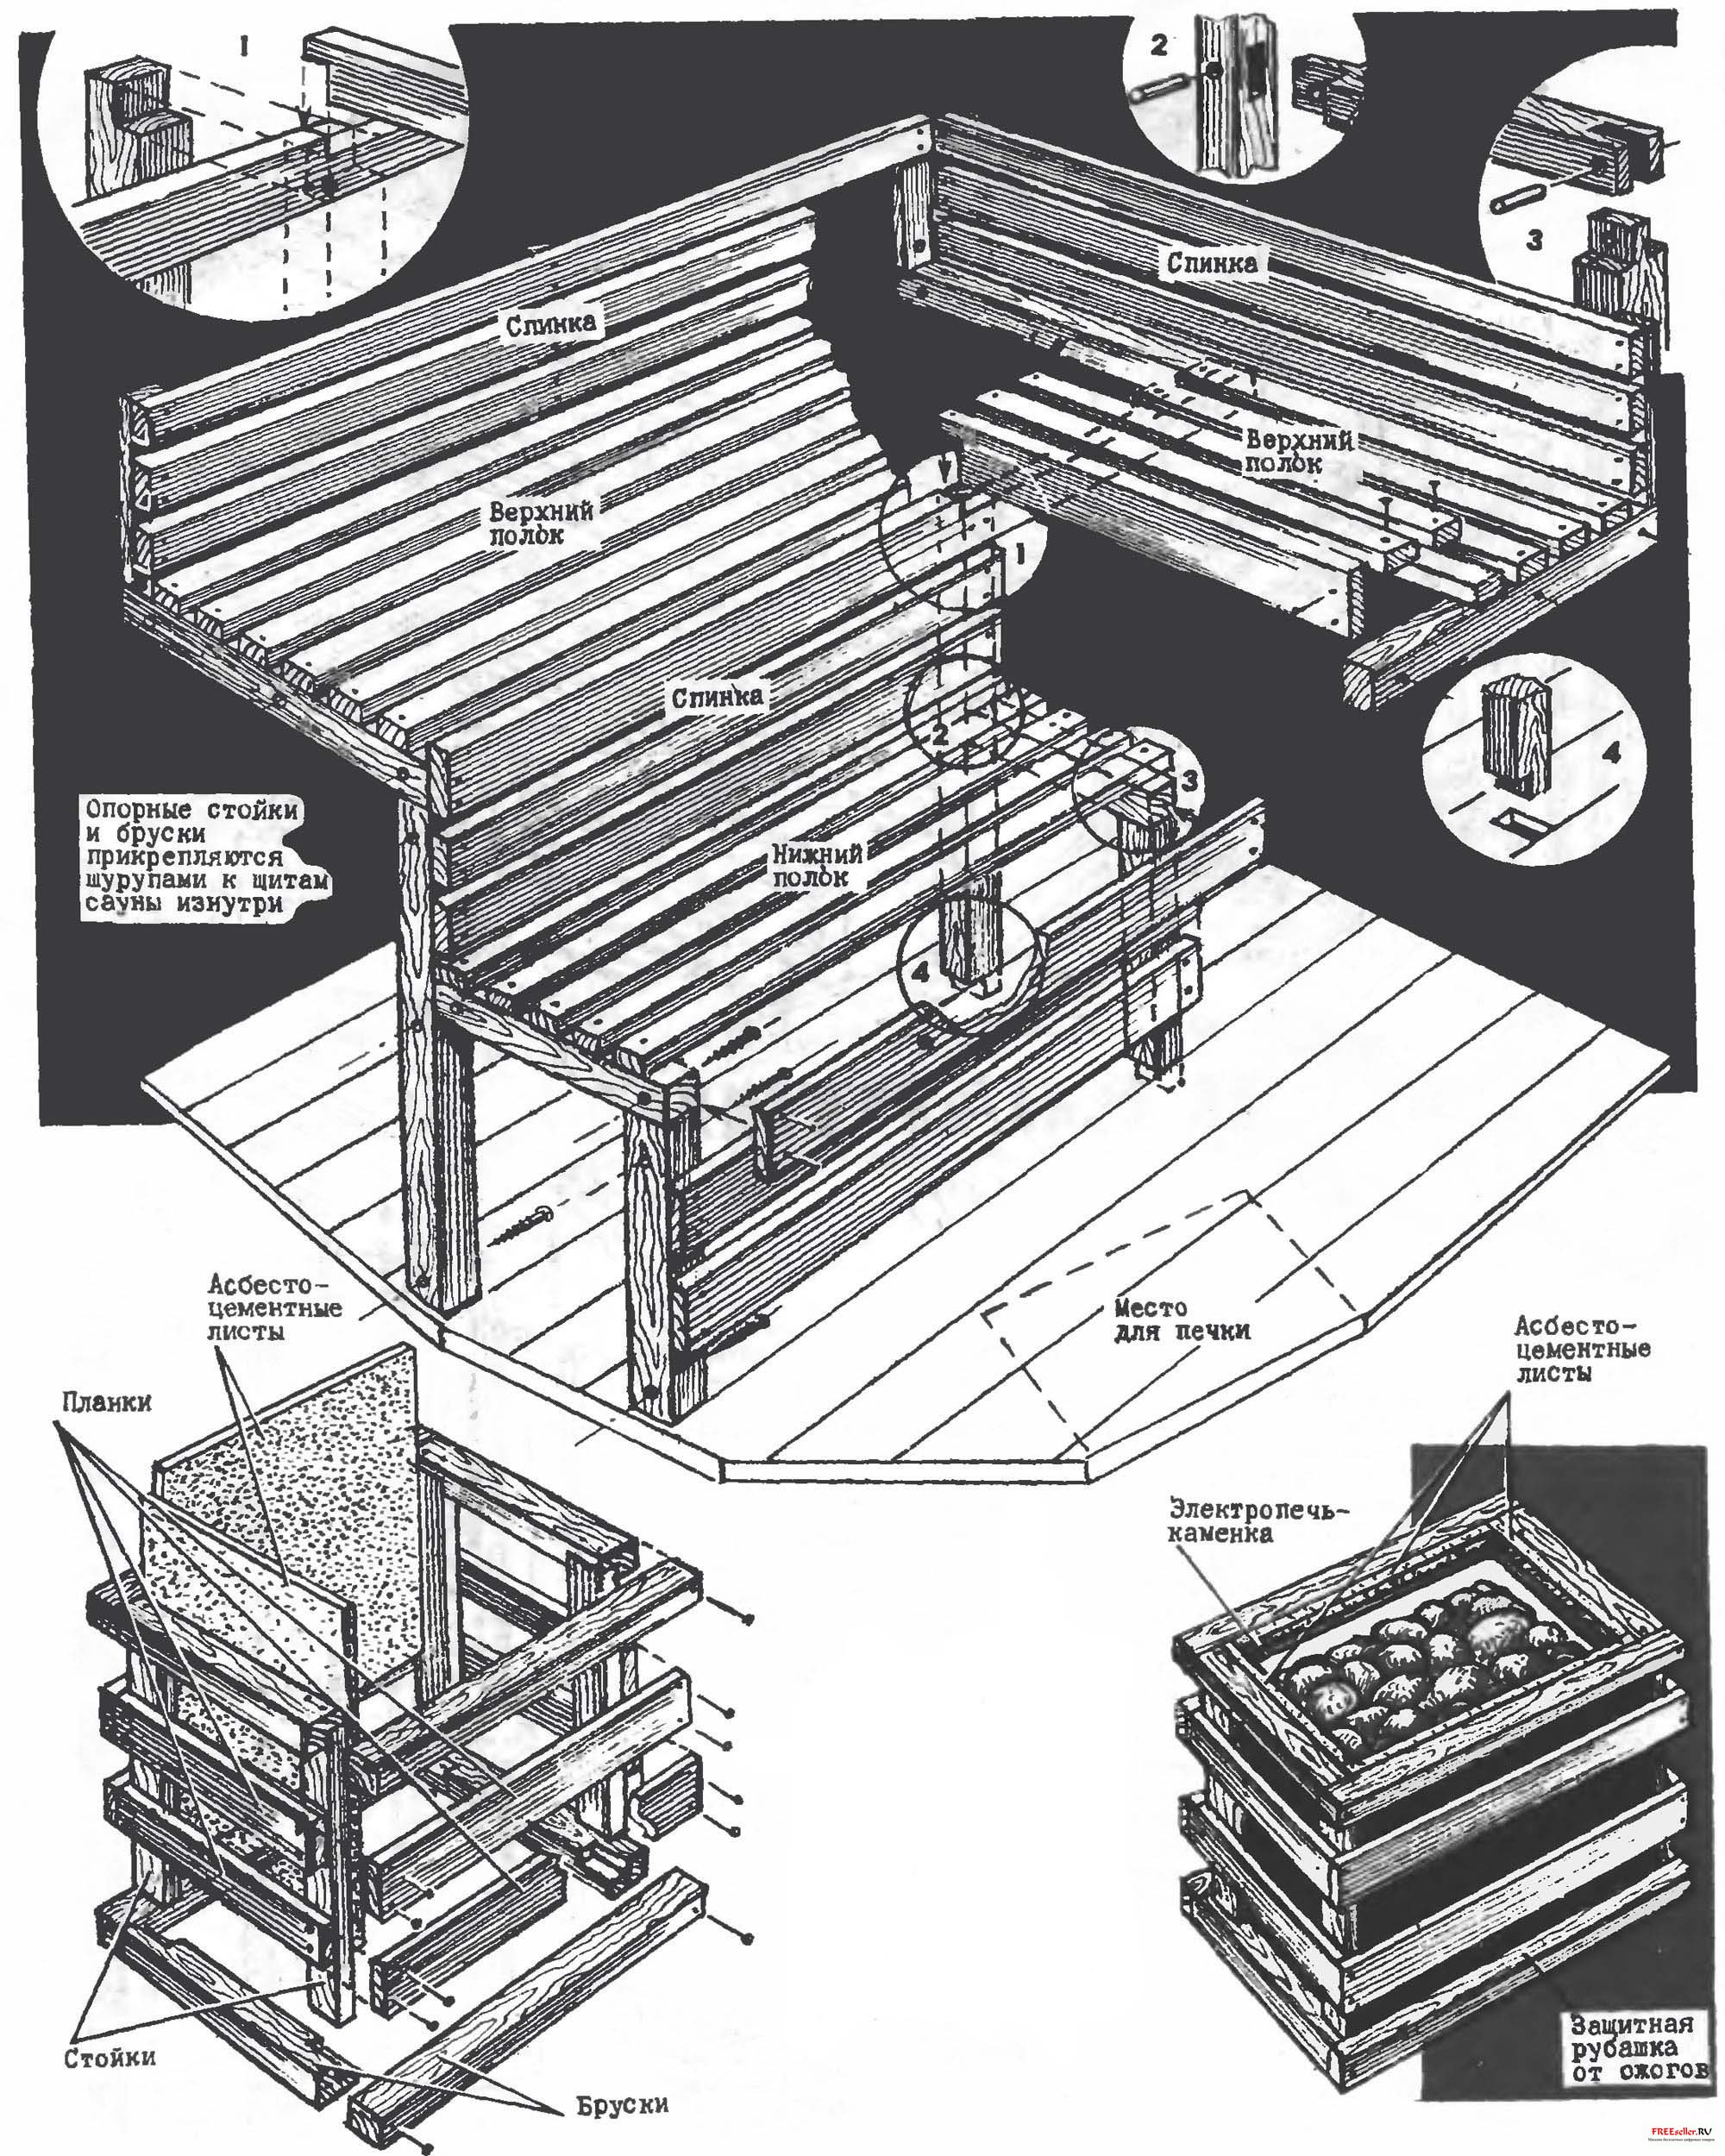
Construction of the frame
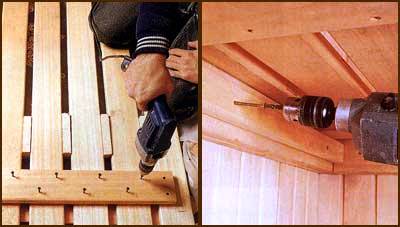
To create a building for a sauna sauna, you will need wooden beams with a section of 40x80 mm, connected to each other by screws. The main beam is sewn horizontally in the area of the third strapping along the entire width of the wall opposite the entrance door. For fastening you need 10 centimeters screws.
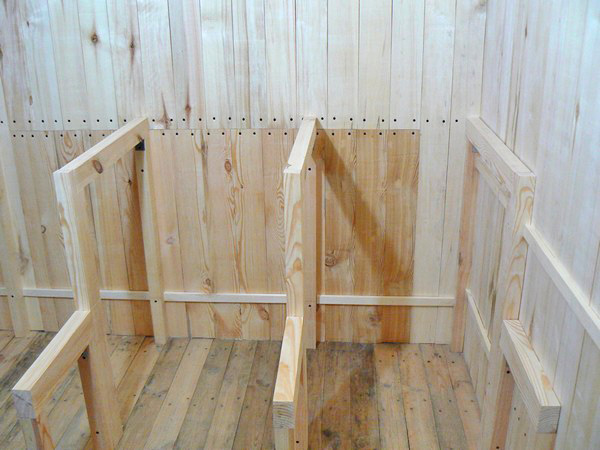
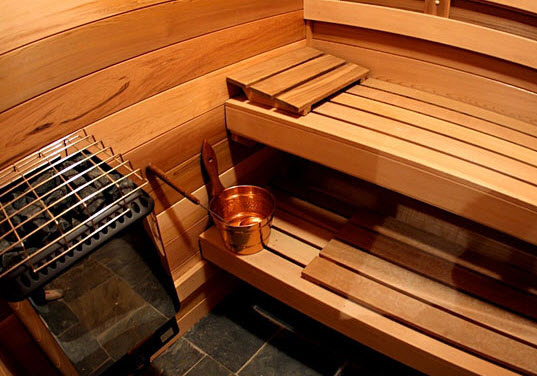
Hats should be buried in a wooden bar so that you are not burned during your stay in the sauna. Similarly installed and benches in the ends, though for this you will have to use special hanging bars and self-cutters of 15 cm length. As a material for the flooring of shops, boards 20x80 mm are successfully used. In this case, the structure must be removable.
Installation of electrical equipment
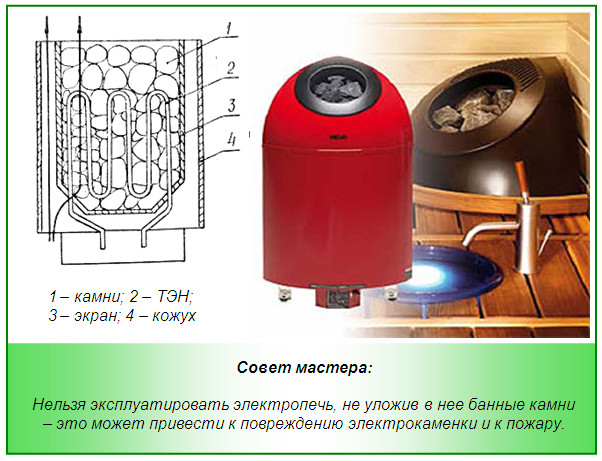
Installation of electrical equipment is the final stage of the construction of a modern sauna in the apartment. Durable and reliable fixture fixing is done on the screws. The heating equipment should be mounted at a distance of 20 cm from the floor. Close to the fence, and between the shadows are close to each other placed stones.
Preparing the sauna for use
After completing all the fixing work, the inner space is peeled and rubbed with damp cloth. Our sauna is ready for use.
And finally I want to remind you that on the first day you need to warm up the steam room to 60 ° С with the doors open, on the second day - up to 90 ° С for three hours, on the third day bring the temperature to 100 ° С by periodically pouring stones with water. From this very period you can arm yourself with a birch broom and use the bath in full.
More details about the features of building a sauna in the apartment you can find out from the video on youtube.


