


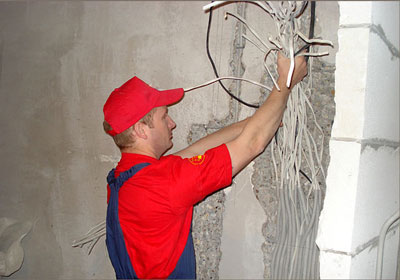
Installation of electrical wiring in the apartment, being an important and responsible stage of any repair, requires strict adherence to fire safety rules, professional approach and accuracy, the ability to quickly find the right solutions in any non-standard situations.Electrical work does not tolerate amateurs, because even the slightest violation of technology or negligent handling of electrical appliances can lead to disastrous results.
The basic rules of wiring in the apartment
We shall designate the basic rules, strict observance of which guarantees to you the development of reliable and effective system of energy supply in the house or apartment.
- electrical installation products, ducts and electricity meters must be installed in accessible locations;
- the installation of switches is carried out at a height of 60-80 cm or 1.5 m from the floor surface in the area of the doorway, and the sockets - at an altitude of 50-80 cm, excluding placing near the skirting. This will protect the cable from short circuits when there is a threat of flooding the room. The distance to the gas or electric stove, pipes or batteries must be at least 50 cm;
- the number of outlets depends on the square of the room: for every 6 square meters there is one outlet. For a kitchen room, the calculation of wiring and sockets is based on the power consumption of household appliances. Installation of sockets in the bathroom involves the use of a distribution transformer, but in the toilet, traditionally, there are no sockets;
- the electrical cable is laid exclusively vertically or horizontally in accordance with the wiring diagram of the room;
- laying the cable horizontally, keep a distance of 5-10 cm from the baguettes and cornices, and with the vertical version, the distance to the door or window openings should not be less than 10 cm;
- the contact of the cable with metal structures is forbidden, and the distance to the gas pipes must not be less than 40 cm;
- all wiring and wiring connection is made with careful insulation of bare ends. Remember, to connect aluminum and copper wires is forbidden!
- use a bolted connection to connect the electrical equipment to ground and protective neutral wires.
Preparatory work
scheme of the electrical network of the apartment
Rightly considered the basis for conducting high-quality electrical installation, the preparatory stage begins with the development of the circuit of the entire electrical network with the display of the sections of the electrical cable laying, the installation points of switches and sockets, the electric flap and the distribution boxes, the lighting fixture zones.

Such a job you can successfully do by yourself or turn to a professional for help. It should be noted that it is recommended to start drawing up the scheme with the location of the switchboard, since all the electric power enters your house through it. Here, devices for the protection and recording of electrical energy will be concentrated.
The development of such an uncomplicated plan will become the basis for determining the required number of points and cable length.
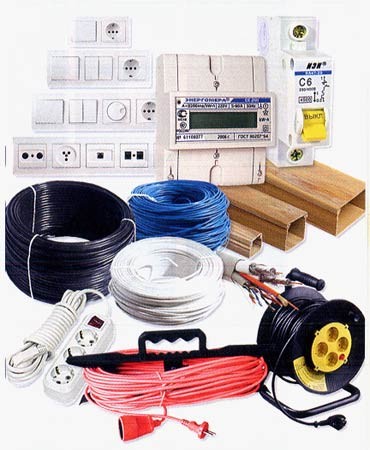
choice of electrical material for installation
With respect to materials and devices, qualitative wiring will require you to purchase an illumination panel, differential automatons or RCDs, cables and sub-boxes, junction boxes, sockets and switches, special corrugations or cable boxes, cable clamps and terminals, various types of insulating tape and nails , dowels, clips, self-tapping screws).
When calculating the length of the cable, it is necessary to take into account all possible branches on the surface of the walls to the installation products and lighting points. Do not forget to add 1-2 meters for the release of electrical wires a few centimeters in places where the sockets and switches are installed. It is better to be reinsured once again in case of error at the time of installation.
choose an electrical cable
When buying a cable, give preference to products with a copper core. Copper conducts electric current better and is more durable.
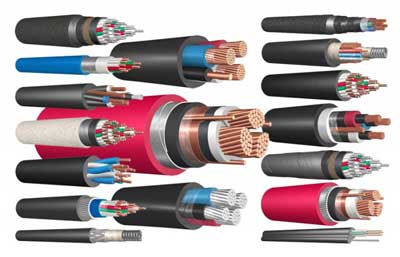
To carry out high-quality electrical installation, electricians make the choice of wiring in favor of VVG-5 * 6, VVG-2 * 6, VVG-3 * 2.5, VVG-3 * 1.5. All of them have good technical and operational characteristics and have their own field of application.
The choice of the machine is determined by the total load of the network. Having bought machines 16A and 20A, you can safely use the first for lighting, and the second - for the operation of outlets.
It's time to choose the method of installation. There are open and hidden ways.
Do you like flush mounting more? In this case, arm yourself with a Bulgarian or a puncher and fight! You are waiting for a rather dusty work - stroblenie walls. Thanks to the hidden installation of electrical wiring, the interior will not lose its attractiveness, and you are guaranteed electrical and fire safety.
If the design of your premises allows outdoor installation, then you can easily cope with fixing the cable to the wall surface on the dowel - nails, clips, cable - channels or special boxes. Fixing of all elements to the basic structures is ensured by fixing elements with such a placement step, which will ensure the reliability of the installation.
And although the result of the external mounting method can not be called presentable, it is easy and fast, and you will be provided with access to the wires at any time.
Concealed wiring
Immediately, we will designate that the hidden method assumes the laying of the cable along the shtroba, under the floor covering, in the voids of the floors, under the plaster and the plasterboard. In this case, the shroud is laid strictly in the vertical direction or horizontally. Start the work with a preliminary application to the surface of the wall markings according to the previously developed wiring diagram. Then, using a puncher, make a groove-shtrobu, in which the wires will later be laid. A special nozzle will help to make jigs and places for junction boxes.

Do not forget to drill holes in the walls to lay the cable between the rooms.Now you can do installation and connection of the lighting panel, differential automatons or RCDs, which will become a reliable protection of your power system against short circuits and sudden voltage drops. The shield can be hinged or built in, the traditional location - near the entrance door.
To connect the machines, install and secure them inside the box, then connect the wires.
The standard switchboard is as follows:
- in the upper plane there are zero terminals,
- in the lower - grounding,
- the central part is equipped with automatic machines.
Now proceed to laying the cable in the stems. Specialists recommend the use of VVG-3 * 2.5 wire for routing from SHCHO to distribution boxes and from distribution boxes directly to outlets. But for connection of switches and lighting points, use the VVG-3 * 1.5 wire.
Place the receptacle in a special recess and connect the wires.
If the budget allocated for electrical work does not allow you to lay the cable in the stems, then you have the opportunity to significantly save by installing the cable in the floor. In this case, you do not need to bend the walls and corners, but just pull the cable directly into the desired room. The cable, protected by corrugation, will fit into the prepared vertical shtroby.
After laying the main wires, lead them into the junction boxes and connect them to a single network.
How? All elementary: carefully clean the ends of the wires and twist together. Do not forget to insulate all bare ends with a normal tape or CuZa. Firmly press the insulated ends of the electrical wires inside the box and close the lid. Check the wiring for the wiring for damage or incorrect connection. Now you can seal the strobes with alabaster, install sockets and switches, light sources. For connection to the power shield, use the services of a professional electrician.
Outdoor installation of electrical wiring
If it is impossible to lay the wiring in your apartment or house with a hidden method, then you have nothing left to do but start the outdoor electrical installation using cable channels or special boxes.
After purchasing the necessary materials according to the wiring diagram, the cable is placed in a special box.

Installation includes:
- marking places for laying electric wires;
- drilling holes for self-tapping screws and dowels in steps not exceeding 0.5 m;
- work on the installation and fixing of cable ducts or boxes to the wall using self-tapping screws;
- drilling holes in the areas of installation of switches, sockets and lighting devices;
- installation of sockets and switches. For lighting devices, use special hooks;
- work on connecting wires in junction boxes;
- having convinced by means of the tester in the absence of errors of wiring and various damages, the box is closed by a cover;
- connection to a common electrical network. To do this, use the services of a professional electrician.
In conclusion, we note that the installation of wiring in an intelligent host does not cause any special difficulties. Accuracy and diligence, attentiveness and basic knowledge in the field of electric power industry will allow you to achieve high-quality and reliable operation of the energy system of your home.


