Modern roof structures differ in complexity and variety - these are broken roofs, hipped roofs, multi-jib, and so on. However, a simple, reliable and time-tested gable roof was and is actual and very common. Due to the simplicity and functionality, a lot of developers give it preference and today, besides the gable roof can be done without resorting to the services of specialists. However, despite the fact that the gable roof looks very simple, its construction requires at least a theoretical knowledge of the process and at least some experience in the construction industry. In this publication, we will look at the process of building a gable roof with our own hands, pay attention to some nuances and subtleties, which will help to avoid blunders to the person building the roof for the first time.
The construction of a house is expensive, it requires a serious investment of resources, time and effort. Naturally, people are trying to find ways to save money, reduce the cost of construction, while using the latest achievements of building technologies. One of them, recently massively gaining popularity in Russia is the frame method of building houses. The main benefit of this method is that one-story frame house can be built without involving professionals. If you have at least a minimum technical literacy, and will strictly adhere to all the recommendations, then without special problems you will be able to build such a house yourself. In the process of building a frame house, it is very often necessary to significantly simplify the construction, and the usual gable roof is not particularly complicated, and is perfectly suited for a frame house.
Content
Gable roof: structural features
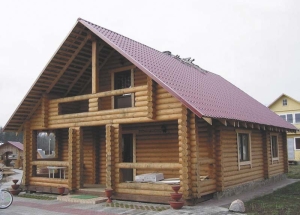
Any builder knows that the durability of a building depends largely on how evenly the load is distributed on the load-bearing surfaces of a house when building a roof, and from this point of view the gable roof is one of the best options. The gable roof is a fairly simple and functional structure. The finished roof consists of two inclined planes, which are supported by two opposite walls of the house. This produces two empty triangular ends, which are called pediments. If you allow the height of the roof and the area of the house, then in the space under the roof you can make one or more living quarters. Residential space under the roof is called a mansard, while a non-residential space is an attic, they are used only for household needs, for example, for years they store all necessary and unnecessary things there.
Step-by-step construction of a gable roof with their own hands. Roof rafter system
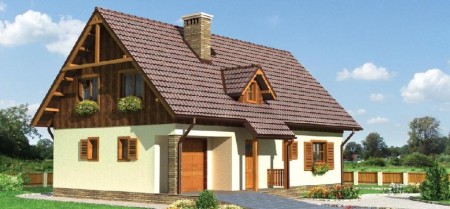
From an aesthetic point of view, the gable roof looks, of course, a bit rustic. This disadvantage can be compensated by using modern roofing materials that will enrich and decorate this most visible part of the house.
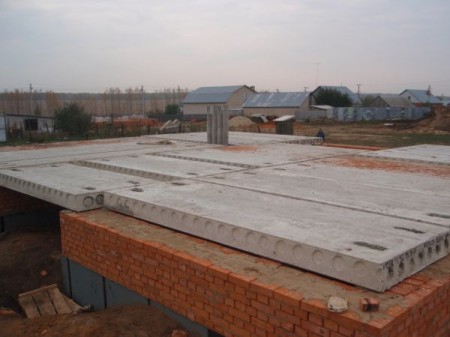
First of all, it is necessary to arrange floors. Very often, with the capital construction of buildings made of brick, block and other traditional materials, the floors are made of reinforced concrete slab.
This saves a lot of time, and the overlap turns out to be strong and durable. But in wireframe construction, the use of such heavy materials is unacceptable, since they can simply destroy the wooden frame and damage the fragile foundation. For construction with their own hands, wooden beams are best.
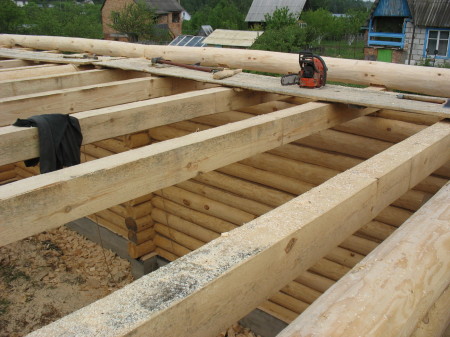
When choosing the material from which the gable roof rafters will be mounted, it is first of all necessary to decide how the space under the roof will be used. If there is simply an attic, then there will be enough bar 50x150 mm. To build a dwelling attic room, you need to use a more massive material with a cross section of at least 100х150 mm, optimally - 150х150 mm. Wooden beams are laid on finished walls, parallel to the gables. Each beam should extend beyond the wall by 50-70 centimeters in order to make it possible to make a roof overhang sufficient to protect the walls from precipitation. Once the beams are laid, we proceed to manufacture and install the rafter system
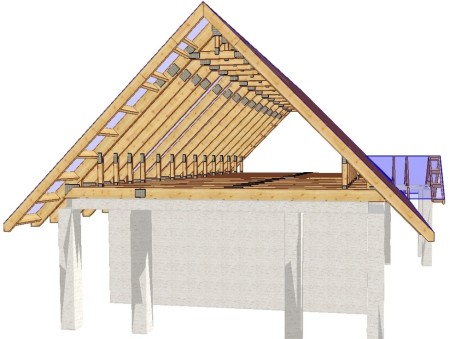
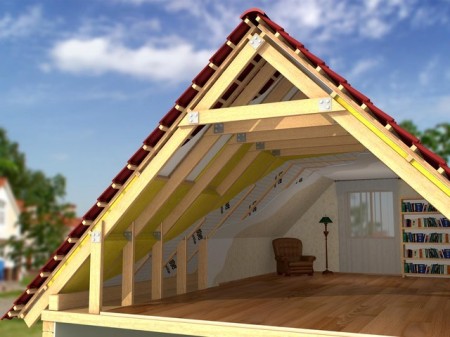
Since the roof we will have a gable roof, the rafter structures make it triangular.
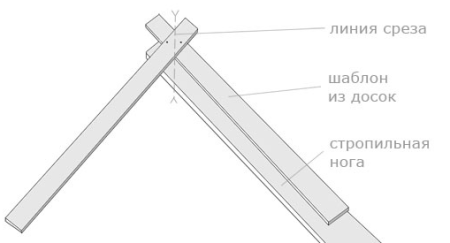
Finished rafters are a construction in the form of the letter "A". It is easiest to assemble each triangular element of a rafter structure on the ground. First cut the beam of necessary length, determine the angle of the ramp. After this, a template is made for assembling the rafters at a certain angle. To do this, take two pruning boards or bars and fasten them at the desired angle. Next, just adjust the uneven bars under the template, trim at the top for better grip, and fasten together with nails or self-tapping screws.
Immediately on the ground to the rafters, you can attach a crossbar. After that, it remains only to lift the finished structure, put it out and fasten it to the top. Fastening of rafters to the beams of the ceiling is done with the help of nails and staples. In general, the design of the gable roof system is considered very simple, and a team of professional builders can assemble it "from scratch" in less than a day.
The crossbar in the rafter must be calculated in such a way that it serves as the basis for the future ceiling of the attic.
Quite often it is not possible to find a bar of the required length for sale. In this case, it is possible to join the timber from both sides with the scraps of the board. Two pieces of the bar are usually fastened with nails, although it is better to use long screws or bolts.
Mansard in the conditions of Russia must necessarily be heated. If it is planned to make a common attic from the overburden, then in this case the task is greatly simplified, and the financial costs, respectively, too. Savings in this case is achieved, first of all, due to warming and lower consumption of material, because the step of rafters can be done somewhat more. However, you should not place rafters at a distance of more than one and a half meters from each other. It is best if the step is 1.2 meters. Thus, even if you make a roof of traditional heavy slate, its weight is evenly distributed throughout the area of the structure.
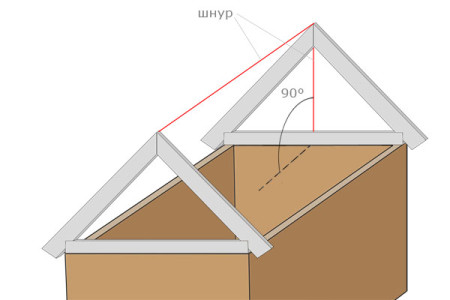
First of all, the front edge rafter structures on both sides are installed.
They are temporarily fastened with the help of long slopes. It is very important to expose the first frontal rafters (however, like all the others) strictly vertically.
After the outer rafters are exposed, a string is stretched between them, with respect to which the rest of the rafters are exposed.
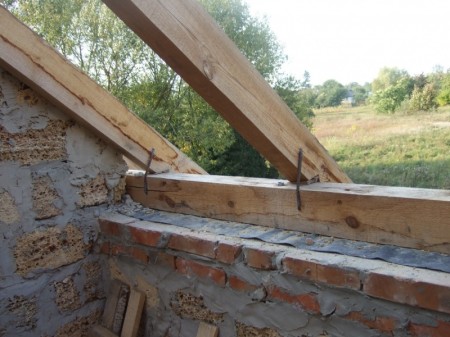
Fasten the rafters to the beams in different ways. For example, overlap with additional fastening with metal brackets, or make a sidebar in the span of a depth of about 5-7 centimeters.
The triangular structure itself is quite stiff, and the additional reinforcement in the form of rails at the height of the ceiling, plus the strong fastening of the rafters to the beams of the floor provide an additional margin of safety, which does not worry about the vertical load on the roof.
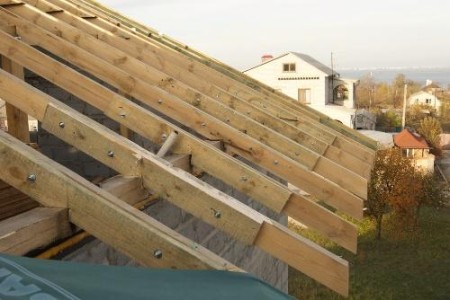
If we talk about the front loads on the structure, then here it is necessary to provide the whole roof truss system with additional rigidity. Usually this is done with the help of cuts, which builders are sometimes called "windshields", installed on the crossbar of the frontal rafters and in the lower part of the middle rafters. Thus, the rafter structure is strengthened on each side, there are only four cuts.
For cuttings, you can use the material from which the rafters are assembled, or you can take a beam of a slightly smaller cross-section, for example 50x100 mm.
Be sure to pay attention to the height of the rafters, and, of course, the angle of the roof slopes. The higher the snow cover height in your region, the higher the rafter structure and the larger the roof slope. When designing and calculating the roof truss system, it is necessary to know these data and make appropriate corrections to the design.
attic. warming of the attic
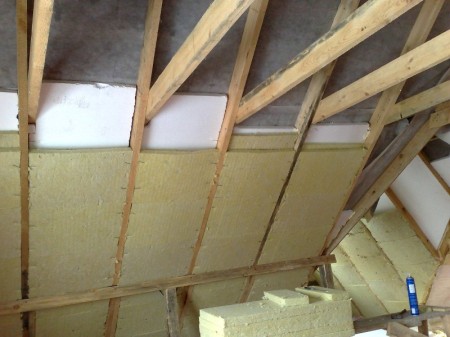
The attic structure assumes the existence of residential premises in the space under the roof, therefore, due consideration must be given to the insulation of the roof. In the design process, it is necessary to provide the width of the insulation, so that in the process of work it is not necessary to cut or increase it, which leads to an increase in the consumption of material, and, accordingly, money costs. Heat insulation is laid only after the crate is ready and the roofing works are completely finished.
Piled insulation must always be covered with any suitable roll material, for example, a vapor barrier, especially if sheets of glass wool or mineral wool are used.
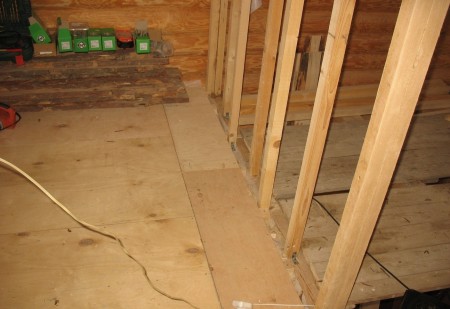
If there are several living quarters in the attic, additional racks will be mounted to the rafter system, which will play the role of the basis for the future walls of the attic rooms. Stands for walls are attached to the crossbars - the basis of the future ceiling of the room.
To maximally insulate the attic room, you can additionally lay the thermal insulation material on the ceiling and the walls of the attic. However, it depends on the temperature in the region where the house is built.
It goes without saying that if you made a decision about the arrangement of living spaces in a space under the roof - be prepared for additional financial expenses, since in this case you will need more building material and a heater.
crate and roofing material
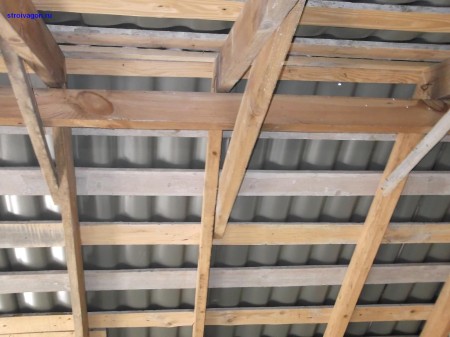
Once the entire rafters system is installed with all the necessary reinforcements and spacers, proceed to the installation of the roofing, to which the roofing material will subsequently be attached. The step, and, accordingly, the density of the crate depends on the roofing material to be used. The cheapest material that does not require the presence of a dense crate is a normal roofing wavy slate. The thickness of the planking under the slate is not less than 2 centimeters. However, for a slate roof, 4 boards per sheet of material for height are sufficient. The main drawbacks of slate are heavy weight, fragility and a rather unattractive appearance.
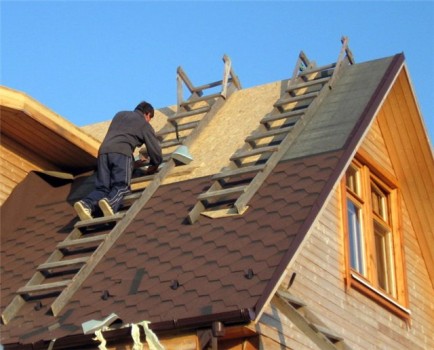
If as a roofing material will be used soft bituminous shingles or ondulin, the lath should be very dense. In addition, a sheet material is often placed on top of the crate for extra strength, for example, chipboard panels. Although the load on the rafter system slightly increases, but this is compensated by the low weight of the roofing material.
Finally, we note that, if all of the above recommendations are followed, the gable roof will be strong enough to withstand snow and wind loads, and with proper care and timely repair will last a very long time.
In addition to the theory, we suggest viewing several videos on the topic:


