


If you got an apartment in a new building or thought about repairing the existing one, then at a certain stage of its implementation you will face the task of replacing the sanitary ware, including the main attribute - the toilet. Maybe you want to update the interior of the toilet, or the model has lost its relevance, or even completely out of order. Let's understand, together with the correct technology of mounting such a key figure of the bathroom, as a compact toilet.
Content
Complete set of compact toilet bowl
Long before acquiring and installing the plumbing you like, it is recommended to determine the look, functional and design features of the device. Today, the market of plumbing devices offers a great variety of different models, which means that you will be able to select the right toilet bowl of the necessary modification and dimensions that will allow you to perfectly fit into the interior of your bathroom and satisfy absolutely all your requests.
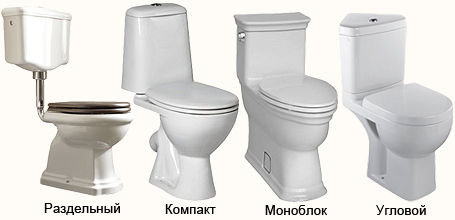
Among the presented modifications you can choose a standard product installed on the floor surface by the usual method, a toilet bowl of a hanging type or a model equipped with functional shelves. Since the most universal and popular models are compact toilet bowls, we will consider the installation of sanitary ware of this type.
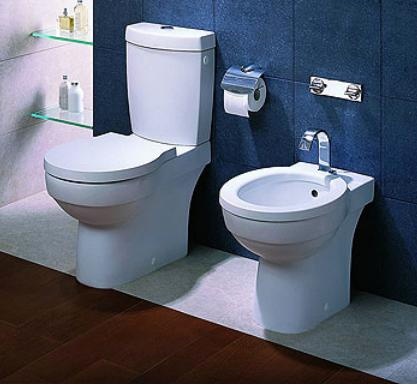
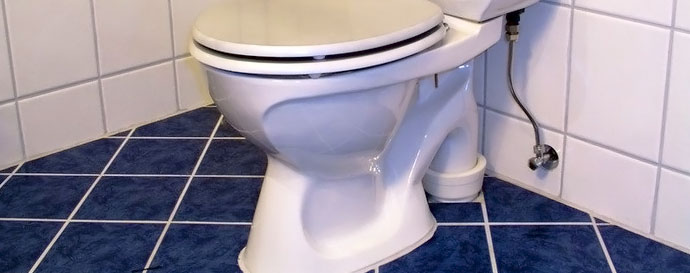
The device of a compact toilet bowl includes a bowl, a drain tank and a drainer or a shut-off valve.
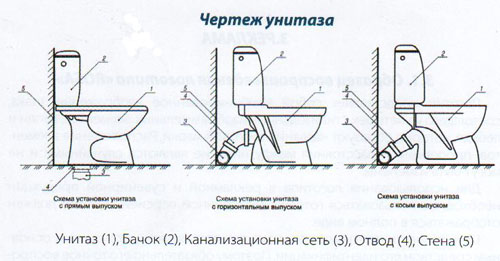
Bowl It performs the function of the foundation, because a tank is attached to its rear part. Directly the bowl is mounted to the floor surface on two screws. Allocate several types of outlet of the drain bowl - oblique output, vertical and at 90 ° angle. It is this feature that professional plumbers are advised to consider when choosing sanitary equipment, since if the sewer descent is vertical, and you acquire a product with a horizontal descent, you will need to rework the riser or fix the toilet through the adapters.
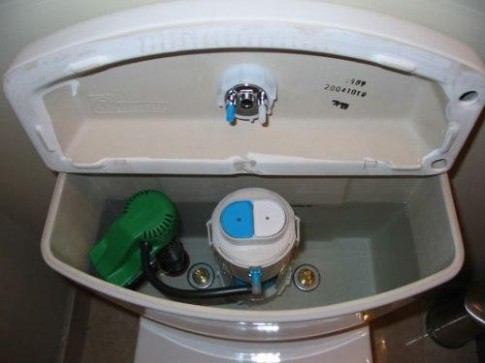
The complete set of the sanitary equipment necessarily contains tank. Its device is somewhat more complicated, but you will always have an opportunity to read the instruction of its assembly. Also make sure that sealing rubber gaskets, because it is almost impossible to imagine the installation of plumbing without them.
Before starting the installation of a new product, you need to choose the method and mounting location, since you will need to drain the sewage and hot water supply (if the device is installed in a new building). If you have to replace the old model with a new one due to its unfitness, then focus on the existing sewage system. In addition, all manipulations must be carried out carefully and very carefully, because the bowls of the modernized models are made from fragile faience.
Mounting Tools
Professional installation, ensuring the uninterrupted operation of the new toilet, can not be performed without the following equipment:
- perforrel;
- keys nut for assembling the drain tank and fixing the equipment;
- wrench for hose connection;
- gas key;
- a hammer;
- screwdrivers;
- silicone sealant;
- bolgar for cutting metal structures.
Preparatory work
The whole complex of works on the installation of new sanitary ware is preceded by the dismantling of old equipment. It is desirable to produce it in goggles and gloves, since fragments can fly in different directions in the process. When replacing plumbing, do not forget to treat it with a special composition for disinfection.
Dismantling activities include several stages:
- disconnecting the equipment from the running water supply. For this purpose, the water supply valve overlaps easily;
- the water remaining in the reservoir should be carefully drained into a prepared container, and the worn out hose must be disconnected;
- the fastening elements are removed from the structure. In case the screws are rusted, they are drilled;
- disconnect the bell. If it is made of cast iron, it is better to saw or dismantle;
- worn socket is replaced with a new corrugated, greased sealant;
- freeing space for installation;
- areas for future anchorages are being marked;
- holes are drilled under the dowels.
When dismantling, remember the sewer steam, which is considered combustible. That is why the pipe for sewerage for the period of installation works is shut up with a rag, and the performer should quit smoking. And only after the completion of all the preparatory measures, you need to start fixing a new product.
Technology of installation of a compact toilet bowl
The process of correct installation includes several stages:
1. The product is unpacked, the nuts for securing the reservoir are carefully pulled to create sealed connections;
2. With a little effort, the nut for the water supply is pulled up, located on the back wall of the new toilet bowl;
3. Sanitary equipment is installed and marks are marked with a felt-tip pen for future fixing holes;
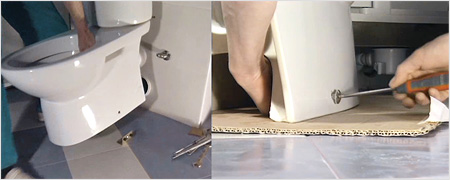
4. neatly drilled holes, then they clogged plugs of plastic;
5. The plumbing fixture is fixed firmly to the fixing bolts, additionally equipped with gaskets;
6. the lid and seat are assembled separately;
7. Corrugation from both sides is carefully treated with a sealant, after which one end is fixed in the plastic socket of the sewage system, and the other end is fixed in the drain hole of the toilet bowl;

8. the device by means of a flexible hose is connected as reliably as possible with cold water supply;
9. connection of cold water supply to the new plumbing is made, the tightness of all connections is checked. In case of detection of water leakage, it is recommended to carefully pull up all the fasteners under the toilet bowl;
10. Using a float, the level of water in the tank is regulated;
11. To make sure that the product is correctly installed, fill the reservoir several times with water, then lower it.
Carrying out the installation work, adhere to the only rule - excessive efforts are unacceptable: ceramics are fragile enough material.
Accurate observance of our recommendations and scrupulous attitude to the work performed will allow you to successfully produce sanitary measures in just an hour and a half. For more details about installing the toilet, you can learn from the video on youtube.
I wish you success!


