


So, you have decided on the choice of wallpaper, and, having calculated their number necessary for the manufacture of repair, purchased. Before gluing the wallpaper, you need to take care that you have at your fingertips the tool necessary for gluing the walls with wallpaper. Be sure to prepare the following: sharp scissors, tape measure, stationery knife, meter ruler, simple pencil, rubber roller for leveling wallpaper, roller and brush for applying glue, spatula, glue tank (plastic bucket), clean non-linting rags, stable stool or bench, as well as a stepladder.
Content
Preparing walls for wallpapering
Before gluing the wallpaper, you must remove all furniture from the room in which the repairs will be carried out, which may prevent us. The room should be sufficiently freed from unnecessary things, since we will have to spread the wallpaper on the floor to apply glue on them. All preliminary work (painting or whitewashing of the ceiling, doors, radiators or windows) must be done now, before the wallpapering of the walls. Now remove the old wallpaper with a sharp spatula, moistening them with water.
We examine the walls, removing all the irregularities, old chopiki and previously hammered nails, pull out the screws. We use a putty and a spatula to smooth the unevenness of the wall and small cracks. After that, we progruntovyvaem wall, spreading wallpaper wallpaper according to the instructions on the package to the liquid state. Remove the top of the outlets and switches, having previously de-energized them for safety.
Preparing wallpapers
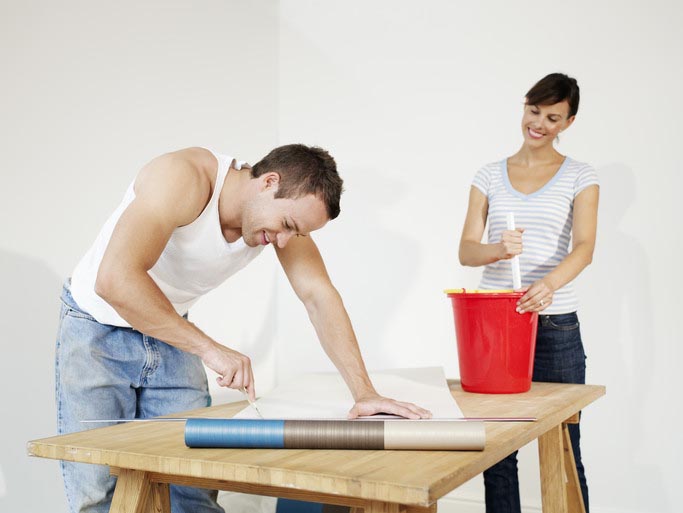
Be sure to wash your hands thoroughly with soap before painting the wallpaper. After all, you do not want the new wallpaper to get dirty right away. For the same reason, the floor in the room, which will be glued wallpaper, must also be clean (because it will have to spread out our wallpaper to apply glue on them). Then, if the wallpaper has a certain pattern or visible pattern, it is necessary to adjust the walls measured in height in advance (plus several centimeters in reserve) and the wallpaper sheets cut off by the clerical knife according to the drawing. If you do not want to bother with the fit of the picture on the wallpaper, then immediately get a one-color wallpaper or wallpaper with longitudinal stripes (or with a very small pattern applied on them).
The larger the picture on the wallpaper, the more their number is required when sticking. Cut off the sheets marked on the reverse side, marking its serial number and top-bottom.
Preparation and application of wallpaper glue
When preparing wallpaper wallpaper, follow the instructions on the packaging. Modern glutinous wallpaper solutions do not require long cooking and aging for a certain amount of time. Therefore, do not prepare glue in advance - it is not stored for long. Before you start to glue the wallpaper, it is necessary to pour cold water into the prepared clean plastic container (bucket), and, mixing it (as if creating a funnel in the water), gradually fill in the adhesive from the package. Formed lumps easily immediately dissolve, rubbing them between the fingers. The necessary amount of water for the preparation of glue is indicated on the package. Having sustained literally a few minutes (usually no more than ten), we apply the resulting glue to the spread sheets of wallpaper, but not all at once, but in turn - first at one, then at the second (no more than two sheets at a time).
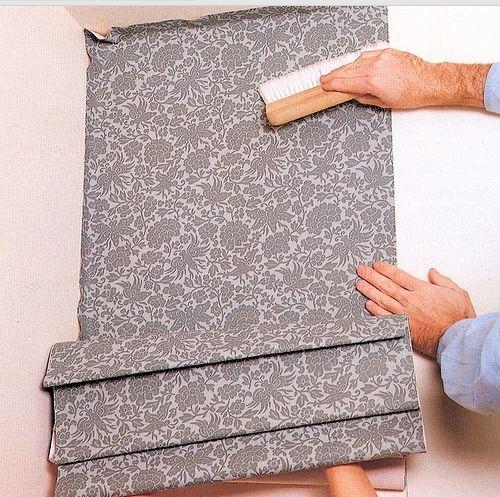
We apply glue to the wallpaper sheets with a roller or brush, diligently lubricating around the edges, but in moderation, without excess. Now you can find on sale a colored (usually pink) wallpaper paste, we advise you to buy just such. After all, it is very convenient - so it is impossible to leave any part of the wallpaper untouched. Coat sheets with glue applied on them must be folded, bent from two sides to the middle, so that they are impregnated with glue for at least five minutes.

The exact time for impregnation is indicated in the instructions for the wallpaper. Sticky fleece wallpaper does not require the application of glue on them, which is applied only to the wall before attaching to it a pre-measured wallpaper strip for the purpose of gluing.
How to properly glue wallpaper
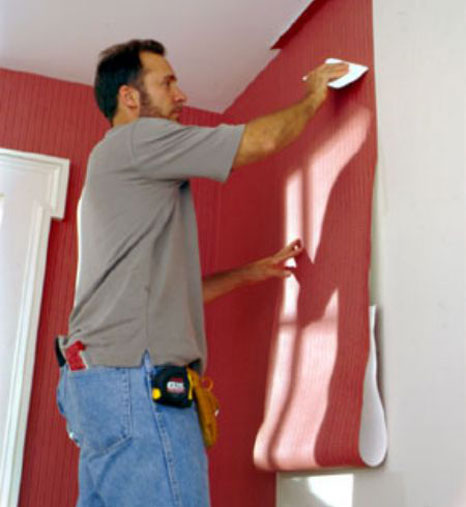
Before gluing the wallpaper, you must exclude all possible drafts, closing the doors and windows tightly. Making sure that the first page with the glue applied to it was already soaked, we take it in hand, and, climbing the ladder, turn it and glue it to the wall starting from the top.
When gluing the wallpaper strip, we make movements with a hand with a clean cloth (or a rubber roller, to whom it is convenient), as if we are drawing a Christmas tree - first, from the top down we draw the strip along the center (as if we are drawing a tree trunk), then make diagonal movements from above down as if we were drawing branches at the tree. So we lead to the bottom, leveling the wallpaper, expelling possible air bubbles and excluding the formation of folds. The next sheet of glue just as well, joining the existing pattern.
Sticky fleece wallpaper is convenient because they do not stretch at all, which means that you should not worry that after drying them they will disperse to the sides at the joint. If the wallpaper is simple - paper, then glue them overlap, taking care not to warp. We begin to paste the wallpaper from the wall that is near the light source (window). We glue in the direction from the light source. Excess glue from the wallpaper wipe dry with a clean cloth. As a rule, modern types of glue do not leave traces on the wallpaper.
Final works
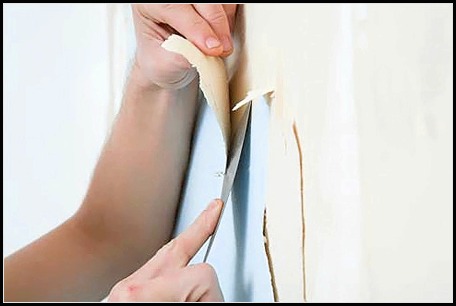
Having sealed the wall with a wallpaper strip in the place where there was a socket or switch, it is necessary, until the wallpaper strip is wet and had time to dry, find this place and carefully cut out there with a stationery knife hole.
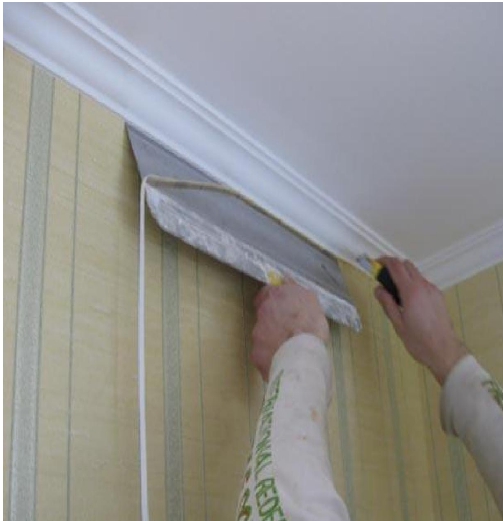
With the help of a clerical knife and spatula cut off the excess (as shown in the picture).
After pasting the wallpaper, we are waiting for when they dry, in order to put on the place removed from the sockets and switches boxes. At this time, do not open the window and door, avoiding drafts for at least a day. Also, do not include electrical heating devices (oil heater, etc.)


