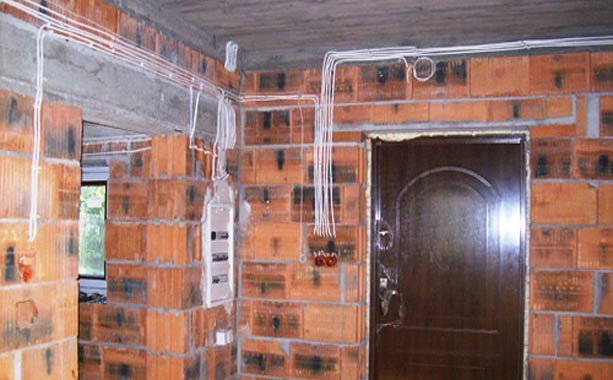
Modern life is inconceivable without electricity. To do this, the house must provide wiring. In this article, I'll explain how to calculate and mount it according to all the rules.
Content
Wiring rules
Everything related to construction is regulated by a set of documents (GOST, SNiP). It is in them that all the basic requirements are prescribed. If you yourself decided to make a posting in your home, then they should be carefully studied.
Now we list the main requirements for electrical wiring:
- counter, sockets and junction boxes must be available;
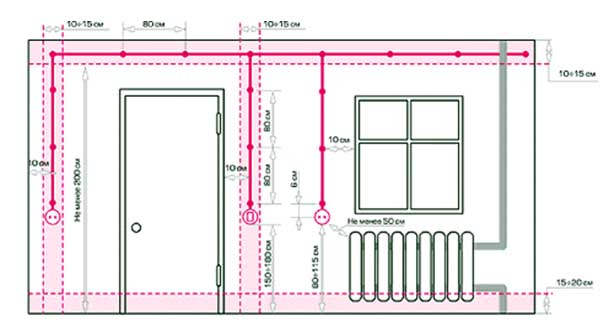
- switches should be located at a distance of 60 - 150 cm from the floor, the wire to them is from top to bottom, and they should be accessible and not overlap with the opening doors;
- the sockets are mounted in 50 - 80 cm from the floor, which will ensure safety during flooding, the wires to them are pulled from the bottom to the top, in addition the distance from them to the radiators of heating and gas stoves should be not less than 50 cm;
- the number of outlets is calculated according to the following principle, 1 by 6 square meters. m, the exception is the kitchen, where their number is dictated by the number of household appliances;
- all wiring is strictly vertical and horizontal, which must be displayed on the plan;
- wiring and their connection must be carried out in junction boxes;
- zero wires and grounding are bolted to the devices.
These are just a few rules that must be strictly followed, because the safety of all tenants depends on this.
Wiring installation scheme
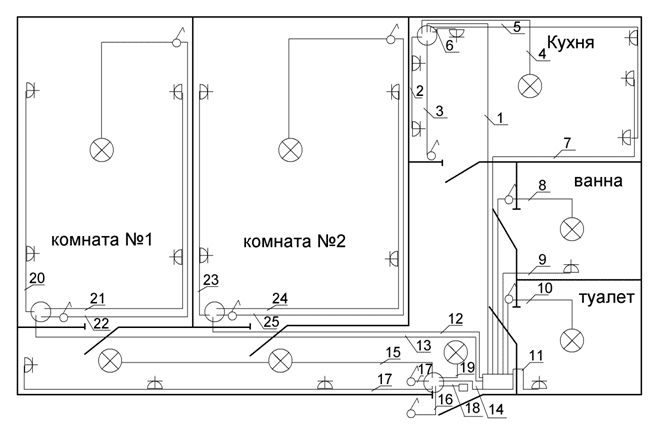
All work on wiring installation must begin with the construction of the circuit. This is difficult enough for those who are not sure of their abilities better to turn to specialists. Otherwise, it is necessary to study all electrical wiring requirements. After this, we take the plan of the house and the symbols for drawing up the layout drawing. Also note where the home appliances will be located to place the sockets in the right place.
After the places of switches and sockets are selected, one must think over the wiring before them.
There are three types:
- parallel;
- consistent;
- mixed.
The latter option is most preferable, because allows rational use of the material.
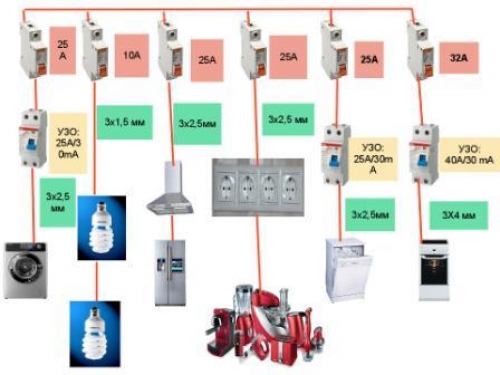
For ease of operation, all connection points are distributed to the following groups:
- lighting of residential and non-residential premises;
- bathroom lighting;
- power supply for the sockets of living quarters;
- power supply of outlets in the kitchen (if an electric stove is provided, a separate outlet is required).
Thus, we greatly simplify the scheme and the work itself.
Laying of electroconducting
When installing electrical wiring, do not forget the safety rules. Wiring can be hidden and external, in each case there are different features of the gasket.
For the hidden we need the following tools:
- punch or bulgarian;
- drill;
- nippers;
- pliers;
- screwdrivers for different screws;
- tester.
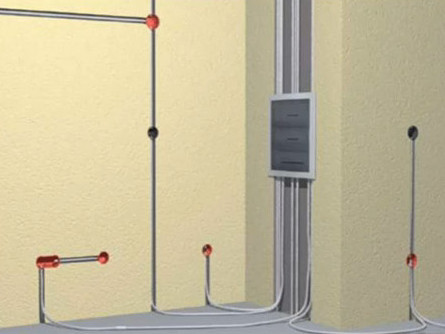
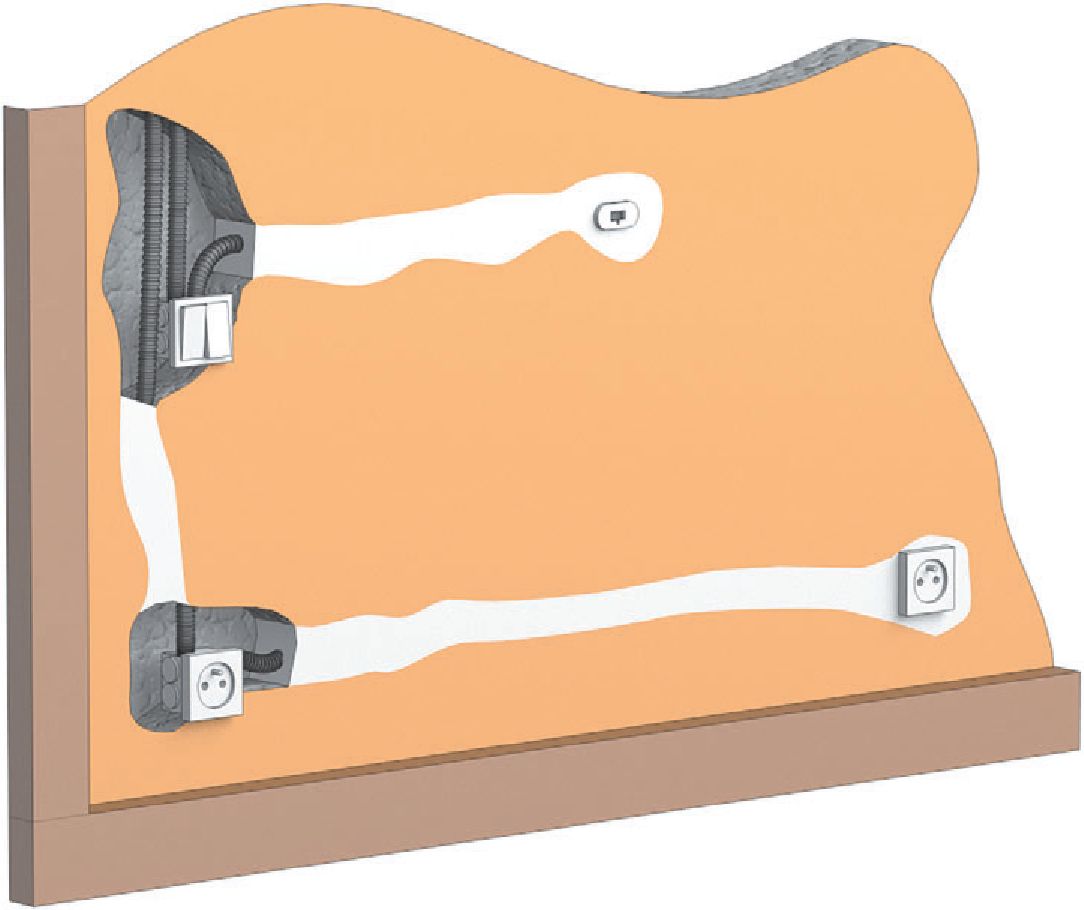
After we plan the places of installation of sockets and switches with a pencil, we plan the wires and the location of the electric flap. Now in the designated places the puncher makes grooves under the wires, their depth should be 2 cm. Also make holes for other elements of the chain. From the ceiling everything is different. If you are planning a tension or suspended ceiling, the wires can safely be located behind them. During the construction phase, the wiring can be hidden in the ceiling, but this is not very convenient. You can make a small string on the ceiling and place wires in it. After all the grooves for the wires are made it is necessary to bring them into the room. Usually they are pulled through the walls, so that in the corner of the room the perforator needs to make a through hole.
Now go directly to the installation. First of all, we mount the lighting panel and connect the wires. After we lay them in the grooves and lead to the places of connection of outlets and switches, then fix the wires to them. After that, all the grooves are shpatlyem and level the surface of the wall and ceiling.
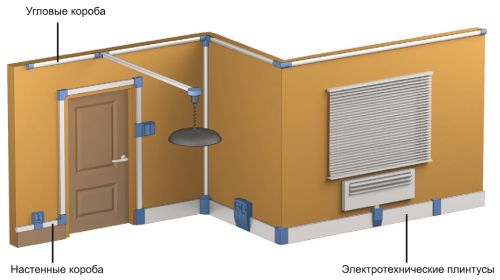
When installing external wiring on the planned lines, plastic cables are installed channels into which wires are placed. A great advantage of this method is the installation of wiring after cosmetic decoration of premises.
Energy Consumers
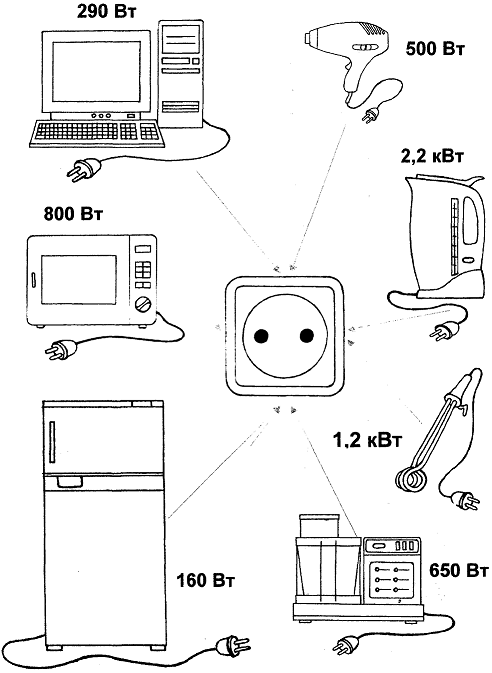
Energy consumers are all lighting devices and household appliances in the house. They consume a certain amount of energy. The total power of energy consumption depends on this. All this must be taken into account. If you exceed this figure, the wiring will not withstand the load and will fail.
Here is an example of energy consumption by devices:
- split system 2 kW / h;
- water heaters, electric kettle, iron 2.2 kW / h;
- washing machine, TV 1 kW / h;
- refrigerator, microwave oven 0,7 kW / h;
- lighting equipment 0,5 kW / h.
If the house has all the listed devices, then the total power is up to 12 kW, at a standard of 15 kW. This will help calculate the load and pick up suitable wires.
Calculation of electrical wiring
Once the appliances have been selected, which will be located in the rooms and their capacity is known, it is necessary to calculate the load in amperes. This will determine the choice of cable.
The calculation is made by the following formula:
I = P / U,
where I - current, P - power consumption, U - network voltage (220 V).
For example: the power of an electric kettle is 2200 W, so the calculation will look like I = 2200/220 = 10 A. After you know this parameter for all devices, you can easily select the desired wire. This can be done using tabular data.
Electric wiring in a wooden house
Installation of wiring in a wooden house is a responsible process. To it it is necessary to approach carefully, after all depends on it safety of tenants.
The materials in this case are the following:
- braiding of cables and wires must be refractory;
- it is best to use copper wires;
- cable channels must be treated with fire protection.
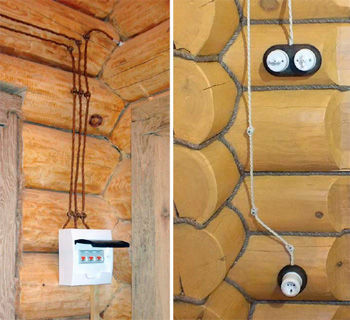
In a house made of wood, it is best to do external wiring, because the variety of materials allows it to be done quickly and beautifully. To do this, you can use wires and ceramic holders for them. When installing concealed wiring, it is necessary to stretch the wires in special refractory tubes. In this case, they will hide behind the lining of the ceiling and walls. In any case, it is necessary to work carefully, observing all the requirements.
Electric wiring in a brick house
In a brick house, the wiring can be done after the construction of the walls and roof. Wires and junction boxes are attached to the walls, after which all surfaces are plastered. Thus, it is completely invisible. If the walls are already finished, you can make a puncher and place a cable in them. After that, they are covered with plaster and the walls are leveled. You can draw a line and outside. In other words, a brick house is more suitable for concealed wiring because of the lack of flammability of the building material.
Types of wiring
The location of the wiring may be:
- internal - is located inside the premises;
- outdoor - laid on the outer walls of houses, under canopies, between the supports of power lines.
By the way of execution it is divided into two types:
- Open - mounted on the surface of walls and ceiling. It can be placed in special channels and pipes, or the wires are attached directly to the wall. This wiring is convenient, because any part of it is available for inspection or repair. It is mounted faster and easier. Do not exclude the economic benefits, the open method of wiring is cheaper.
- Hidden - mounted inside the walls, ceilings and floors of buildings. With this type of wires are laid in special boxes or flexible hoses, which will be hidden by plaster. It is characterized by high reliability and durability. It looks more aesthetic. But this is a more expensive way of installation. And in case of repair and hard-to-reach. Therefore, it is best to use latent wiring when it is impossible to open the technical, aesthetic and economic indicators.
Based on the above, you can choose the type of wiring you need.
This article describes the installation rules and the types of wiring. Examples of load calculations are given. Using the advice of the article, you will be able to make a diagram and select the necessary type of wiring in your home. Successful work.


