Mount gypsum cardboard to the walls can be in various ways, it all depends on the surface, its characteristics and quality. Being guided by these factors, the master makes a choice independently. How to fix GCR to the walls of brick, concrete and wood, and also to the ceiling - within the framework of this material, we will try to give exhaustive answers to these questions.
Content
In order to quickly and qualitatively cover the plasterboard wall, first you must carefully work with the wall itself: carefully study the surface for damage and irregularities, pay attention to the wall material. Of great importance is also the purpose for which the wall will be covered with sheets of plasterboard. Having thoroughly analyzed all the factors, the master chooses the method of installation.
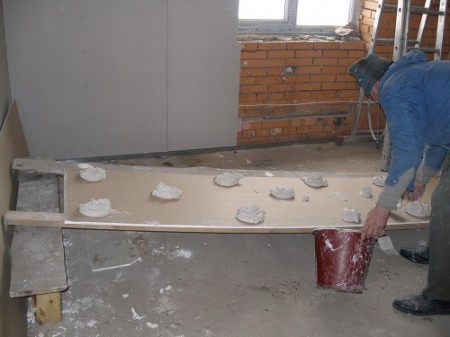
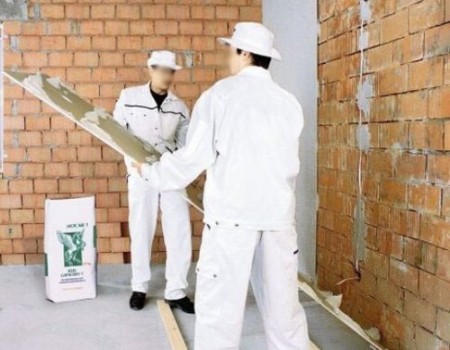
Fastening of drywall sheets to glue
This method is used only if the wall surface is practically perfect - without chips, cracks and irregularities, the ends of the reinforcement or wire do not protrude from the surface, etc.
In this case, the wall is only impregnated with an antiseptic and a primer. Next, you need to accurately make the markup under the sheets, stir the glue and proceed directly to the installation.
To glue drywall to the concrete wall is simple, it is necessary only to leave gaps of 5 mm between the sheets, to make sure that cross-shaped joints do not turn out. The clearance between the GCR sheet and the wall must be at least 5 mm. If there is a depression somewhere in the wall, it is best to use lighthouses - the work will go faster and easier.
When attaching GKL sheets to the glue, the work should begin with the most convex point. The grooves can then be filled with mortar, and it is much harder to remove the mounds.
Fastening drywall to the frame
With this type of installation of gypsum board, two types of frames are used - a wooden frame or a frame made of a metal galvanized profile. Which frame to choose, the master decides, based on the characteristics of the surface, and the conditions in which the wall will be exploited in the future. Most masters generally do not consider the wooden frame as an option, giving unconditional preference to the metal profile, since in this case the technology of mounting drywall on the walls is simpler.
But there are times when using a wooden frame is much more convenient. By the way, if you take all the necessary measures to protect the wooden frame, treat it with impregnations and antiseptics, then it will last for a long time. Drywall is mounted on the frame in several cases: if it is necessary to make a false wall, if the wall needs to be warmed, hide any communications, and if the wall is very uneven, and it is impossible to fasten the sheets to the glue.
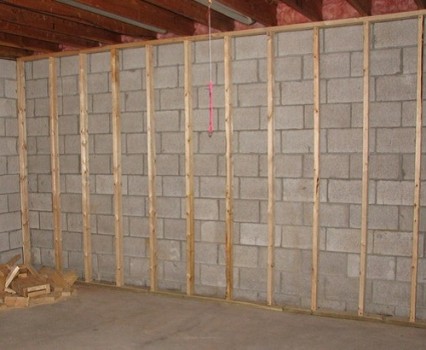
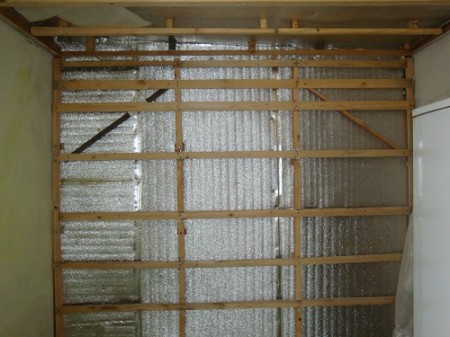
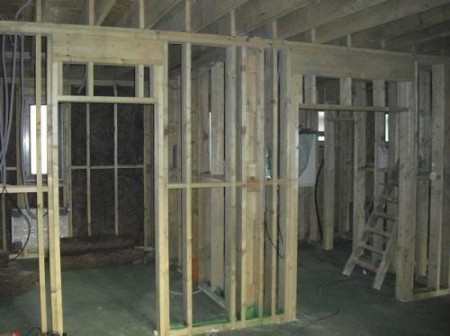
skeleton made of wood
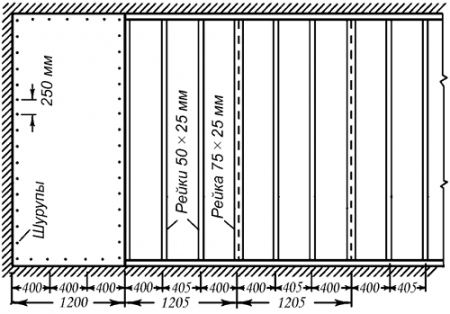
For the installation of a wooden frame, use rails 2.5 cm thick and 4-5 cm wide. To the wall they are attached at a distance of about 40 centimeters from each other. In places where the GCR sheets are joined, wider rails, about 8 centimeters, should be used.
Before starting work on the fixing of the rails, you need to make the appropriate marks. If the wall is made of brick or concrete, the slats are attached using dowels. To a wooden surface they can be simply nailed with nails, or screwed with screws. Nails before work for several hours are boiled in oil or drying oil, to prevent corrosion.
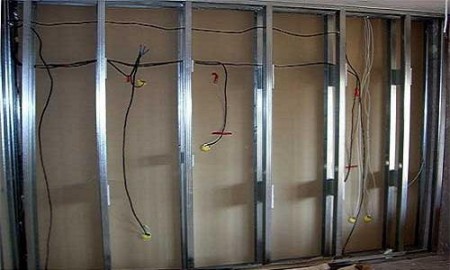
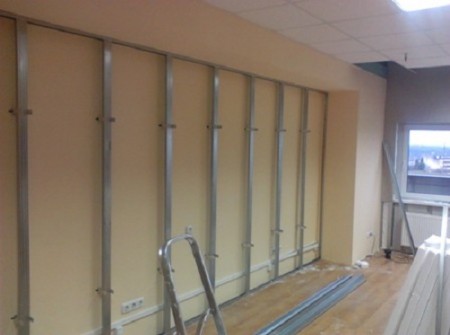
framework of metal profile
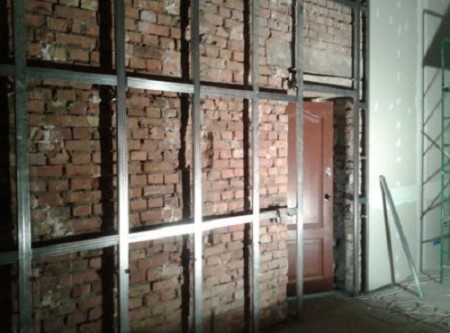
In principle, mounting GKL sheets on the metal frame is much easier, but with the frame itself you will have to tinker a bit. On sale there is already a ready-made metal profile. Work with the measurement of walls, then make a markup. Defines the line for the guide profiles. To do this, draw a straight line parallel to the wall on the floor. Calculate the distance from the wall to the line can be based on the thickness of the sheet drywall, the thickness of the profile and space, which is necessary to hide communications or wiring. In doing so, be sure to consider possible wall irregularities. Usually this is a small distance, because nobody wants to reduce living space.
Then the line from the floor needs to be transferred to the ceiling. To do this, use a plumb line. Plummet from the ceiling is lowered to the floor, and when he stands exactly in the middle of the line, make a mark. The labels on the ceiling are connected in one line.
Next, you can proceed to fixing the guiding profile, respectively, applied to the ceiling and floor lines. For the installation of the guide profile on the wall, self-tapping screws are used, and the dowel on the ceiling. The distance between the fasteners should not exceed 90 centimeters on the floor, on the ceiling - 50 centimeters. After the guide profile is fixed, it is possible to begin fixing the rack-mount profiles. The profile is mounted on the suspension at a distance of approximately 70 cm from each other. Next, you need to put rack-mount profiles inside the guides. To do this, perpendicularly bend the corners of the suspensions. Fix the exposed profiles with screws.
Cutting the profile is most convenient with special scissors, although you can use the Bulgarian. It is desirable to treat joints of profiles with a sealant, so that the metal structure does not creak. At this installation of the frame from the metal profile to the walls is considered finished, and you can proceed directly to fixing the sheets GKL.
In general, the reasons for attaching drywall to the frame are quite a lot, for example, the installation of decorative elements. But still, with conclusions it is not necessary to hurry, consider all possible options for fastening, their feasibility from a practical and financial point of view.
The GKL editing technology is not only a practice, but also a theory. Since it is necessary to weigh and evaluate many different factors, before you finally decide which method of attachment is most preferable in a particular case.
Installation of drywall on the walls of wood
The need for facing the GKL wood walls can arise in many cases: for example, the owner wants to make a layer of air, insulate the wall or hide the wiring, water pipes or heating, or simply make the wall perfectly smooth for subsequent finishing.
It is quite easy to mount a plasterboard cover on a wooden surface - in some cases it is enough just to attach the sheets to the wall with screws. But if you need to observe the gap between the wall and plasterboard, then you need to use the frame attachment method. What type of frame to use - wood or metal, choose yourself. However, many masters hold the view that the tree in this case will still be more appropriate.
Installation of plasterboard on a brick wall
In this case, it is not important which way you decide to fix the drywall to the wall. Here it is only necessary to understand that the skeletons of wood and metal under the same conditions will behave completely differently. If you are going to work in an old building, in a non-residential or dacha, then use only a metal profile. In the old building there may be increased humidity, drafts, serious temperature fluctuations may occur. What happens with wood, we think, it is not necessary to explain. Wooden frame makes sense to use only in a dry and warm room. If the wood is properly processed, then it will serve not less than metal.
Installation of drywall on a concrete wall
In this case, drywall is most often attached to the glue, since the concrete walls are usually quite even. For insurance, it is possible to penetrate the surface before starting the installation work. But if it is sufficiently level, then you only need to treat it with an antiseptic. After that, you can start to glue the sheets GKL. If the wall is uneven or you want to move the plasterboard cover to some distance, you will have to mount the frame.
Installation of plasterboard on the ceiling
The work begins with marking on the walls. This should be a perfectly flat line, which will represent a feature of the ceiling level. This is done with the help of a building level, or, better yet, the level. The line must exactly close at the starting point, there should not be any displacements. In the process of marking on adjacent walls, the level is established not only on the wall itself, but also in each corner, in the spacer. The most accurate markup can be done quite easily with a laser level.
So, the horizontal level of the ceiling is marked. After that, the layout should be moved to the ceiling, mark the places where I will attach direct suspensions.
As a result, you should get a grid with a cell 60х60 centimeters.
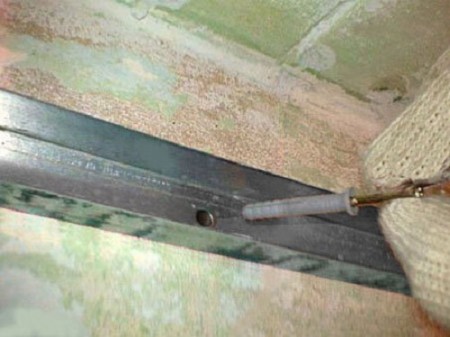
Further along the perimeter of the room is fixed the guiding profile. In places. where the profile is in contact with the wall, it is desirable to glue it with sealing tape. The profile is sold in standard length - 3 meters. If you need to mount a profile of this length, it must be fastened to the wall in at least 4 places. For fastening it is best to use dowel-nails with a mushroom-shaped head. This fastening element allows to achieve the most reliable and durable connection. Here it is important not to allow gaps between profiles.

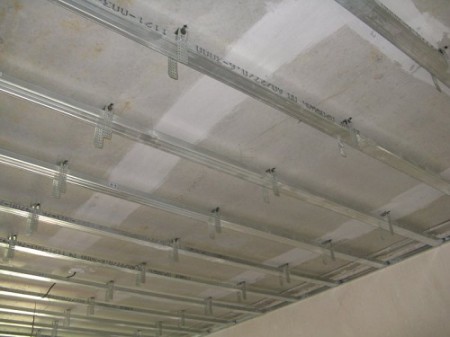
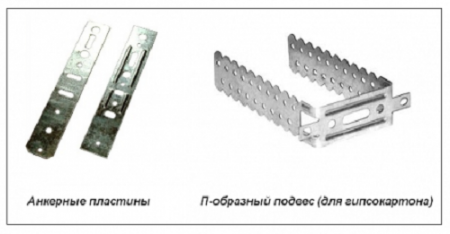
Next, we mount the U-shaped suspensions. They are fixed according to the markings on the ceiling.
At the same time, an interval of 0.7-1 m is observed. Indents from the walls must be symmetrical. For fixing it is not allowed to use dowel-nails for vertical fastening. For this, it is better to use plastic dowels and screws. If the ceiling is concrete, it is better to use metal dowels designed for heavy weight.
Then you can proceed with the installation of the ceiling profile. First, two long profiles from one wall to the other are attached. Between them establish transverse, shorter profiles. Cross-shaped joints are made using special fasteners. The ends of the ceiling profile are installed in the guides. After that, designate the horizontal level of the ceiling profile with a level, and attach it to the U-shaped suspensions.
After this you can proceed directly to the installation of the GCR. Installation must be done together, as it is impossible to hold a whole sheet of drywall yourself. You can, of course, experiment with different kinds of props, but this is ungrateful, long and hard work.
During installation, the following recommendations must be strictly adhered to:
- Do not fasten the sheets against the walls, leave a gap of several millimeters.
- The sheets must be fastened in staggered order, joints should not coincide.
- Use only self-tapping screws for fastening. They need to be screwed in steps of 20 centimeters.
- The hat of the self-tapping screw should be recessed into the sheet of plasterboard for several millimeters, so that there will not be any difficulties in carrying out shpatlechno-painting works.


