


Not all private houses are originally equipped with cellars. Keep home canning and vegetables in the house uncomfortable. For them it is necessary to provide a separate room with a certain temperature regime, and this is very difficult. It's much easier to build a cellar on your site. About how to do this correctly in this article.
Content
Cellar on site
Before you start building a cellar, you need to correctly identify the place for it. The most important thing is to reduce the impact of subsoil waters. To do this, it is located at the highest point of the site. Thanks to this, the cellar will be dry and the vegetables will be absolutely safe. The optimum depth for it is 2.5 - 3 m. So, we determine the level of groundwater. To do this, you can refer to specialists who will determine it by drilling a small well and measuring. Ah, you can use folk methods.
For this we need:
- wool;
- egg;
- glass jar.
Wool must be placed in the intended location of the cellar, on top of it, put the egg and cover everything with a jar. We leave it for the night, and in the morning we look. If the egg and wool are wet from dew, then the underground waters come close to the surface of the earth, and it is not advisable to build a cellar in this place.
Also, the type of structure influences the choice of location:
- attached;
- standing separately.
The most convenient option is a cellar located next to the house or garage. It takes a little useful space and is convenient for use.
Despite this, there are a number of general recommendations for the erection of cellars:
- it is best to start work in the summer;
- choose a better place for the cellar on the site;
- walls must be strong, this is the guarantee of your security;
- all wooden elements must be carefully prepared and impregnated with antiseptic compounds;
- it is necessary to strictly follow the sequence of actions during construction.
Choosing the right place, erect a cellar, will not be so difficult.
Types of cellars
Despite the simplicity of the structure, even the cellars differ in species.
We list their main types:
Earth cellar or "Yaroslavsky". For the first time they began to build in the Yaroslavl region, from where it went and its construction. It is distinguished by its simplicity of construction and ease of use. For its erection, no special monetary investment is required. Such a cellar is excellent for storing tubers, they do not shrink, and do not deteriorate. Build it on a raised place, which ensures its dryness. For its construction, it is necessary to dig a pit two meters deep or slightly more. The walls of the cellar can be decorated with boards. This is very practical, because in summer they can be dismantled and dried. Sex is best made by adobe. And in its base it is necessary to provide a layer of rubble with impregnation from bitumen (serves as a waterproofing). The ceiling should be made of boards and insulated with clay mixed with straw. Shelves and storage areas for vegetables are located on both sides of the passage for convenience. The floor can be made lattice, which promotes ventilation. Outside, the cellar is usually made with a ditch for water with a depth of 35 to 50 cm.

Cellar with a cellar.This view is good because it is cool in the summer, and in the cold season the temperature is higher than the street temperature. Pogrebnitsa is called a land structure, which serves to further protect the lower part from frost in winter and as a preliminary storage place for vegetables. The walls of this cellar are best concreted. The entrance to the cellar is a hatch measuring 80 by 80 cm. The funerary can be built of wood, brick or shell. The roof can be of various shapes, the main thing is to provide drains for water, which will ensure the dryness of the walls.

Garage cellar. Quite often in the presence of a garage on the site of the cellar is arranged exactly in it. This kind of something similar to the previous one, but instead of the cellar is a garage. The cellar is usually arranged in the observation pit, having a large depth. Its walls must be carefully waterproofed. This can be done with liquid bitumen or a film.

Stone cellar. This species is very reliable and durable. It can store both home canned food and fresh food. It is built from stone using clay mortar. It will take a lot of effort and time to build it. As for ventilation, in this type of cellar it is absent due to architectural features. Air exchange occurs due to the slots in the hatchway.

Ground Cellar is a warmed box of wood. For its arrangement it is necessary to dig a hole up to 70 cm deep. The bottom is rammed and covered with sand, gravel and expanded clay. The walls and ceiling of the cellar are double, for the device of thermal insulation. The top part of the cellar can be made from any materials, the main thing is that they are not blown by winds. The ventilation hole is best covered with a net to prevent the entry of insects and pests.

Semi-buried cellar. This is a good option for sites with a high groundwater level. The bottom of the cellar is at a depth of 80 - 120 cm from the surface. The walls of such a structure are concreted or laid out with a brick. Overlapping can be made of boards. Waterproofing can be done with any convenient material.

From all types of cellars you can choose the most suitable option for yourself.
Cellar in winter
The cellar is designed to store products in different periods of the year.
The harshest time is winter, it is during this period that careful attention should be paid to ventilation.
For ventilation, there are a number of general rules:
- ventilation pipes must be on opposite sides of the cellar, so the air that enters the room will pass through it and will come out;
- the pipe radius should be the same;
- it is desirable to install straight pipes, otherwise ventilation will be impaired;
- the supply pipe should be from the floor at a height of 20 - 30 cm, so the air will flow into the lower part of the room;
- on the pipes is best to provide a damper, which will help control the flow of air.
If the temperature on the street dropped below - 10 degrees, the draft in the ventilation of the cellar is strong. Therefore, with fully open flaps, the room will be strongly cooled. The inflow of air must be regulated. It is recommended to open the damper wider on the exhaust pipe than on the supply air. In severe frosts, it is best to close both. Another problem of this situation may be condensate, draining from the exhaust duct. This problem can easily be solved by installing a tank, which must be released from time to time. If this is too difficult and inconvenient, install a forced automatic ventilation system in the room. It will maintain optimum temperature and humidity inside.
Cellar in the house
The cellar inside the house is very convenient, you do not have to watch it in the cold and go out to bring food. Truth can be some difficulties. The first of these is the foundation pit preparation.
It can be solved in two ways:
- prepare a pit during the construction phase of the house;
- dig a foundation pit in the existing housing.
The second way is much more laborious and time-consuming. Also, remember the strength of the building itself, and do not dig near its walls. So, the place is found and the pit of the necessary sizes is prepared. The first thing you need to do is sex.
This work is carried out in several stages:
- level the bottom of the pit;
- make a sand cushion 20 cm thick, and tamp it well;
- we fall asleep with gravel and we compact it;
- on top of the gravel we put the waterproofing material (polyethylene, roofing material), and the sheets must be overlapped;
- we conduct the reinforcement with a grid of reinforcement, the thickness of the rods must be at least 5 mm, this will give additional strength to the floor;
- pour concrete, the layer should be about 15 cm thick.
By sex, it is best not to walk for a couple of weeks. During this time the concrete will rise and gain the necessary strength. Next, we mount the walls. Most often for this use brick or foam blocks, but in a private house you need to take care of waterproofing. Therefore, it is best to make them from reinforced concrete.
All work is divided into three stages:
- we make a grid of reinforcement, for this purpose it is best to take grooved rods with a diameter of 10-15 mm and bind them with wire;
- we mount vertical formwork, for this purpose boards, plywood and other material will be useful;
- we pour concrete solution into several receptions, each layer being compacted, the height of the wall must reach the ceiling.
After the walls are erected, you can proceed to the installation of the floor. It can be made of a shield made of boards. Also it is necessary to take care of the insulation. First, a vapor barrier must be attached to the shield, after which all the voids in the ceiling should be covered with thermal insulation, mineral wool should be excellent. Then lay the waterproofing material, it is better to use a roll and cover it with the final coating. Do not forget to provide a hatch. Its dimensions are better to do based on your own convenience. Entrance to the cellar can be placed in the kitchen or in the hallway. To make the hatch less visible, it must be covered with the same material as the floor in the room. In this way, you can arrange a cellar in any house. The main thing is to gain strength and patience.

Extract in the cellar
Having constructed a cellar it is necessary to think and about an extract. It will ensure the air circulation and maintain the optimum temperature and humidity. The easiest way is to make ventilation from two pipes. One will be supply, and the other exhaust. The supply pipe is located so that one of its end faces the street and is protected by a cap from moisture ingress, and the other is located 20-30 cm from the floor. The exhaust pipe is located in the other part of the room above the products, and its upper part is also taken to the street. The hood can be made with forced ventilation. To do this, install fans that will help the air circulation. In this simple way, you can make ventilation in any cellar.

The device of a cellar
The device of the cellar directly depends on its purpose. If you need to store homemade canned food, then a small cellar is enough. And to store vegetables need a more spacious room with a ceiling height of about 2 m and the same length of the walls. It is also necessary to choose the right materials for its erection. Which are best suited for the construction of cellars will be considered further.
material for the cellar
For the construction of a cellar I do not recommend the use of porous and hollow materials:
- foam blocks;
- hollow bricks.
The material should not allow moisture to pass through. It is best to make the floor and walls of concrete. If you are sure that a plot without groundwater can lay out the walls with a brick, previously making a waterproofing. On the average 1 cubic meter. m of concrete costs 2800 rubles. Of course, this is not the cheapest option, but durable. You can make the walls of the cellar from the planks, and in the summer the plating can be removed and the room dried. And you can use not edging board or croaker. It will be environmentally friendly material at an affordable price. Average cube. m not edging boards costs from 4 to 8 thousand rubles, depending on the type of wood. For the installation of a ventilation system you can use plastic pipes they are safe and do not emit harmful substances. And now the market offers a wide selection of ventilation pipes made of plastic and accessories to them. Plastic ducts cost from 100 to 400 rubles, depending on the length. And the price of components (connecting knee, flange, etc.) does not exceed 300 rubles apiece. Thus, for the erection of the cellar, you can find materials at an affordable price. In this case it is necessary to take into account the characteristics of your site.

Construction of a cellar in the suburban area
For the storage of vegetables and canned food a cellar is excellent. The most popular version of the cellar is semi-deep. The design features are the division of it into two parts. One is located underground, and the other is above its surface. And the depth of the lower part can reach 2.5 m, and the top depends on the destination.
Obligatory conditions for construction are:
- work only in dry and warm weather;
- choose a higher location on the site;
- be sure to provide a ventilation system;
- we process the wooden parts with an antiseptic;
- entrance to the cellar is located on the north side.
Work should start with digging a pit, which is 50 cm more in each direction. This stock is necessary for the installation of waterproofing.

The walls of the cellar can be laid out of brick or stone. You can build a monolithic concrete wall. Preliminary it is necessary to make a waterproofing from roofing material or bitumen. At the same time, attention should be paid to the joints of the floor and walls. Before pouring the floor it is necessary to make a layer of sand and tamp it well, and then put on it a grid of reinforcement for additional rigidity. After that, pour the surface with concrete.

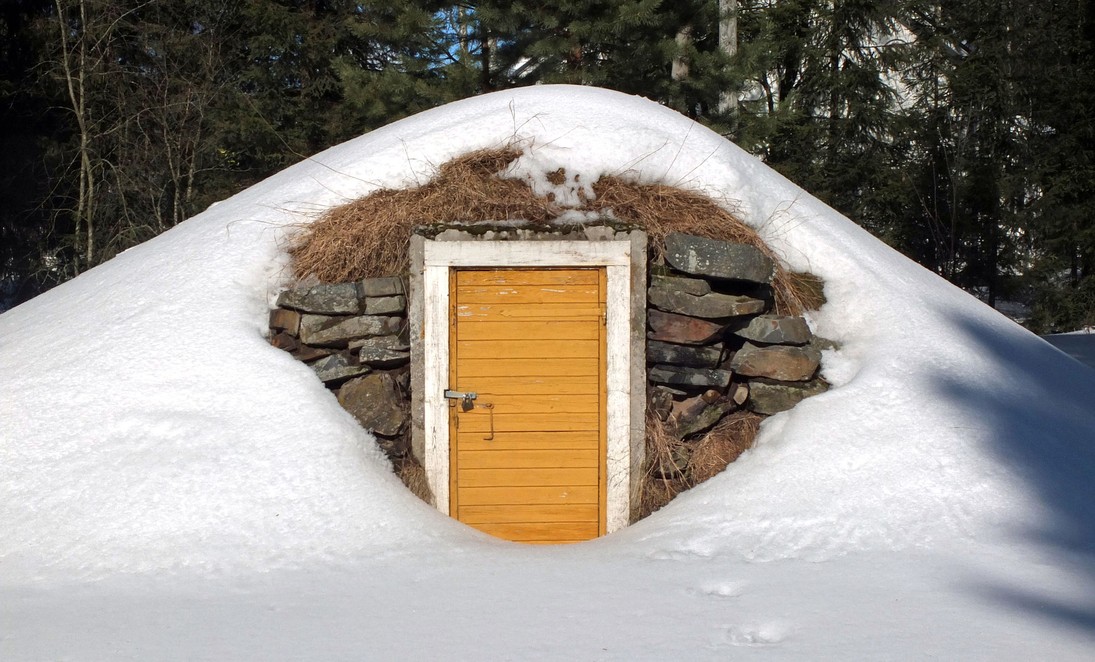
In order to accumulate moisture in the cellar, and do not develop mold and paddles, it is necessary to provide ventilation. To do this, you can take two zinc-coated pipes with a diameter of 15 cm. One of them is located under the ceiling to divert air, and the second is almost above the floor for inflow. After the construction of the lower part, it is necessary to begin construction of the ground part. The funerary may be of small size if necessary for entry. If you plan to store vegetables in it before the cold, you need to provide a place for them. Particular attention should be paid to the insulation of the roof. To do this, you can apply a backfill of straw with clay, or another thermal insulation material. Outwardly, the upper part can be shaped like a mound with a beautiful door.

Inside the cellar you can whitewash and make shelves and boxes for all vegetables and sunset.

This article describes the device of the cellar. It is told about their types and features. Using the advice of the article, you can build a cellar on your site or build a basement in the house. Having developed a fantasy you can give it an original look. Successful work.


