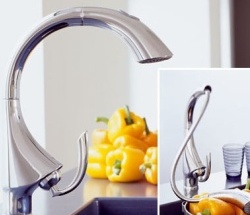
The mixer is the most important and inalienable element of any kitchen space, which means that it should be taken very seriously and responsibly to its choice and installation. This phenomenon is explained not only by the aesthetic and functional characteristics of the device, but also by the requirement for its continuous and trouble-free operation and wear resistance. After all, a quality mixer must withstand an infinite number of inclusions - more than 3000 per month, excluding the emergence of emergency situations in the form of breakages and water leakage. The amount of water discharged at the same time reaches 2000 liters per month. So, the fundamental moment when choosing a device is its performance characteristics: durability of moving elements, convenience and ease of operation.
Content
Installing the mixer in the kitchen
You have already sewed a sink in the countertop and made the installation of water pipes in the walls, it's time to start installing the mixer in the kitchen.
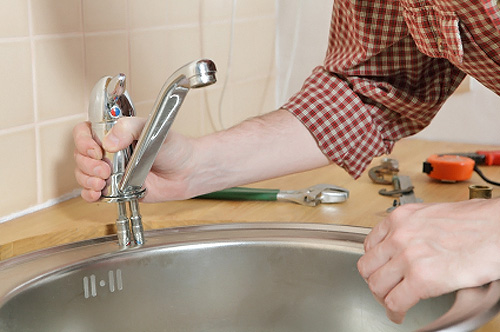
The whole process includes 3 stages:
- Preparatory work
- Setting the mixer
- Commissioning works
Preparatory work
Before starting the installation of the crane, prepare a set of tools and necessary accessories.
You will need tools such as:
- adjustable wrench,
- screwdriver,
- pliers,
- wrenches 9/11 and 10/12,
- fUM tape.
Work out the preparation of the workplace:
a) Performing any works of sanitary nature, make sure first of all that the water is blocked. To do this, check the valve located in front of the water meter, try to open faucets with hot and cold water supply.
b. Start dismantling the worn mixer. For convenience, the sink is slightly moved away from the adjacent wall. Armed with the adjustable wrench, unscrew the flexible hose nuts from the water pipes, before inserting the container underneath. Then unscrew the studs fixing the mixer to the surface of the sink, and remove the worn out device.
c) If necessary, clean the seat on the surface of the sink with cleaners and start the installation of a new mixer.
Setting the mixer
You have prepared all the tools and mixer kit, carefully checked its serviceability. You can start installing it.
a) First, pack the flexible hoses with a fument. Carefully thread the threads of both connections of the windings by winding several turns of the bag. This will eliminate the possible leakage during the operation of the mixer. Pass the hoses into the washing hole and screw them into the new device using a 10-wrench. Do not forget to insert a rubber ring of increased strength into the special groove on the lower part of the valve. It will serve to create a seal at the base of your sink.
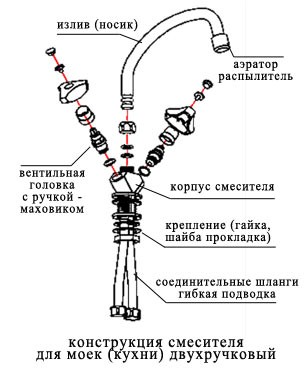
b) In the hole of the mixer, using a screwdriver or pliers, tighten the studs tightly. Their number is determined by one or another modification of the crane.
c) Each mixer kit includes 2 parts resembling a horseshoe shaped: a thick rubber gasket and a metal plate.
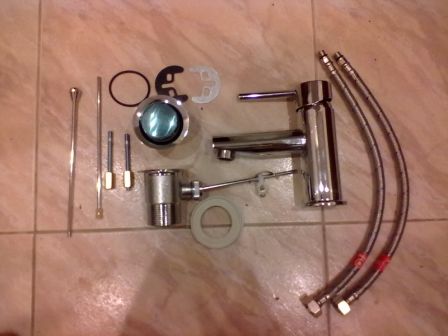
First, firmly put a gasket on the stud, from above the plate and press it to the sink. Hold the new mixer and the gaskets by hand and carefully twist the bronze nut onto the stud using the 10/11 key (depending on the manufacturer of the device). After confirming that the mixer is mounted exactly, hold the nut to the stop. The device is deemed to be installed.
d) Try to connect flexible hoses to the pipes. To do this you will need 1/2 "union nuts with rubber gaskets inside. Tighten them tightly and, armed with a wrench, tighten to the stop, but do not overdo it - you can not twist it! Otherwise, the risk of damage to the gaskets and the flow of the connection is great. Now you can check the work for a leak.
Commissioning works
Installing a new faucet in the kitchen, wipe dry the joints. The inlet valve can now be opened and, finally, try to start the water. Inspect all nuts and hose fittings carefully. If the joints are tight and moisture does not appear, then it can be argued that the complex of works on installing the mixer in the kitchen is made "excellent". We remove all the tools on the workbench and enjoy the work of the water tap!
Basic installation rules and recommendations
So, to install a new mixer in the kitchen, as it turned out, you can and yourself. Now the task of the whole family is to properly use and timely care of the device. And that the mixer for a long time pleased you with trouble-free work, experts advise adhering to some elementary rules:
Rule 1. The mixer is only to be replaced if it can not be repaired. Therefore, first carefully study the valve-axle valves or cartridge. Usually the tap starts to leak if these parts are faulty. Having studied the repair manual, you can repair yourself or trust the specialist.
Rule 2. Standard mixer kit includes flexible carts, the qualitative characteristics of which, admittedly, leave much to be desired. Made of silumin - a material that is unreliable and cheap - the cartons are thrown away at once. Instead, look at the hoses in the metal winding marked with blue and red colors. Be careful when choosing the length of the hose. To do this, measure the distance from the tap to the withdrawal of pipes taking into account a small margin.

Rule 3. If you first encounter the installation of a kitchen mixer and the rewinding of pipes, it is important to remember that the winding must be carried out exclusively clockwise, otherwise you can overtight and cause a leak.
Rule 4. Observe the generally accepted norm for the location of pipes with hot and cold water removal: the cold water supply pipe is located on the right, for the hot water pipe is on the left. Be sure to take this moment into account when installing flexible hoses. The supply to the right is cold water, hotter to the left.

The mixer is mounted directly on the sink. Standards and standards GOST determine the height of the countertop - 86 cm. That is, the height of the spout of the placed mixer will be at a level of 1 meter. Thanks to this mixer height, you can comfortably use the crane without bending over. But if your family members are taller, then it is better to buy a higher sink.

Rule 5. Use only high-quality instruments and accessories from proven manufacturers.
Rule 6. Connect the piping so that during the operation of the mixer there is no deformation of the trunk under the influence of external factors (for example, located objects of kitchen utensils).
Rule 7. In order not to alter the work on the installation of a new mixer, periodically check the quality and tightness of all connections.
You can find out how to install the mixer in the kitchen in the video on youtube.


