If your hands grow from the right place and you do not want to overpay for work "someone else's uncle" - lay, on your hands, on the floor of your apartment flooring in the form of a laminate.
Content
In which part of the apartment you can lay a laminate
Laminate is one of the most popular flooring materials, as it has many advantages over other flooring:
-relatively low price;
-a large selection of colors and quality;
- Simplicity of laying;
-Easy leaving.
Given the above advantages, the laminate can be laid in the main part of the house, except for rooms with high humidity and the possibility of flooding.
The composition of the laminate is a tree, and this material is very dependent on moisture.
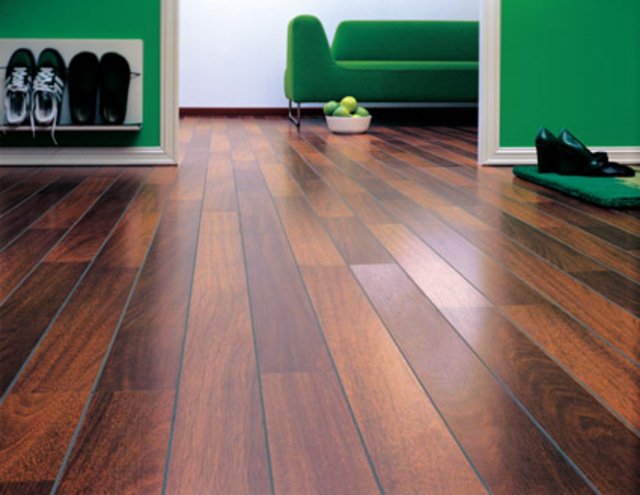
In this way, the laminate will feel great in the bedroom, the living room and the nursery.
Determined with the color of the laminate and the strength class (depending on the load on the floor, the laminate is selected), calculate the amount, i.e. it is necessary to measure the area of the room.
Laminate is sold in packs, ten boards or two square meters.
Dividing your area by 2 (the total area of the laminate pack) - you will get the necessary number of packs for the room.
As laying the laminate with your own hands for the first time, there may be errors in the form of breakage of the crest or breakage of the board - it is necessary to purchase a spare pack.
Preparing the rough floor
To make the floor quality, did not creak, did not crumble - you must comply with certain conditions:

-preparation of the base in the form of leveling the floor (you can make a screed, but this is an extreme option, since the screed is tied with water and after the screed the laminate can be laid only after the rough floor has dried completely, and this is very long, more than 30 days);
If the floor is wooden, then it is enough to remove the mounds and swells, i.e. just walk the grinder on wood;
-laminate can be laid directly on the old linoleum, the main thing is that the floor was flat.
Tools and materials for work
Before starting work, stock up on necessary tools;
- an electric grinder, for sawing a laminate;
-a hammer;
-woody plank, 15-20 cm long, with its help, the laminate boards are pushed together;
-roulette;
-pencil;
- roll of foamed polyethylene (underlaid in the form of a substrate under the laminate);
- The acquired laminate should "settle down" in your room within 48 hours.
Laying the laminate with your own hands
When laying the laminate, you need to call for help from a friend (you can wife).
Stacking is made on the principle of a comb-groove.
The crest of one board is inserted into the groove of the other and tapping with a hammer, through a wooden bar, the laminate boards are tightly fitted to each other.
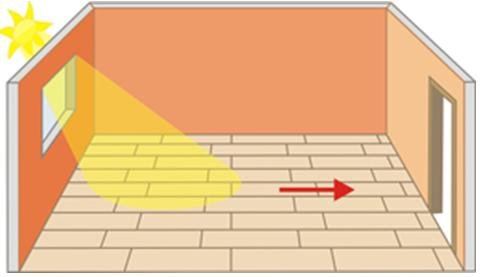
In principle, you can start the work from any side of the room, but to see the joints between the boards, lay the laminate perpendicular to the window.
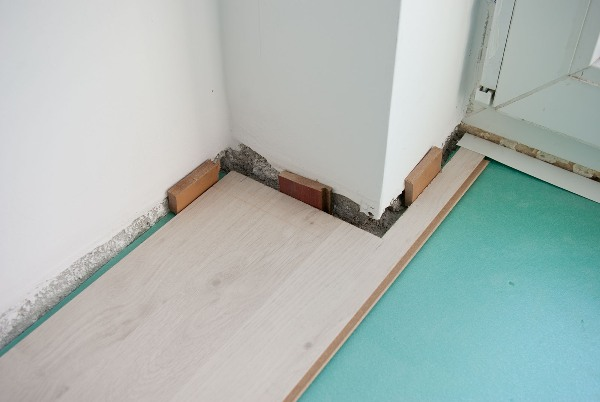
First lay the substrate so that it does not interfere with the work, lay it as the floor covering advances.
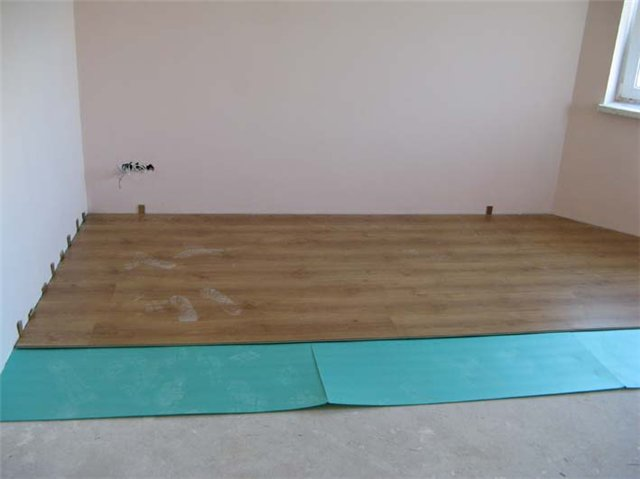
Laminate boards are laid out in one strip, along the wall, they are fastened together from the front side.
Applying a wooden plate, we substitute it to the end of the board (but not to the crest - otherwise it will break) we adjust the boards tightly to each other, knocking on the bar with a hammer.
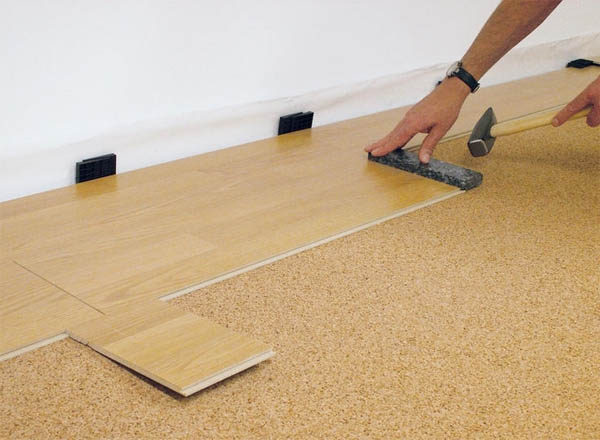
Do not use bad force, otherwise you will damage the laminate board. Leaning the first board in the wall, adjust tightly the second and so along the entire length of the wall, at the end cut off the board of the right size.
With the help of clinics, firmly press the first strip.
The first band is ready.
The second strip is best to start with half a laminate board and also fold along the entire length.
The third page begins with a whole board, etc.
As a result, you will get a laminate in the form of a chessboard, while this pattern provides increased resistance to the laminate and it does not walk.
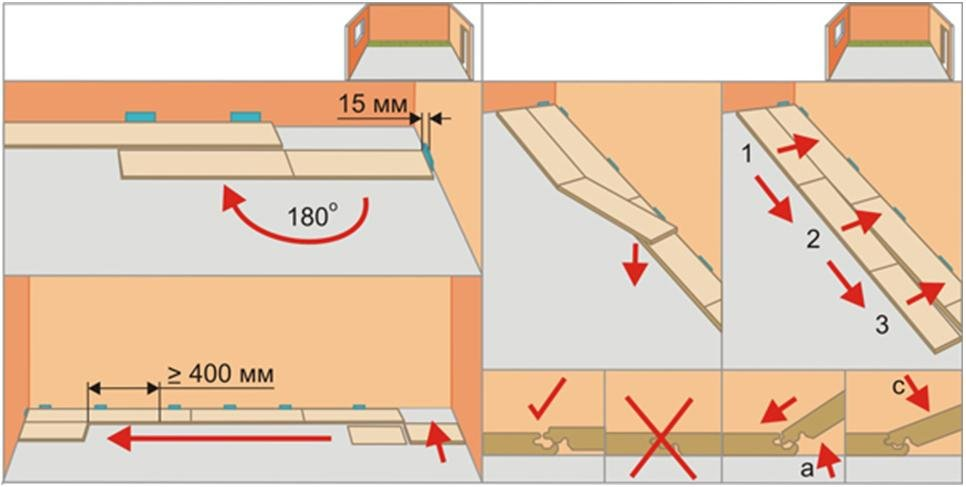
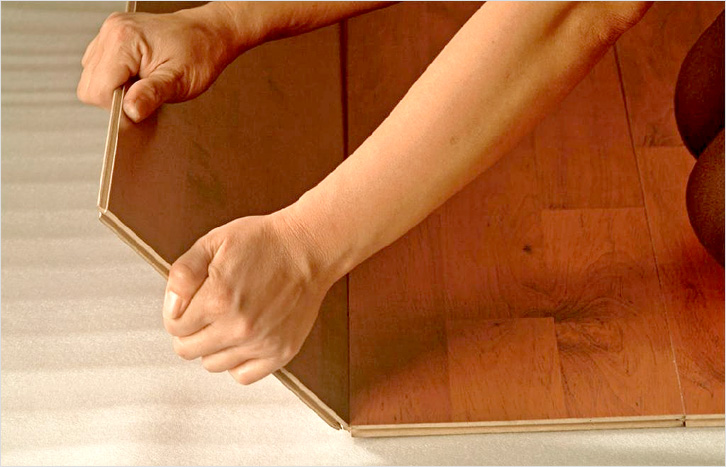
If you have a partner, then the second strip can be completely inserted into the groove of the strip that is pressed against the wall.
The work is done at an angle of 20 *, the stripes are tightly pressed, and then gently pushing from above, your strip, from the boards, will densely enter the crest into the groove of the strip pressed against the wall.
If it did not work, try again.
The main thing is that the comb must fit into the groove, and not a groove in the groove or the comb in the crest.
To eliminate the gap between the stripes, use a plate and a hammer.
Knock along the entire strip neatly, over the groove.
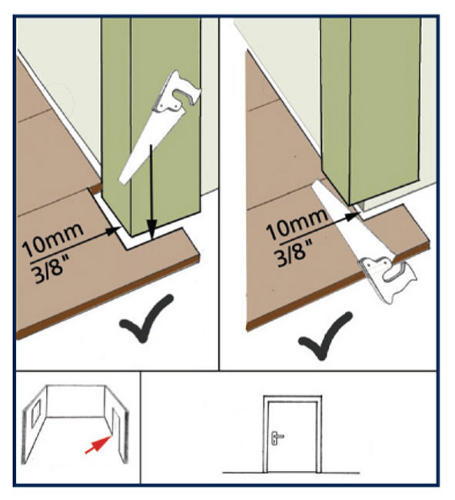
Do not forget to insert a wedge between the wall and the laminate, to create a gap of at least 1 centimeter.
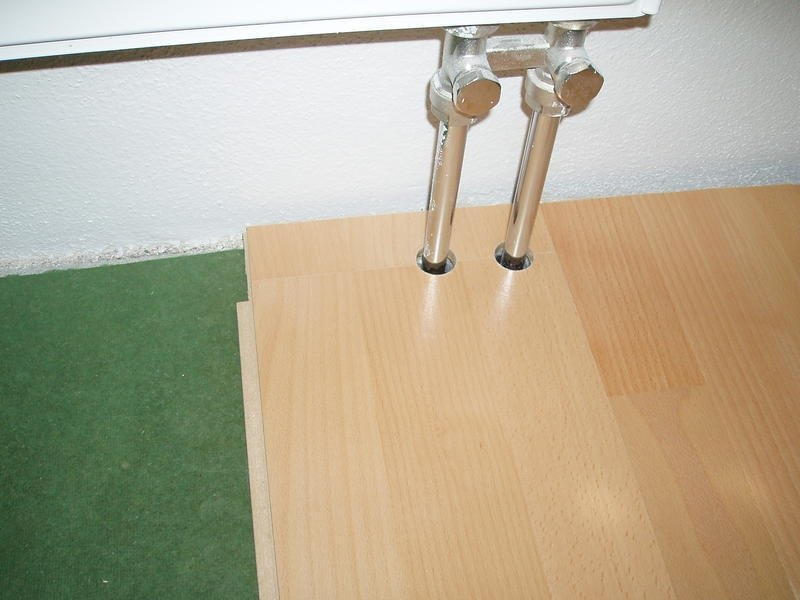
If you need to bypass the pipe, use a jig saw to make a cut.