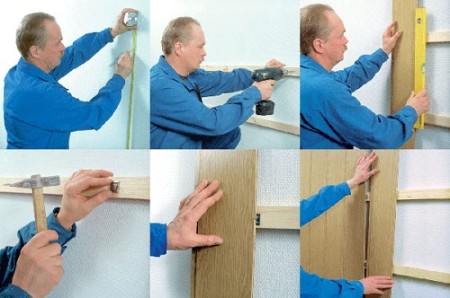
The dream came true, we bought an apartment in new metro Novoyasenevskaya. The layout is excellent, the location of the house is good, it has been retained. We decided to do it ourselves. The hallway was made MDF panels. We decided to share with you the technology of finishing. MDF panels are widely popular not only because of their relatively low cost, environmental friendliness and attractive appearance. Working with panels is quite simple: you only need to follow the instructions carefully and accurately. Everyone who has at least elementary skills in repair work will be able to make the installation of MDF panels independently.
Content
What is MDF?
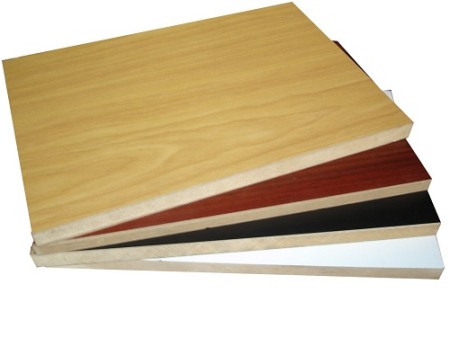
MDF panels are made from woodworking industry waste.
Do not confuse this material with chipboard or fiberboard. MDF is produced by dry hot pressing wood without binding components.
The essence of this method of manufacturing is that the fibers and tubes of lignin, from which, in fact, the wood consists, become soft and plastic under the influence of high temperature and high pressure, as in the case of steaming, and firmly adhere to each other.
Here you can compare with felt - the structure of MDF is very similar to it with the only difference that it consists of wood fibers.
No specific mechanical properties of MDF is different, but due to the fact that it does not use chemical bonding components, the material is completely ecological.
The material is perfect for interior decoration of premises.
The principle of working with MDF is exactly the same as when working with wood.
Glue material can be any glue for wood. However, for MDF there is a special adhesive composition, the so-called "liquid nails".
It is a usual carpenter's glue containing a filler made from wood chips.
With its help, you can glue the parts together, and also seal the slots and holes from the heads of the screws.
An important point: since MDF panels are produced with a decorative coating, try to pick up liquid nails in such a way that their tone matches the tone of the decorative coating. Select liquid nails, focusing on a drop of sample on the lid of the jar with glue.
Tool for working with MDF
For sawing the material you need a jigsaw, you can also use a hand-held circular saw.
The saw is good because it is convenient, compact and versatile.
Changing the circle, you can cut metal, thick wood and even stone.
However, the saw costs a little more than the electric jigsaw, despite the fact that, more often than not, it has a depth of cut of about 12 mm.
The thickness of MDF - 16 mm.
You will also need: a plane, a screwdriver, a hammer, a pencil, a building level and a small Bulgarian.
Material mounting technology
If the room in which it is planned to finish the MDF panels, at least once exposed to dampness, the walls have wet spots, peeling or bloating of the plaster, its layer has a thickness of more than 12 mm, then before starting to finish the MDF, the plaster layer must be completely remove, up to the main wall.
It is desirable to remove the plaster in any case - thus, you minimize the costs of fastening and identify possible hidden wall defects.
Skirting boards are also subject to mandatory dismantling.
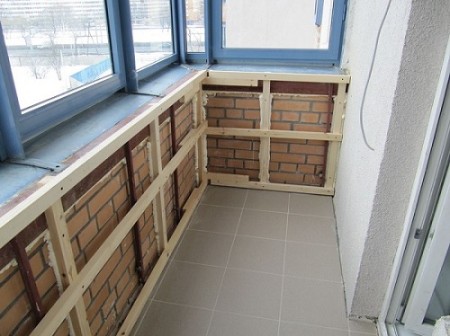
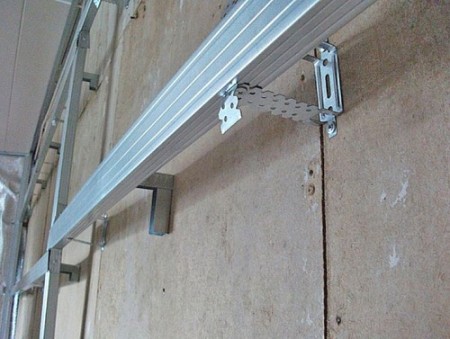
When decorating walls with MDF panels, two technologies are used: installation on a wooden frame and on a frame made of a special galvanized profile.
The wooden grill is easier to manufacture, requires less expense of hardware, but at the same time the lattice made of wood will eventually cost you more than a metal lattice.
In addition, the wood must be impregnated with chemical solutions against fungi, mold and pests before the installation.
In a room with high humidity and in buildings made of bricks, it is absolutely not recommended to make a wooden grate, since moisture and spores of fungi can freely penetrate through the pores in the brick.
In this case, the empty space between the panels and the wall will be an excellent place for pest breeding.
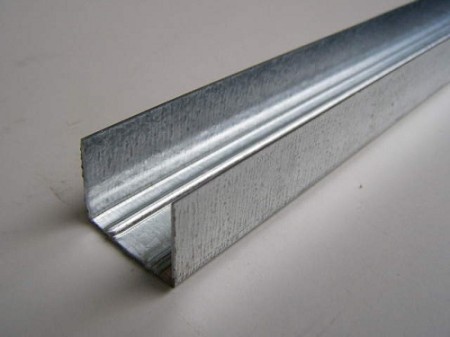
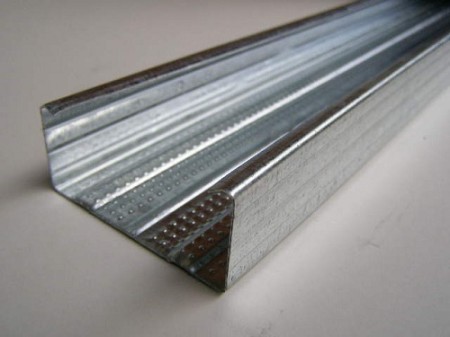
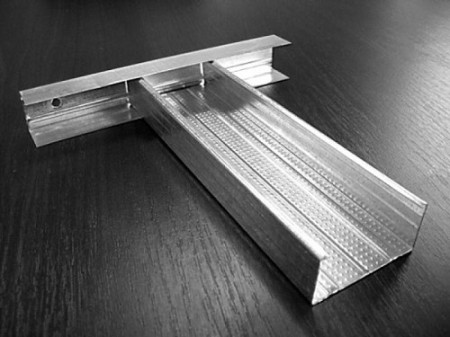
For the manufacture of a metal frame you will need metal guide profiles UD
and CD
Both profiles are U-shaped, the difference between them is only in the configuration of the section.
Often complete with CD profiles are sold fastening ears and connectors.
Apply them for a large amount of work, which must be performed in a short time.
If you need to panel one or two rooms, you can do without using these parts. In the process of working with MDF panels, it makes sense to take care of additional insulation.
To do this, the cells are filled with polystyrene foam.
Foam sheets are glued with silicone or building foam.
Polyfoam not only insulates the room, but also creates protection against the formation of condensate in voids and pests. MDF, in fact, the same wood that can be attacked by pests, albeit to a much lesser extent.
In the summer heat, when the building warms up, due to the MDF panels, the heat inflow into the interior is significantly reduced, since the material mounted on the frame is a heat shield capable of reflecting heat.
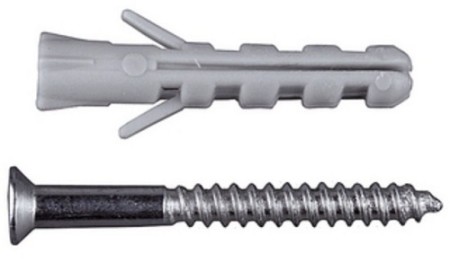
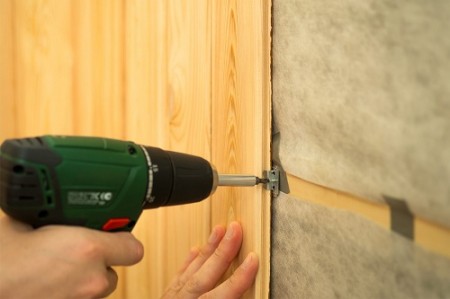
The wooden grid is fixed to the walls with the help of self-tapping screws or mounting nails (dowel-nail).
The dowel nail resembles a self-tapping screw with a smooth asymmetrical thread.
He is slaughtered in a plastic nest with a hammer.
On the head of the nail there is a slot for a flat screwdriver so that it can be easily removed if necessary.
As for the metal battens, it is attached only with the help of screws. In this case, fasteners with a diameter of 4 to 6 millimeters are used.
The more reliable and stronger the wall, the smaller the required diameter of the screws.
All screws or dowels-nails are equipped with plastic sockets.
Holes for nests in the wall must be done exactly along the diameter of the nest, not taking into account the protrusions of the cage.
In the hole, the nest is clogged with soft hammer strokes.
The nail or the screw must enter the wall to a depth of at least 3-4 cm.
For example, the thickness of the plaster is 12 mm.
The lining is made from a slat having a thickness of 40 mm, and the thickness of the MDF is 16 mm.
In this case, the length of the fastener should be 12 + 40 + 60 = 68 mm.
That is, in this case, a fastener with a minimum length of 70 mm is required.
The nest under the mount must be made a depth greater than the length of the plastic holder by 15-20 mm.
In our case, it will be approximately 100 mm.
If an excessively long drill bit is used, set the limiter to it.
The easiest way is to make a limiter from a tube of suitable diameter.
Do not get carried away and drill very deeply, since the thickness of the perestenka in polkirpicha can not be more than 200 mm, and you drill through it.
Installation of a wooden crate
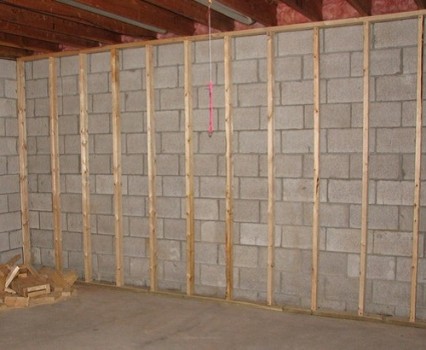
It is necessary to start with the installation of vertical racks.
Racks are installed in all corners in pairs, so that they form an angle, and also along the edges in the door and window openings to the full height of the wall.
Do not forget to check the verticality of the racks with the help of a building level or a plumb.
The racks are mounted in the following way: we apply the stand to the wall, on the one hand we draw it with a pencil.
After that, we drill holes in the wall for fasteners, observing the step of 500-700 mm.
In the holes we hammer in the nests for self-tapping, using the pencil we mark the place of their location on the wooden stand.
After that, we drill a hole in a wooden rack with a diameter of 2/3 of the diameter of the hole for the fasteners, and attach the stand to the wall.
More experienced masters make holes in the stands beforehand, and holes on the wall are marked through them.
After that, we mount the horizontal racks with the same step.
At the top of each opening and under the windows, horizontal racks are installed without fail, regardless of whether the step is obtained.
In the slopes of the door and window openings, we also set the slats, from the inside and outside.
At the final stage, we remove all the ledges at the joints of the rails with a planer.
If you are making a ceiling from MDF, remember that the panels must be placed along the posts and across the lags.
That is, if the panels on the ceiling are located along its short side, the crate must be done parallel to its long side.
Mounting of metal battens
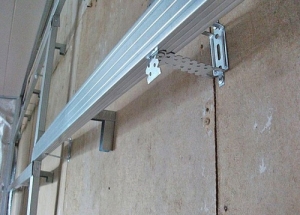
The metal structure is mounted in the same way: the racks are placed along the apertures and corners, then cross-pieces are installed.
The step is the same as in the case of a wooden crate.
Vertical racks are made from a UD profile into which cross-section CD profiles are inserted.
Cross sections are checked by tape measure and level, then fixed to the UD profile and to the wall, into pre-prepared holes.
Dowel-nails in this case is not recommended, because you can damage the profile or do not finish the nail to the end.
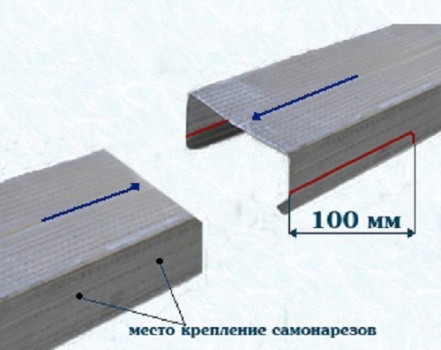
The pieces of CD profiles are pre-assembled to achieve the required length.
To work with a metal crate, it is best to use a small Bulgarian or a small saw blade.
When working with an electric jigsaw, a rather large percentage of rejects is obtained.
"Ears" and connectors of metal profile
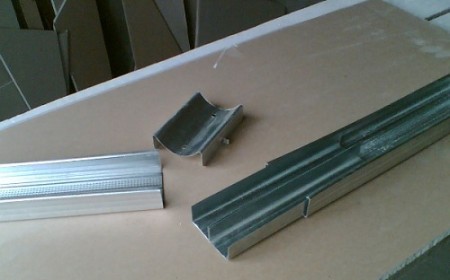
The "ears" from the CD profile are made as follows: at the ends of the pieces of the U-shaped rod, make a small cut corresponding to the width of the profile UD to the crosspiece plus a few millimeters.
The cut is done slightly obliquely, since with a forward or reverse cut the CD profile may become stuck.
Note that "ears" are necessary only if the lath is made only from the CD-profile.
When the racks are made from UD, the CD profile is simply pushed inside.
For CD profile connectors we measure a piece of the same profile of the required length.
For one connector, we need about 120 mm of profile.
For example, if you need to make ten connectors, then it takes 1.2 meters of the CD profile.
It should be noted that the U-shaped sticks of the CD profile are not straight, but with a bend inward.
This bend should be cut to 2-3 millimeters.
After that, cut the workpiece and the required number of pieces of the profile.
Connect the CD profile as follows: a piece-profile connector is half-pushed into one of the pieces of the profile to be joined, another piece is put on the remainder.
There may be a small gap between the profile parts to be joined, but this is not terrible.
Masters are sometimes advised to additionally fasten the joined pieces with screws.
Doing this is not necessary, since the parts are always held fairly tight by friction.
After installation, the part can not fall out, as it will rest against the wall, and will not slip to the side due to the fact that it is inserted with the spacer.
If there are any communications on the wall - pipes or wires, then in the metal profile or the wooden rail, grooves are cut in advance for them.
For this purpose, before installation, measure the height from the floor on which communications pass, as well as the distance to which they protrude beyond the wall.
In this case, the thickness of the elements of the crate must be 5-10 millimeters more.
Wall finishing with MDF panels
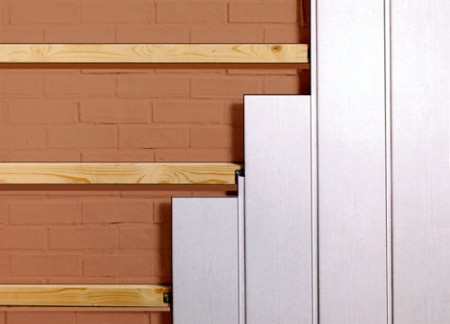
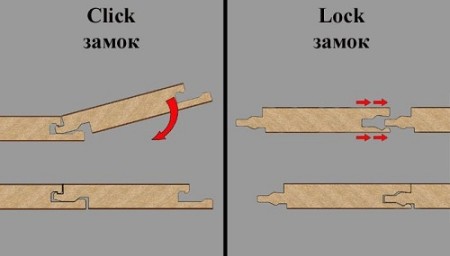
Fastening of MDF panels to each other is performed by connecting a sheet piling lock, which consists of a ridge and a groove.
To the crate of wooden bars bars are usually fastened with small studs.
They are clogged at an angle into the groove of the panel.
To finish the nail in the groove to the end, use a metal puncher, similar to the core for the metal, only at the end of it make a groove under the head of the nail.
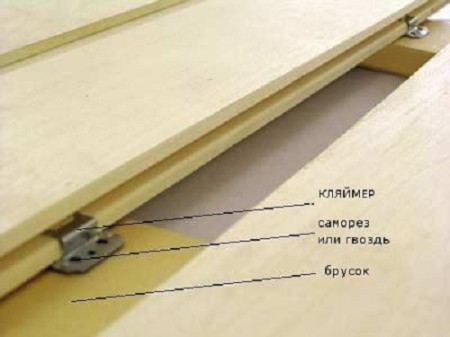
For fixing MDF panels to the metal crate, so-called stickers are used - small metal brackets with a hole for fixing and denticles that press the shelf of the groove of the tongue. The clamp is inserted into the groove of the panel until it stops and fastened with a screwdriver.
It should be noted that the fastening with the help of the stickers will cost you more, it takes quite a lot of time and effort.
At the same time, such fastening is quite reliable, and if there is such a need, the lining can be fairly easily disassembled without damaging the panels themselves.
Installing the panels is quite simple, if compared with preparatory work that takes a lot of time.
You need to start from the corner.
We cut the MDF panels, the dimensions must correspond to the length of the cell.
At the corners of the cutting line, we slightly pass through fine sandpaper.
From the first panel you need to cut the comb and fix it with nails or screws - depending on what material the crate is made of.
From the side of the groove we fasten it with crambers or carnations.
Next, take the next panel, insert the comb into the groove, attach the same way.
We work this way until the last two panels remain.
The last part, if necessary, is cut lengthwise into the required size, with a margin of several millimeters.
The crest of the last panel is cut lengthwise by half.
The last two details are inserted in the "house", and gently squeezed until complete connection.
The last panel is pushed to the stop on the previous one, and at the free edge we attach it with screws.
The final stage of the work is the fastening of the last two panels, the most crucial moment in the work, its implementation requires some skills.
If you are not sure about your skills, practice on two pieces of panels.
Finishing of slopes is made according to the same scheme, but here options are possible: if the slope is narrow, then it needs to be sheathed across.
A wide slope can be tailored to your liking-across or along your choice.
Look pretty slopes, which are trimmed across the light and dark pieces of MDF, through one.
But this is at the discretion of the master.
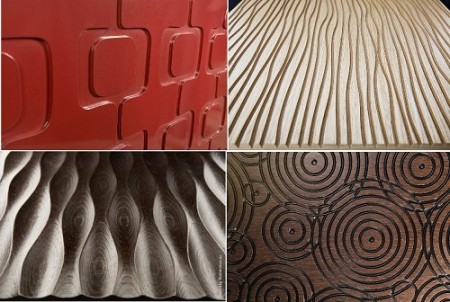
As for the cracks and angles, then there should not be any difficulties: there are practically any skirting boards and corners for MDF panels of any profile, size and tone.
Corner or skirting board should only be glued with liquid nails, after smoothing the corners, and cleaning the place of gluing with sandpaper.


