Due to the democratic price, high reliability, long service life, more and more people are choosing for the facade cladding of their house vinyl siding. This lining material simultaneously performs both decorative and protective functions. Vinyl siding provides protection of the facade from atmospheric influences while maintaining heat inside the house, if a heater was used during the installation. Siding is mounted on the facades of private buildings - houses and villas, both new and already operated. This material is also faced with public buildings - shops, warehouses, underground passages, etc. Sometimes it is used for interior cladding works. But siding is not only the panels that the walls cover. Quality cladding is not possible without additional additional elements. What is it, what are the additional elements, what they are needed for and how to mount them - all of these questions will be answered in our publication.
Content
- 1 Additional elements: types and purposes
- 2 Installation of additional elements during installation works
- 3 How to independently calculate the siding and additional elements
- 4 Calculation of additional elements for siding
- 4.1 finish and start line
- 4.2 internal and external corner pieces
- 4.3 J-profile
- 4.4 H-profile
- 4.5 sill
- 4.6 clypeus
- 4.7 soffit
Additional elements: types and purposes
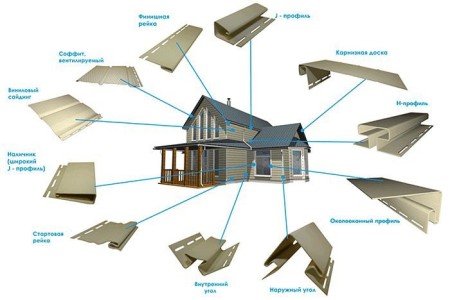
In the process of finishing the facade of the house, it is necessary to use special additional elements or, as they are called, accessories for siding, many of them also perform an important decorative function. So, the connecting bars are designed to hide the joints of the panels horizontally. Internal and external corner elements hide joints and cracks between panels that are installed in different planes, as well as decorate the corners of the walls of the house.
Additional accessories for the siding can greatly simplify the installation work and decorate the finish. Other additional elements are also of great importance. On how much such parts are used, the price, which will have to be paid for the material and finishing works, ultimately depends on their quantity and quality.
Any siding manufacturer also produces all the necessary parts for its installation. All components can have minor differences in size, shape, profile, even have several different names, but this does not change their purpose. And they serve to protect the facade from the wind, moisture penetration and other atmospheric influences.
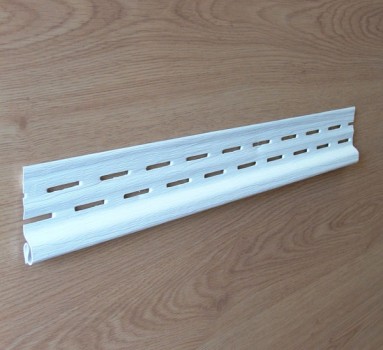
The starting or starting line of vinyl siding.
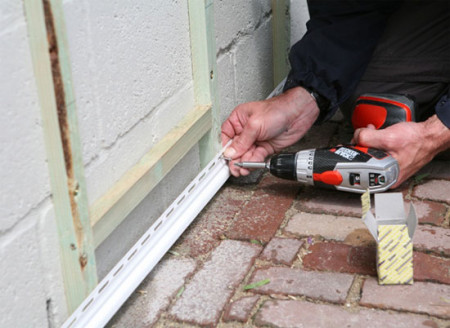
With the installation of this element, the facing of the walls begins. The bar is fixed to the wall of a previously drawn horizontal line, which should be no more than 40 millimeters above the bottom of the finish. Further, the first siding panel is inserted by the lower crest into the starting bar, and the upper part of it is fixed to the wall or to the material of the crate.
Important point: the siding panel completely hides the starting bar, it does not have to buy the same color as the rest of the panels.
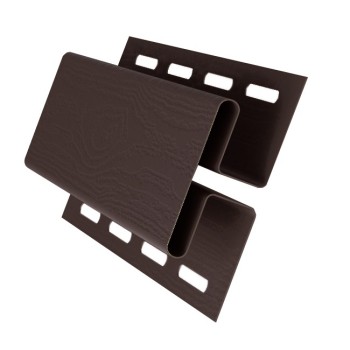
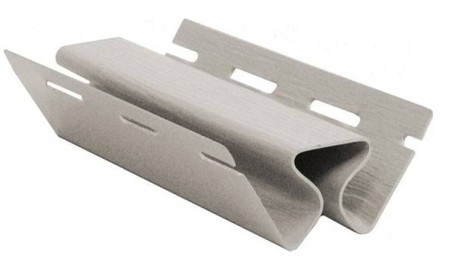
H-profile, or connecting strip.
With its help hide the seams between the panels and the seams from the panel joint, if their length is less than the wall, and the panel has to "grind". Or you need to connect the panels of different colors.
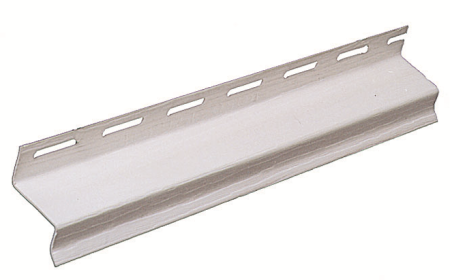
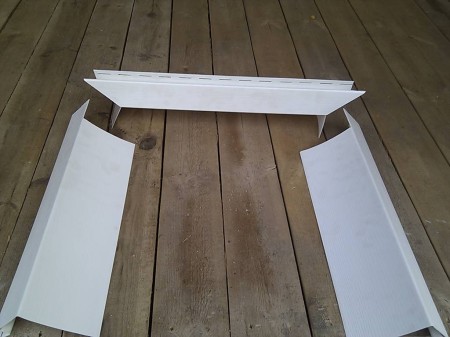
Draining bar (hinged).
Mounted to protect the plinth and windows from the rain. It is attached to the joints of siding panels with a plinth or at the top of window openings.
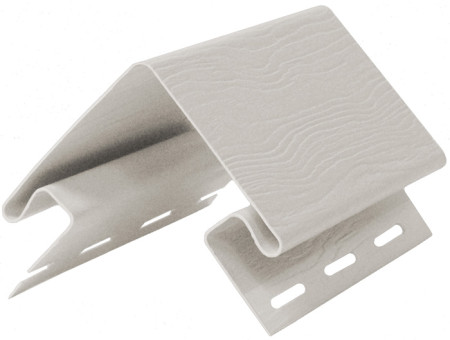
External and internal angle.
With their help hide the joints of siding panels, which are in perpendicular planes.
J-chamfer or windshield.
It is intended for installation on a roof cornice.
Near the window and plank.
These parts are trimmed window or door openings.
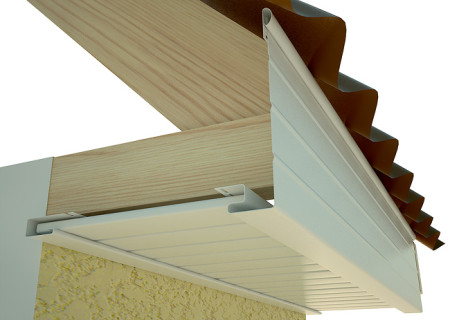
Soffit.
Designed for finishing roof gables.
Finishing siding.
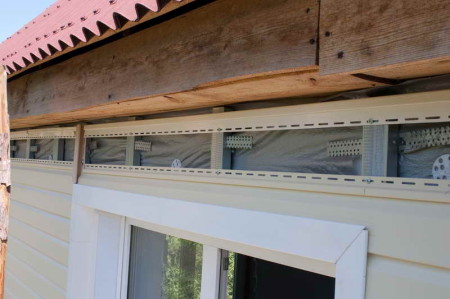
The final element in the finishing works. It is installed directly under the cornice before installing the latest panel. The finishing strip hides the cropped or perforated edge of the panel.
Installation of additional elements during installation works
Almost all of the above accessories are designed for mounting on the facade of the building before installing the panels. It's about the starting bar, corners, as well as the details for finishing the door and window openings.
setting the starting bar
If you study the theory well, strictly follow the instructions and recommendations of the manufacturer, then it is quite possible to make the facade decoration with vinyl siding yourself. So, the installation of panels always begins with the fastening of the starting plate. First, you need to determine the bottom of the finish, and pull back from it by 40 millimeters. With the application of the building level, place marks on the carcass profiles. If the siding is mounted directly on the wall, the marks are made on it, and then they are combined into one horizontal line. The starting bar should be attached to the top of the drawn line and attached to the base through the holes of the perforation with the help of nails or self-tapping screws.
In the process of fastening the starting plate it is important to observe the following points:
- If several start plates are to be attached to the base in sequence, a gap of 5-6 millimeters should be left between their ends. This is necessary in order that, with temperature changes, the parts can expand freely without touching each other. If the ends are moved closely, a small, but still noticeable "wave" may appear on the surface of the cladding.
- The same gap should be left between the starting bar and the details of the corners.
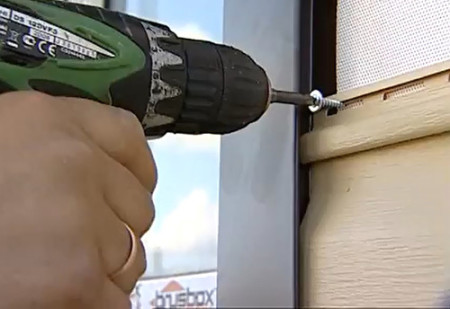
- Nails or screws need to be screwed (twisted) exactly into the middle of the elongated hole, not from the edge. To twist or drive in not completely - the bar must have a little free running within the hole of the perforation.
- The distance between the fixing points should be within 300-400 millimeters.
installation of connecting bars and corner elements
To begin with, we note that all the requirements of the installation instructions for siding and additional elements for the facade and walls are aimed at making an integral "floating" structure that will not be subject to deformation when temperature changes and strong winds.
All corner elements are fixed strictly vertically. The upper end of the corner element should not reach the eaves or the wind bar by 5-6 millimeters. The lower end of the part is lowered by 8-10 millimeters from the lower edge of the starting plate. Similarly, the H-profile is mounted.
installation of a finishing strip
Most often the finishing strip is fastened at the very top of the wall, right under the cornice. But not always. The finishing strip can be used to decorate the protruding wall details.
The finishing strip is installed before the last panel is fixed. Fasten it with screws or nails, like other additional elements, through the holes in the perforation. After that (if necessary), the panel is cut to the desired width, perforations are made along the cutting line, after which the last panel is joined from the previous one, and the upper edge is simply turned under the bend of the finishing strip.
How to independently calculate the siding and additional elements
It's not as difficult as it might seem at first glance. Siding PVC is just a finishing material that has quite specific geometric shapes and sizes. And you can calculate the amount of necessary material and details quite accurately.
You will need:
- Roulette.
- A pencil and a piece of paper.
- Calculator.
First, the number of siding panels is calculated, then the number of additional elements. All calculations can be carried out using the formula: S calculated = S walls - S door and window openings. In addition, you must always take into account the waste material. In this case: S siding = S calculated +% material waste.
For waste, you can safely add 7-10%. And this is the case if the walls of the house are rectangular, simple configuration. With a complex wall configuration, waste accounts for at least 15%. After that, the obtained area, together with the percentage of waste, is divided into a useful area (it can be different for different manufacturers) of one panel.
To avoid possible mistakes, it will be very good to make a plan in which to specify the location of the siding panels on the facade and each wall.
Calculation of additional elements for siding
Even if it is necessary to pose only one solid wall with the siding, it is still impossible to do without additional elements. You will need at least a starting bar. And if the configuration of the walls is complex, you will have to calculate the number of all additional elements.
finish and start line
As we already mentioned above, the starting strip is the fastening element that is used to mount the bottom panel. The finishing strip is for the last panel. Their calculation is made in linear meters according to the size of the walls of the house. To calculate the details in pieces, the entire footage is divided by the length of one strip. Counting the number of starting and finishing laths, overlap can be ignored.
Experienced finishers often do not use start bands. They simply cut off from one of the panels the lock, which plays the role of the starting strip. A strip with a cut lock is installed last.
internal and external corner pieces
We count the number of angles, multiply them by the length. The resulting number is divided by the length of the profile. It is better to calculate all angles immediately by the piece, as the connections on the corners of the building are very noticeable.
J-profile
It is set to the end of the panel plane. According to the mounting technology, the J-profile is needed in order to frame all vertical and horizontal slices. However, it is often used as a finishing strip when the siding panel is horizontally cut. The profile is calculated in running meters. The result is divided by the length of the profile.
H-profile
Applicable in cases where the length of the wall is longer than the length of the siding panel, or it is necessary to connect panels of different colors. Calculate by the piece.
An important point: the panels can be joined without the H-profile, by overlapping. Some manufacturers even manufacture panels without locks.
sill
This part is used in case the window or doorway is sunk more than 20 millimeters (in this case it is advisable to use the J-profile), but less than 180 millimeters. It is considered one by one to avoid the formation of joints.
clypeus
Used for finishing the apertures, in the case where the siding panel is flush with the edge of the opening. Quantity is better to count in pieces.
soffit
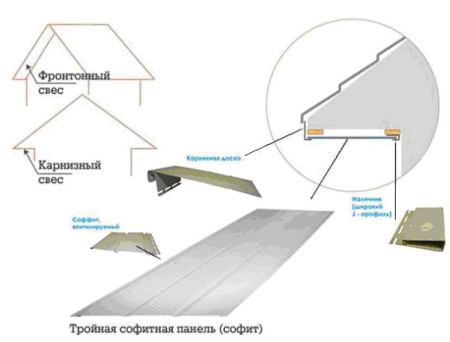
Calculate siding soffit is quite simple, since the facing area, most often, has a simple configuration. It is easier and more convenient to mount the soffit in the roofing works.
All the accessories needed for the installation of the soffit are shown in the figure below.
The soffit panels are calculated by multiplying the length by the width of the surface. It is considered in square meters plus 2-3% per waste.


