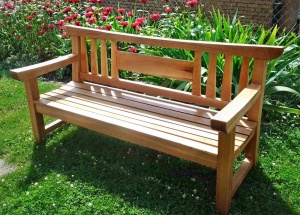
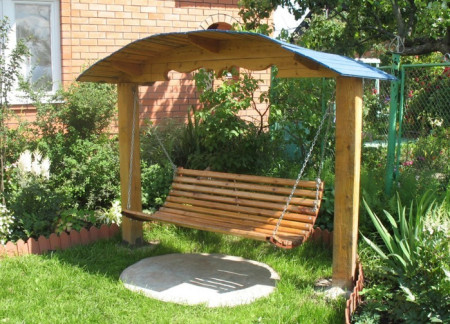
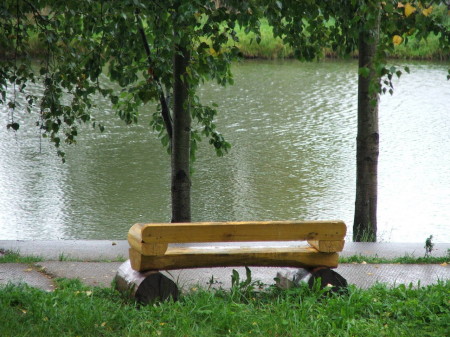
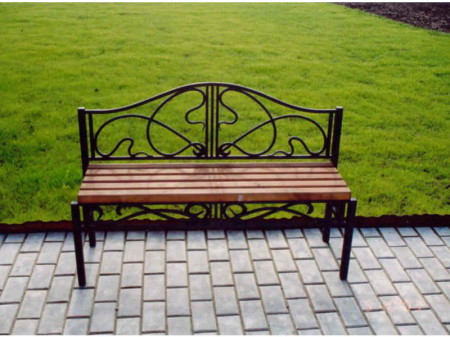
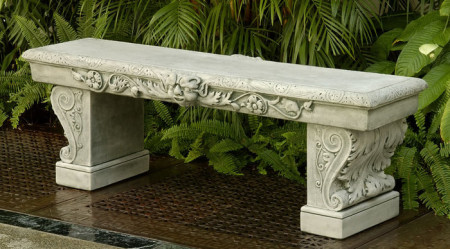
To consider a garden bench as an ordinary piece of furniture is a fundamentally wrong opinion. After all, in addition to its direct purpose, garden benches can be used as a worthy decoration of the infield, to create from garden furniture whole compositions that fit beautifully into the design of the garden or the courtyard.
Of course, that in our deficit-free time you can buy anything, including garden furniture, and the choice is very wide and varied. But is not it a real pleasure to do something really beautiful and useful for your garden? And time can be spent with advantage, and rest on such a bench will be more pleasant.
Benches for the garden with their own hands can be made by every owner of a country house or cottage. The main thing is to correctly define the design, the location of furniture, choose the material, but for starters, of course, it does not hurt to get acquainted with this publication.
Content
Choose a place for a garden bench
It would seem - which is easier. I chose a place, and I installed a bench. In fact, to ensure that the object of garden furniture fulfills its mission by one hundred percent, it is very important to arrange it correctly. To begin with, you need to decide for what, in fact, your bench will be designed:
- For privacy
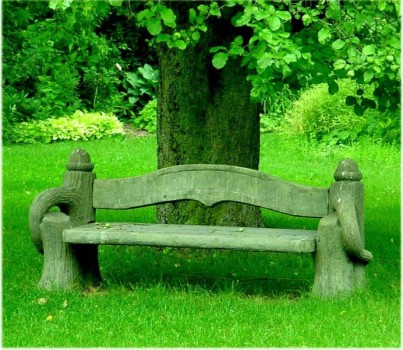
As you can understand, the bench is meant to be hidden from prying eyes, spend time alone or with your loved one. Such a bench is better to install somewhere in a secluded place, for example - behind a hedge, under a large sprawling tree, near a pond, etc.
- Bench for a fun holiday in good company
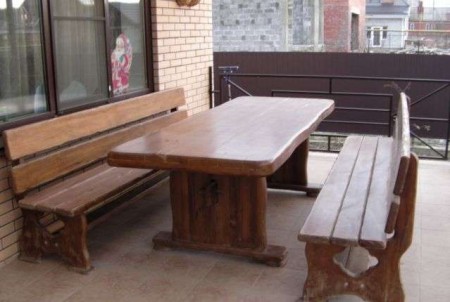
It can be installed directly on the veranda of the house, in the gazebo, in the courtyard in front of the house. Since it is supposed to rest in the company, complete with a bench should be a table.
- Bench for rest after work and household chores
Such a bench will always come in handy, as there is always work near your house, after which you want to sit down and calmly rest for a while. The bench will look appropriate, for example, near the garden path, overlooking the pond, garden or garden.
It goes without saying that the bench should be located in the most beautiful and picturesque place of the site, so that the surrounding situation promotes calm and relaxation.
The more in your area of flowers, ornamental plants, trees and bushes, the more pleasant it will be to spend your free time on the bench, enjoying the good weather and pleasant view.
But, ultimately, where exactly to establish a shop on the site, depends only on your personal tastes and preferences.
Materials for garden benches: stone and forged products
To create a beautiful and modern landscape design, the site uses a variety of building materials, including for the installation of garden furniture, in particular, benches. If you include fantasy, then for this purpose you can use almost any material, including plastic bottles, and cardboard boxes. Of the traditional building materials for the device of garden furniture, metal, stone and wood are most often used. Garden furniture made from these materials from time immemorial, and to this day, stone, metal and wooden furniture is considered classic and is very popular.
Benches made of metal look very nice and elegant, such a product will be a real decoration of your site.
In addition, metal benches are very durable, and serve for decades, and openwork forging looks very elegant. To ensure that the metal bench does not look heavy and cumbersome, wooden parts are often used together with forging. For example, handrails and legs can be ordered in a blacksmith shop, and the seat and backrest made of wooden racks that can be easily installed, installed, sanded and varnished by yourself.
Very beautiful looks metal bench, installed, for example, under an arch decorated with climbing plants. Another advantage of metal benches is that there are a lot of options for their execution, and you can make an original exclusive product for your garden.
A stone bench will bring a note of medieval antiquity to the design of the farmland.
Such a bench can be folded independently, or make an order in a specialized workshop. The surface of such a bench, in the presence of imagination and patience, can be turned into a real work of art, for example - to make a mosaic, an imitation of cave people's drawings, etc.
The stone is a "cold" material, and you can use this bench only in the warm season, but if you make a place for a fire nearby, and the bench itself is "warmed up" with soft pillows or a blanket, then even on a cool autumn evening, with comfort to rest.
Wooden benches
Almost always after the completion of repair or construction work on the cottage or garden area, scraps of beams, boards, logs, and other wastes remain. Do not rush to throw them away or burn them - this is a good building material, from which you will get a good bench for a summer residence.
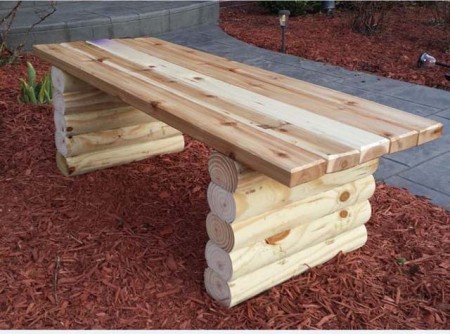
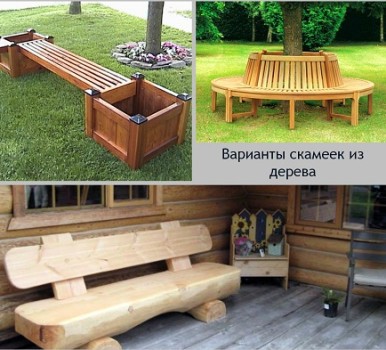
For example, a bench made of logs, at first glance, looks simple, but, at the same time, cozy and funny. And to make it simple - cut off two logs from a log and dig them into the ground in the chosen place. The distance between them will be equal to the length of the bench. In the logs we cut out grooves that correspond to the width of the log used for the seat. The log, designed for the seat, is first spread out along two halves and inserted into the grooves. After that, on the back of the block, two strong pruning of the bars are fastened to which the second half of the log is nailed as a backrest. After the shop is assembled, it should be polished and varnished, which will give the product an aesthetic, finished look, and significantly extend its service life.
With the help of additional elements placed next to the bench, you can make a place for relaxation even more cozy and attractive. For example, if you wish, smash a small small flowerbed from small wooden boxes near the bench. Boxes can be attached to the back of the bench, and you can use them as supports for the shop itself, by pouring into the boxes of the earth and attaching a seat to them. Inside, you can plant flowers or sow lawn grass - as you like.
One of the main advantages of wooden benches is the comparative simplicity of their manufacture. It is only necessary to have several inexpensive tools at your disposal. A little patience, accuracy plus the availability of basic skills - and you will have at your disposal a beautiful and original garden furniture.
Garden rocking chair with own hands
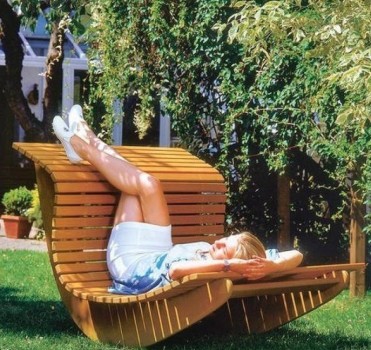
As you can see from all of the above, comfortable and beautiful garden furniture is an important attribute for recreation on your site. And if, for example, make an original rocking chair with your own hands, which, by the way, can be installed at its own discretion anywhere?
At first glance, such a product will cost a little expensive. If you buy a finished product or order it in a workshop, then it really is. If you make it yourself, you will only have to spend money on materials. In addition, the hand-made object of garden furniture - is this not a reason to show off to relatives or friends? Yes, and relax in this chair, you see, much more pleasant.
For the manufacture of rocking chair will need the following tools:
- Grinding machine with attachments.
- Electric jigsaw.
- Electric drill and wood drills.
- Bits for screwing self-tapping screws.
- Ruler, corner, tape measure.
- Building pencil.
- Eurofaner - for side parts, 3 cm thick.
- Lumber (see picture)
- Confirmaty (eurovint, euroshout, screw joint)
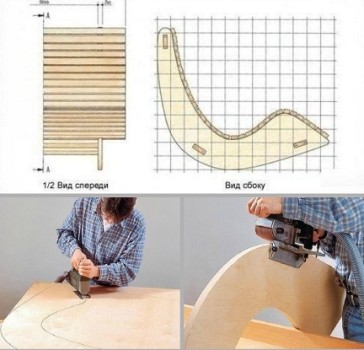
The principle of manufacturing a rocking chair is completely understandable from the below pictures and drawings. Dimensions - free, choose for yourself.
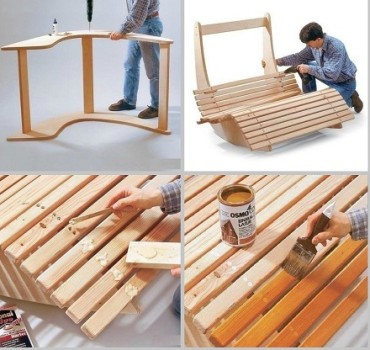
To start, you need to make a shape (shape) of the sidewalls, as in the figure. You do not have to repeat the form exactly. From the pattern we transfer the contours to the plywood, we cut out with an electric jigsaw, and we grind the ends with a machine. After that, you need to make a marking for fixing the connecting rails. To make the holes for the racks coincide, we drill both sides at the same time, stacking them on top of each other.
The frame is going to be confirmed, or screws. The locations of the racks are pre-marked, then fastened with self-tapping screws. It is desirable for each samorez to drill a hole, so that the rail does not crack. For this, a smaller diameter drill is selected than the self-tapping screw. One rake is used instead of the gasket, so that the distance between them is the same. Screws self-tapping screws a few millimeters deep into the slats so that the holes can then be plastered. As soon as the putty completely dries, remove its remains and open our chair with varnish. Apply the varnish in several layers. For the first layer, the lacquer is diluted approximately twice with the solvent. After the application of the first layer, the tree is likely to become "ruffled" and raise the pile. Carefully remove it with a small nazhdachkoy, wipe with a damp cloth, and we apply a thick lacquer. To achieve the desired effect, it is recommended to apply a minimum of two or three coats of lacquer.
Making a bench for a garden of wood
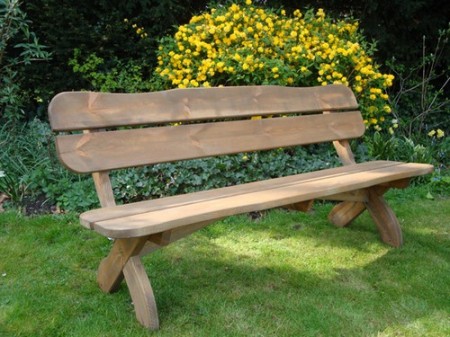
Of course, you can not ignore the relatively simple and easy-to-assemble ordinary wooden benches. On the site of such there should be at least two or three pieces, and believe me, they can come in handy at any time.
Here is an example of making a simple bench:
- Product Length: 1.8 m.
- Width: 35 cm.
- Height 45 cm.
For work we will need:
- Wooden beams.
- Self-tapping screws.
- Glue for wood.
- Emery - 120.
- Roulette, pencil, saw.
- Sanding machine.
- Electric drill or screwdriver, wood drills.
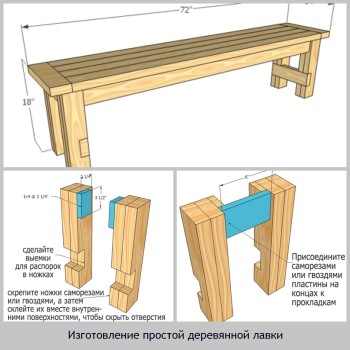
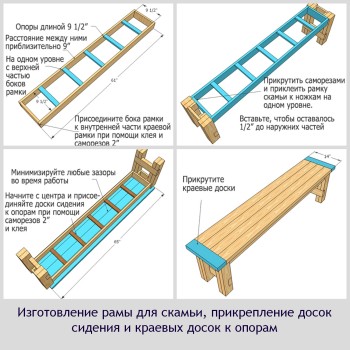
The following figures detail the process of making a bench. All dimensions are in inches (1 inch to 2.54 cm).
Garden bench made of stone
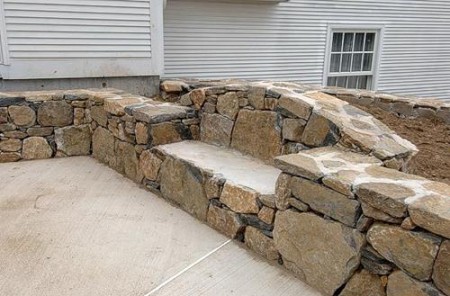
A stone bench will decorate any landscape. Of course, it is impossible to make a carved figured stone product by itself to the usual owner of a dacha or private plot, but if you have a small amount of small cobblestone left after construction work, you can easily make an unpretentious stone bench.
Since contact with a cold stone is uncomfortable and harmful, it is better to make a bench seat wooden. Our future shop will be a solid stone base with a seat of wood. If you like flowers, then on both sides of the bench, you can arrange niches for plants right among the stones.
The following materials will be required:
- Cobblestone is of medium size, preferably flat.
- A bit of gravel for the finish.
- Metal corner or armature for the skeleton of the base of the bench.
- Cement grade 500.
- Board thickness of 2.5-3 cm.
- Beam 5x5 cm for attaching the seat.
basement foundation
Although the stone bench itself will be stable, but a product with a foundation can last much longer. To begin with, mark out the contours of the future bench on the ground.
Take an example of a rectangle 50 cm wide. We choose the length arbitrarily, based on the amount of material, placement, etc. From the rectangle marked on the ground, we remove a layer of earth with a thickness of about 30 cm on the bayonet bayonet.
At the corners of the pit, we cut vertically the corners of the corner or the reinforcement - one at a time in each corner and along the perimeter with a step of 50 cm. The angle or reinforcement should be slightly less than the height of the stone foundation plus 30 cm for fixing in the ground. The pit is covered approximately half the depth with rubble or construction debris and cemented.
base of bench
Cobblestone we put on the marking on the cement mortar in the markings in such a way as to make a solid stone base. Stones need to be adjusted as tightly as possible to each other so that a minimum of voids is obtained. When the base reaches the required height (the recommended height of the garden bench is about 50 cm). Before laying the last row of stone, trim the transverse bar between the cobblestones. To them the seat is attached later. If the bench is up to one meter, then two pieces are enough, otherwise cut off the cuts in 50 cm increments. The upper part of the base is leveled.
If the experience of a bricklayer is not enough for you, and the sides of the ground are crooked - nothing terrible. To smooth the irregularities, we use gravel. All irregularities and cavities are filled with mortar and pressed into it with pebbles, so we will get a more or less neat surface.
seating installation
The seat can be made from a solid piece of wood, or from several parallel planks. Mount the seat only after the solution has completely solidified. Preliminary boards must be ground and treated with an antiseptic compound. The boards should be simply attached to the cross bars with screws, preferably from non-ferrous metal - and your shop is ready, enjoyable rest!


