Bath is the default building with a warm and humid environment. To heat is not wasted, the bath is thoroughly insulated from the floor to the roof. But what happens if the water gets to the heater? It can completely lose its properties. From this follows the question: how to insulate the floor in a bath and do it right?
Content
Warming of the floor in the bath, so it is necessary
The sauna warms up to high temperatures, and the heat should be stored. Up to 90% of all heat loss falls on the walls and roof of the building - their warmth is given the main attention. But the owners often recall the heat that also leaves the floor after the bathhouse is ready and in operation. There is a need for dismantling the floor covering and the top layer of the finished floor, after which it is possible to produce insulation, waterproofing and installation of the floor covering. Everything is much worse if the floor in the concrete bath - its dismantling and subsequent warming will require significant financial and labor costs. However, professional builders advise - the insulation of the bath floor is necessary. And it's not even about heat loss, which is not so high, but at least because visitors who leave the steam room will be much more comfortable walking on the warm floor, and from the cold concrete surface and catch a cold for long. In addition, insulated, or the warm floor really allows you to make the room much more comfortable and save on heating.
Warming of the floor in the bath, nuances
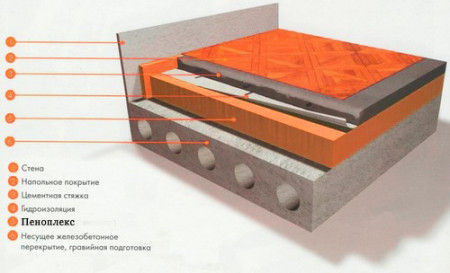
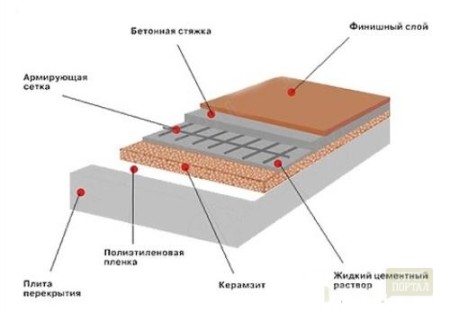
The method of floor insulation directly depends on the material from which the floor is made, and there are only two options: concrete and wood. On a concrete base, ceramic tiles are most often placed, and as for the wooden floor, it is, of course, sewn up with a board. Such a poor choice of floor coverings for a bath is explained very simply: the high temperature does not allow the use of any synthetic materials, since when heated they intensively release toxic substances, although they are harmless at low temperatures. The same criterion is guided by choosing a heater for the floor. Carrying out work on the insulation of the concrete floor, the heat insulator is laid on the floor, protected by a layer of waterproofing. Above the heater is reinforced mesh, which is applied to the cement slurry. After the drying of the screed is complete, you can start finishing work. Well, to ensure that the ceramic tile is always warm, under it you can mount a system of warm floor. But we'll talk about this a little later.
Very often for insulation of a concrete base, the plates of penoplex are used. Another way to warm the concrete floor involves pouring the solution in several stages. Between the layers of the solution make a heat-insulating layer. It is best in this case to produce insulation with expanded clay, although it is also good to use coal slag.
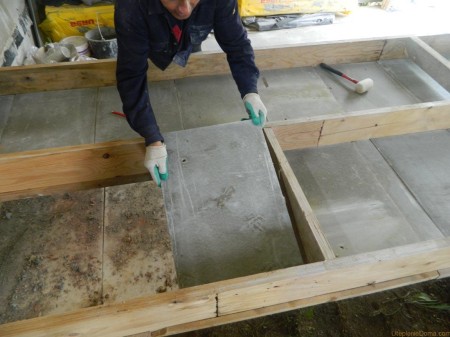
The process looks something like this: first a layer of concrete about 12-15 centimeters thick is poured in, waiting for it to dry completely (about three weeks). Throughout this time, the surface is periodically watered and sprinkled with sawdust - this allows to strengthen the base and prevent its cracking. After that, the concrete surface is covered (or stacked) with a heater, for example, expanded clay, the second layer of concrete solution is poured on top, which also needs to be kept for at least 3 weeks, periodically moistening the surface - all the same as with the first layer. Then you can lay ceramic tiles.
Another, quite effective version of insulation - screed floor with expanded clay. More information about this method of insulation can be found by watching the following video:
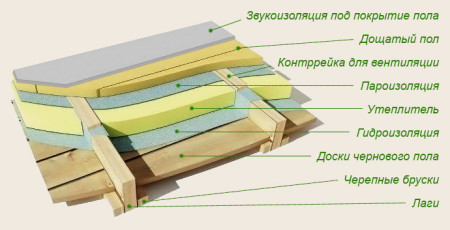
The device of a wooden floor is rather simple: initially the beams of the ceiling and the cranial beam are laid on the foundation, after which they are covered with a vapor barrier material. On the base thus obtained, a rough floor is mounted, onto which, in turn, a heat insulator is placed, placing it between the beams of the floor. Then it remains only to lay the waterproofing and to lay the floorboard.
As you know, wood and moisture are little compatible. Under the influence of moisture, the tree swells, can become covered with mold and fungus, and after the tree dries, it changes its shape, warps, cracks. The wooden floor in the bath is fully exposed to these destructive processes. For this reason, you need to start with the right material for the wooden floor. In this regard, the best option is larch wood. Due to the dense structure, it perfectly resists the effects of moisture. With excess moisture, you can also fight using removable wooden panels as a floor covering. In this case, the wet floor is simply removed and dried in the sun or in a dry heated room. Wet panels are replaced with a second set.
Important advice: spreading the floorboard in the bath, do not immediately nail it. It is better to wait a while until the board "settles", and will dry a little. Then the gaps between the boards will be minimal.
Types of insulation, brief characteristics
To warm the floor in the bath you can use different materials.
Popular among developers use:
• Mineral and glass wool.
• Felt with bituminous impregnation.
• Penoplex.
• Perlite.
• Expanded clay
• Coal slag
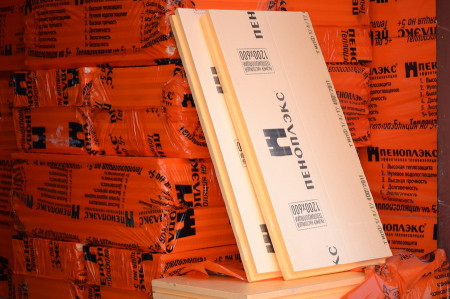
Of all the listed materials, penoplex (extruded polystyrene foam) is quite popular.
Warming penoplex is easy - the material is lightweight, easily cut, with transportation, loading and unloading, too, there is no particular difficulty.
For foaming polystyrene, carbon dioxide is used, so when heated, the foam does not emit harmful substances. However, this thermal insulation material, with all its many advantages, has a very high degree of flammability (G3) and needs reliable insulation. However, under a layer of concrete, foam foam is unlikely to light up, so for the insulation of the floor this material is quite suitable. When installing foam plates, it is very important to take care of leveling the surface of the insulation using the building level. This will greatly facilitate the work with the screed and the laying of ceramic tiles. Warming penoplex by one's own strength is even one that has no building experience for a man - this is one of the simplest and most convenient materials in the work.
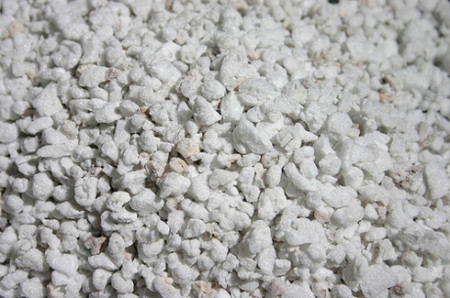
Pearlite is expanded sand.
It is not flammable, but has no equal in terms of heat insulation characteristics. But working with this material is not easy, it requires some skills. First of all you need to know that perlite is an ultralight material, and even a weak draft or a gust of wind can blow it off, and it will not be possible to assemble it any more. Therefore, work with this material should be carried out only indoors. If you work with penokleksom plates simply laid on the base, then from perlite need to prepare a mixture. To do this, two buckets of material are carefully poured into a suitable container and poured into a bucket of water, and then mixed. The mixture decreases in volume. Then they fill up the half-bucket of cement of grade 300-400 into the container, thoroughly mixing the mixture. Add a little water and stir until the desired consistency. The mixture should still decrease in volume, so add another bucket of perlite and about a half-liter of water. Because of the intensive mixing, the composition becomes plastic, releasing water at the same time. The mixture may seem too dry, but you can not add water to it, you need to continue stirring.
A ready perlite mixture is applied to a concrete substrate in a layer of 2-3 centimeters. Perlite must dry for several days (the time for complete drying of the mixture is usually 5-6 days), after which you can continue to work.
Warm floor in the bath
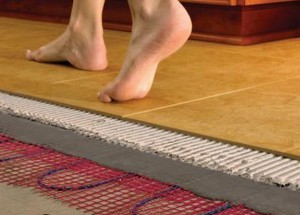
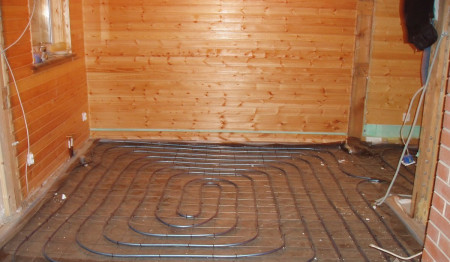
If in a bath a concrete floor, faced with ceramic tiles, which is a cold material, it makes sense to arrange a warm floor system. For the device of a water-heated floor, pipes of plastic, polyethylene or metal specially designed for this purpose are used. Heating is mounted on the concrete screed, just before laying the floor covering. The system must be equipped with a water pump and a temperature sensor. The pipes are connected to the hot water heating system of the bathhouse or apartment house, if possible. In this case, the sensor removes information about the water temperature in the system, which is regulated by the thermostat - when the temperature reaches a certain temperature, the system will shut down.
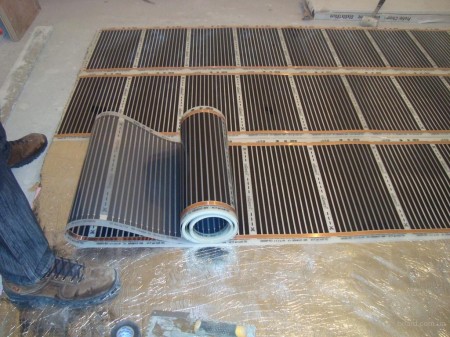
The water-heated floor is a rather complicated system, and its design and installation should be handled by professionals. The simpler version is an infra-red system of a warm floor, which, following the instructions, can be mounted independently. It is a cable in a strong hermetic polyethylene film, which conducts heat perfectly. The floor warms evenly, and the system is absolutely not afraid of moisture.
If, for some reason, there is no possibility to install a warm floor, then you can simply lay some removable covering on the tile. For this purpose, straw mats are perfect.
How to insulate a wooden floor - the algorithm of work
Before the insulation, the finished wooden floor must be completely dismantled. First of all, dismantle the floorboards and skirting boards. All elements that are removed, it is strongly recommended to number, so as not to get confused when re-laying.
Damaged, rotten and stale areas of wood should be removed and replaced with fresh bars or a board of the same size. The lower edges of the lag are enlarged by smaller bars, thus forming a support for the rough floor, which is made from cheap lumber. The cover is laid in such a way that there are small crevices between the boards - this is necessary so that the boards do not warp from the temperature drops. The planks of the rough floor are laid on the logs freely, without fastening.
If under the building of the bath the soil is heavily saturated with moisture, it is necessary to use a vapor barrier to protect the heat insulation layer from the evaporations of wet soil. The vapor barrier must cover the rough floor and the logs. If under a low level of groundwater, it is better to use a vapor barrier membrane, if high - waterproofing is required. You can use a common ruberoid or pergamina. The insulation should cover the entire floor area and capture at least 10 centimeters of the walls, forming something like a container. If roll material is used - stripes are overlaid with overlapping, joints are glued with adhesive tape.
To hydro-and vapor barrier is not "glued together", they must be attached to lags and walls. Heat insulation is tightly laid in the free space between the lags, leaving between the upper surface of the heat insulator and the bars a few centimeters of the air layer. If the thermal insulation closely adjoins the finish floor covering, it is necessary to make a crate to create ventilation. The step of the crate must be at least 40 centimeters. After this, add another layer of waterproofing. It is desirable to use a membrane material to prevent moisture from entering the insulation. The waterproofing layer should be placed between the thermal insulation and the lathing.
How to insulate a concrete floor in a bath
The concrete floor must be insulated only after the construction of the rough screed. As a waterproofing, ordinary thick polyethylene can be used. The film must be spread over the entire surface of the rough concrete screed, it must go to the walls at least 5 centimeters, unnecessary to cut off. If you use a roll material, between the stripes make an overlap of 10 centimeters, the joints are insulated with adhesive tape. Concrete floor can be insulated with the most ordinary foam, expanded clay, coal slag, etc. If foam is used, the plates are fixed to the floor with special plastic dowels - "umbrellas". A small layer of fixing solution is applied to the foam on top, after which a reinforcing mesh is placed on top. The thickness of the concrete screed above the foam should be at least 2 centimeters. After the reinforcement screed is completely dry, fill the black leveling screed. For this, a self-leveling mixture is used. The total thickness of the screed over the foam should be at least 5 centimeters. The final screed is leveled with a special needle roller to remove air bubbles.


