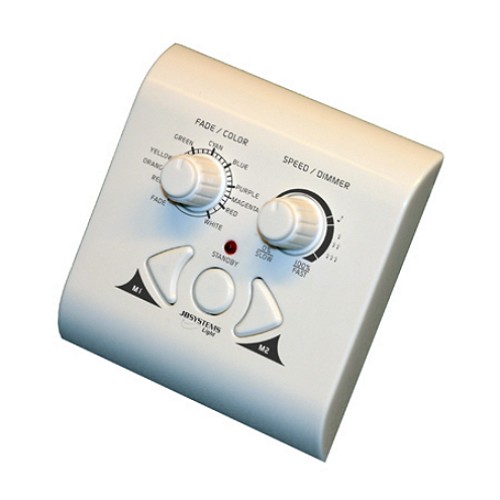
A small fairy-tale prince of the empire of light can be called a dimmer. The magical transformations of darkness into bright light are possible with his direct participation, it is sufficient to extend a hand. Want to install a functional dimmer in the apartment? Then boldly forward, back to where the sea of lights!
Content
For what purpose is the dimmer
Modern microprocessor technology once showed the world a multifunctional dimmer. Initially, the first dimmers had a mechanical control, the function of which was only to change the brightness of the luminaire.
Currently, the dimmer performs the following functions:
• Light intensity control
• adjustable on and off modes
• automatic shutdown
• remote control over existing signal transmission channels.
But this is not the limit. It is possible to connect several control buttons in parallel. Then lighting control can be made from different places in the apartment. However, the dimmer wiring diagram is very critical to interference. Therefore, it is simply necessary to know the element base of the dimmer and the wiring diagram.
How the connection scheme is arranged
The connection diagram of the dimmer switches is divided into mechanical and electronic. Mechanical dimmers are designed to connect halogen lamps and incandescent lamps.
The electric dimmer is a circuit of a variable resistor or autotransformer. Therefore, the dimmer is connected in series with the load power.
Compared with thyristor and triac dimmers, the autotransformer has significant overall dimensions, weight and requires effort in control. The most advantageous are compact electronic dimmers using semiconductor switches.
For dimmers of any type, a minimum load (40 W) is required. For this purpose, an additional load in the form of an incandescent lamp with insignificant power is installed in parallel.
The connection diagram of the dimmer is shown in this video.
How to install and connect the dimmer in the apartment yourself?
In order to connect the light glider with your own hands, you need to know its design.
Dimmer construction
The design of the simplest dimmer consists of a housing on which the rotary lever and two terminals are located.
A simple design can be used to adjust the brightness of incandescent or halogen lamps, as well as fluorescent lamps.
The dimmer is connected in the same way as the circuit breaker. Similar to a simple switch, the dimmer is connected to the break of the circuit supplying the load. Therefore, the connection and installation is identical: the dimmer is installed in a junction box, the order of the installation is the same as setting the switch.
In this case, it is necessary to pay attention to the conditions declared by the manufacturer when connecting the leads to the phase and load.
To do this, the marking on the dimmer armature is opposite the terminal used, the letter L.
What kind of lighting is controlled by the dimmer
Distinguish the main groups, the control of lighting devices which is carried out with the help of a dimmer:
• for ordinary incandescent lamps and halogen lamps with a working voltage of 220 V
• for low-voltage halogen lamps (transformer required)
• for fluorescent and LED lamps.
Therefore, the purchase of a dimming device is necessary for a specific purpose for specific lighting sources and the total power of lamps intended for adjustment is calculated.
One of the best ways to save electricity is a dimmer switch. The ability to turn on / off lighting allows you to extend the life of lighting in the apartment.
Methods for controlling dimmers
By way of control, dimmers are rotary, push and touch.
Rotary and push dimmer switches are easy to operate. For the rotary dimmer it is enough to turn or briefly press the control knob to change the intensity of the light flux. The touch dimmer distinguishes from the existing controls simplicity of manipulation. Adjustment is made by a small touch to the necessary key on the control panel.
A short touch is about 0.3 seconds. A longer touch allows you to adjust the lighting from the minimum value to the maximum. What is remarkable about the touch dimmer? Thanks to the built-in microprocessor technology, the dimmer "remembers" the latest settings. In this case, the last set brightness level of the illumination is achieved by a dimmer without flashes and jumps. The lighting is switched off in a similar way. The sensor dimmers are equipped with an infrared signal transmission receiver.
If you plan to install a dimmer, it will not hurt to know that there are basic methods of connection: single and group. A single dimmer is used for one or more lighting devices. In this case, the dimmer switch is connected in the same way. The group connection method assumes a single dimmer control center, which can combine up to 6 light zones.
The connection scheme of the LED dimmer is slightly different from the connection schemes for lamps. * LED dimmer is designed for fluorescent lamps and LEDs. The structure of this dimmer is additionally introduced with a throttle. Brightness and intensity of illumination in this case will correspond to the set parameters.
How to install the dimmer yourself
Pre-cut off electricity and check its absence in the network. We dismantle the old switch. The control key is removed from the dimmer housing and the protective frame is removed.
Then loosen the mounting feet and unscrew the mounting bolts. We take out the switch and disconnect the cable.
The dimmer wires are connected in the reverse order, as in the case of dismantling.
Find the terminal of the device marked with the letter L. This line is for the supply wire, connect it. Connect the second wire to the free terminal. Now fasten the dimmer housing, turn on the power and check the operation of the device.


