


Vintage wiring, or retro wiring - in fact, just an open wiring that is attached to insulators. At the beginning of the last century, this type of wiring was found in all buildings to which electricity was supplied - and in private homes and public institutions. Progress does not stand still, new technologies and building norms were gradually introduced. Retro wiring has become a rarity and over time it has been successfully forgotten. Although, in some old houses, such a wiring works successfully to this day.
Today, when the fashion for wooden houses is at the peak of its popularity, the retro wiring has again become in demand, as otherwise the wires in the log cabin can not be laid.
Content
Vintage electrical wiring in a wooden house

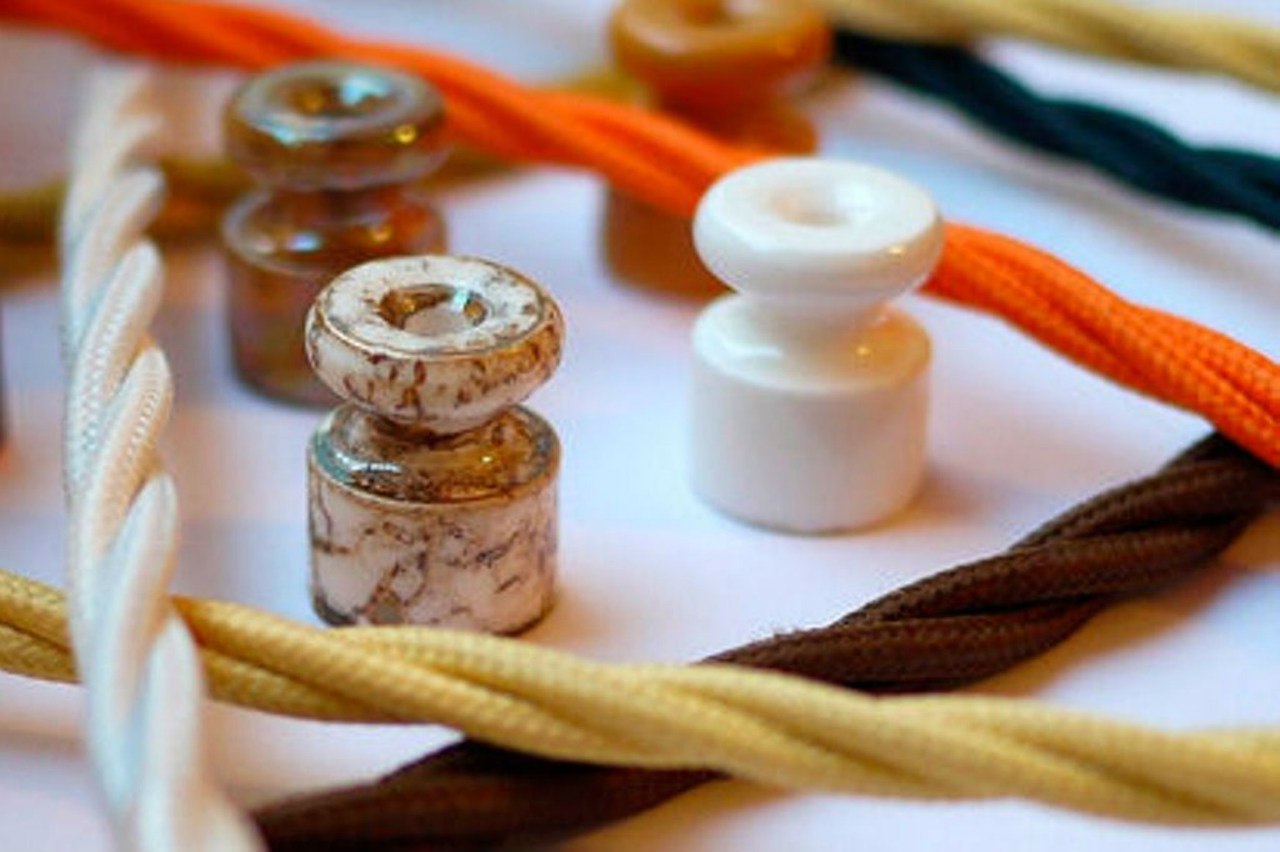
Wiring attached to insulators, today enjoys great popularity among customers. This indicates that its practical and aesthetic properties are appreciated. So what exactly is a vintage electrical wiring? These are single-core wires twisted together in a special way. Wiring of this type is laid on walls and ceiling by the open method with the help of insulators, which are fixed to the surface. When laying open wiring, it must be borne in mind that the distance between the insulator and the surface can not be less than one centimeter. This is a mandatory safety requirement.
The wires of the retro wiring are insulated in several layers. The first layer - vinyl insulation, the second or top layer is made of cotton fabric, which is impregnated with a special fireproof varnish.

Often there are wires in insulation made of fiberglass. The expensive cable can be insulated with a silk cloth, but this, as they say, for aesthetes.
The cables of the vintage wiring must be made of copper and have a section of at least a millimeter, along the outgoing lines - not less than 2.5 millimeters.
If electric scooters, cookers, or heating boilers are powered from the sockets, then in such cases wires with a larger cross-section are used.
Before you buy a cable, you need to make an accurate calculation of the load on the wiring, the method "by eye" will not work here, careless attitude towards such things as life shows, leads to very sad consequences. If you do not have enough knowledge and experience to independently carry out the necessary calculations, you should always turn to professional electricians for help.
estimated cost of materials
When planning the costs of installing vintage wiring, you need to focus on such prices:
• Cable Bay (100 meters) - 5-15 thousand rubles.

• Porcelain roller (1 pc.) - 20-50 rubles.

• Socket, switch (1 piece) - 600 - 3600 rubles.

• One unit of substrates, rotary and corner insulators - 500 - 1800 rubles.

installation of vintage wiring in a wooden house

To install retro wiring in a wooden house you will need the following tools and materials:
• Cable of required cross-section.
• Junction boxes.
• Overhead sockets and switches for retro wiring.
• Insulators.
• Substrates, corner and rotary insulators.
• Junction boxes.
• Screws, screws or nails.
• Combination pliers with insulated handles, screwdriver, sharp knife.
• Screwdriver, electric drill.
Vintage wiring is carried out only after finishing all the finishing works - on top of painted, varnished surfaces or wallpaper. When choosing the color of the parts that will be used for installation. it is necessary to take into account one interesting nuance. The fact is that absolutely identical parts, but painted in different colors can differ significantly in value. For example, a cable for wiring a brown color will cost about half as much as the same cable, but painted in golden color.

First of all, you need to select insulators, and only then fasteners. This is done in order to correctly combine the color and length of the rollers. To fix insulators, you need to choose self-tapping screws or screws of sufficient length.
Installation of vintage wiring is done in the following sequence:
First, the walls mark the location of switches, sockets, lighting devices, etc. When mounting retro wiring in a wooden house, the sockets should be placed at such a height from the floor so that there is no risk of damage to them.

The tracing of the retro wiring is done using the laser level, because the reliability and durability depend on how the wiring is done. For each room, the route is selected separately - for convenience in operation and in terms of aesthetics. If it is necessary to twist the cable from the wires, it is very convenient to use a screwdriver or a drill for this. If the cable is purchased in the ready-made form - you can proceed to fix the rollers-insulators.
In order for the vintage electrical wiring to be finished, it is better to use screws for a flat slot or conventional nails instead of screws. When marking places for rollers, you need to make sure that the distance between them is the same. Distance from the ceiling and also desirable to do the same along the entire length of the wire - so the wiring will look aesthetically pleasing. After the insulators are screwed, you need to carefully attach a twisted pair to them.

During installation, make sure that the wire does not twist into the "lamb" and does not hang. At the corners, the cable can be run through rollers or rotary tubes made of ceramic. To pass the wire through the wall, use copper or ceramic tubes. All branches and connections are made either by twisting with subsequent soldering and insulation, or ebonite or porcelain junction boxes (preferably with screw terminals) are used.

Installation of sockets and switches is made through a substrate. In addition to originality, substrates are necessary to ensure safety during operation.
Manufacturers of electrical materials
Most parts for modern vintage wiring (cables, switches, fittings, insulators, etc.) are purchased in Italy. The most popular products are manufacturers Fontini.


Gl Gambarelli is a company that manufactures cables, switches of various types, junction boxes for cables, and so on.
All the vintage elements are made in the design "antique", and made of high quality porcelain. All products are of high quality, which makes it possible not to worry about the possibility of ignition - all products meet the strictest standards of fire safety.
Retro wiring is not a cheap pleasure, and not everyone can afford it. Even if we take, for example, the products of the firm "Salvador", whose production facilities are located in China, it is not inferior in the cost of production to analogs from Europe. So to save on vintage wiring today and in the near future will not work.
As for the cable, the choice in terms of colors is very wide, and you can buy wires with braids of any color. Someone prefers shades of brown, under the color of wooden walls, someone likes the contrast - black on white, or vice versa.
By the color of the wires are selected insulators, rollers, junction boxes, etc.
Since open wiring, made in retro style, is quite expensive, you can save a little by doing only retrofit part of the wiring, and the remaining wires hide under the cover. If initially it is planned to hide the wire in the corrugation, instead of it you can use the cable channel of the corresponding color.
Another way to save on the cost of wiring is that some of the wires that will serve to feed the groups and which branch off from the switchboard are made from a conventional cable hidden under the skin.
Expensive retro wires are allowed from distribution boxes to outlets, switches and lighting. Most often, to create a retro design, this is quite enough, because the most noticeable part of the wiring is the one that is laid on the walls and ceiling.
Types of retroconnection connections
To connect the veins of a cable in vintage wiring, several methods are usually used:
Normal twisting with soldering. In this case, the ends of the wires are cleaned and soldered. In this case, do not forget to use the flux and not save on solder - then the connection will serve for decades without any problems.

Connection of terminal blocks. This method is ideal for cases where it is necessary to connect a vintage cable and an explosive (a conventional copper cable in PVC insulation) - this, by the way, is the only reliable method of connection in this case.

Finally
Summarizing all of the above, unfortunately, it is necessary to state that today in the domestic market only foreign producers "rule".
The price of vintage cables and wiring elements is very high, so this type of electricity supply housing is not affordable for everyone. You can save on installation, if you have the experience and the necessary knowledge - the vintage electrical wiring with your own hands is mounted quickly enough - there is no need to chisel the shrouds and grooves under the sockets.
And although recently there are domestic manufacturers that are engaged in the manufacture of elements of vintage wiring, these small, almost artisanal enterprises, and at the moment can not provide their products to everyone. Billets from porcelain are ordered at the same place in one place, the remaining parts in the other, and are collected all together almost manually.
Thus, demand remains unsatisfied, and the corresponding market niche remains almost empty. But, let's hope that this will not last long, and with time, every interior lover will be able to afford the vintage wiring "under the old days".


