In ancient times, the baths served, first of all, for the adoption of water procedures and sanitation, in the attic of the bathhouse in summer dried herbs and berries, the rest room was used for temporary residence. Taking into account all these moments, the dimensions of the structure were determined - there should be enough space for it to be washed, steamed and rest, and simple household work.
Content
- 1 Construction of the bath start with the layout
- 2 Choosing a place for construction
- 3 The foundation for a skeleton bath
- 4 Skeleton baths with our own hands - we construct walls
- 5 How to properly make a skin skeleton bath
- 6 How to make a roof for a skeleton bath
- 7 How to make a ceiling in a skeleton bath
- 8 We equip the floor in the bath
Construction of the bath start with the layout
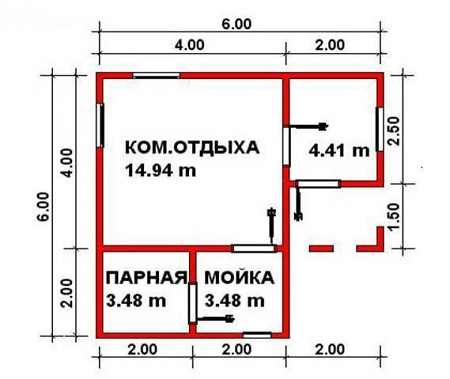
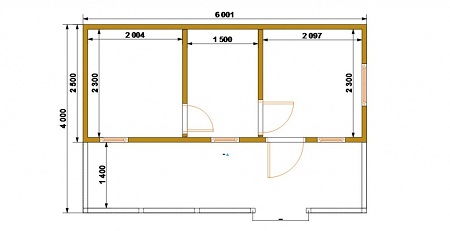
Before you start the construction should determine the total area of the bathhouse, detail the size of each room in it, determine the convenient arrangement of rooms.
On a sufficiently large area the frame bathhouse 6 by 6 m will be optimal, such dimensions will allow to allocate space for a spacious steam room, a washing room and a rest room.
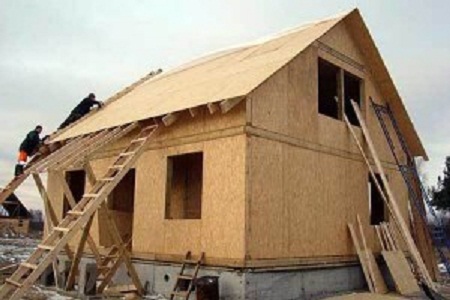
An important issue that needs to be discussed by the whole family will be the choice of the option of finishing indoors and outdoors, and, in fact, the solution of the question of what will be built of a bathhouse. If earlier baths were built from natural wood in a frame, then today it is quite an acceptable option to build a frame house - cheaper in value, but no less practical and reliable.
Choosing a place for construction
If there is a lot of space on the site, then it will not be very difficult to choose a suitable bathhouse. It will take only:
- adhere to the rules of fire safety,
- sanitary and hygienic requirements for this kind of facilities.
It will be better if the bathhouse is hidden from outsiders, you can place it in the depth of the site, or at least away from the fence.
Usually, a place is used for construction that is unsuitable for planting a garden or breaking up beds, preferably on a hill. If the site has an artificial pond, then the bath can be placed near it.
On small plots of the issue with the selection of the place may be more difficult, perhaps more convenient to build a sauna house in the form of extensions to existing facilities, it may be necessary to make changes in the framework baths project and reduce the size of some rooms or combine them based on the functional purpose.
The foundation for a skeleton bath
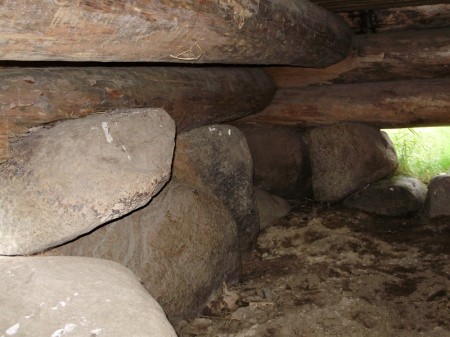
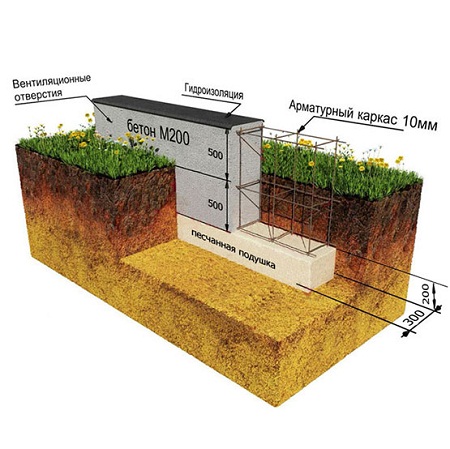
Depending on the ground on which the bathhouse will stand, you will need to determine the type of foundation. Since the structure will not be particularly heavy, the foundation for it can be laid columnar, block or belt. More often for frame structures resort to installation of columnar foundation, as the most economical, convenient, simple in the construction. Such a foundation is easy to restore if necessary, in addition, it is not exposed to moisture, intumescent or freezing in winter soil. An interesting option may be the use of boulders as supports, the so-called "boulders". butted foundation. It can be built on dense clay soils.
The principle of creating a budded foundation is to install poles at the corners of the structure, then - by installing intermediate supports from large boulders. They are installed in excavated holes so that the foundation of the future building is strictly horizontal. The difference in the height of the stones should not exceed 5 cm. Such a slight difference can be compensated for when constructing the strapping of the lower part of the frame. Further, all the free space between the supporting stones is filled with smaller ones.
More often in the construction of a bath resort to the construction of a strip foundation with anchor terminals - it can give the frame structure a special strength. It is not necessary to perform reinforcement of such a foundation on strong clay soils.
Experts recommend when casting tape base equipped with air vents (not less than 2, with a diameter of 8 to 12 cm) and technological - to connect all kinds of communications, a size exceeding the outer diameter of plug communications. A layer of waterproofing should be laid on top of the foundation.
Skeleton baths with our own hands - we construct walls
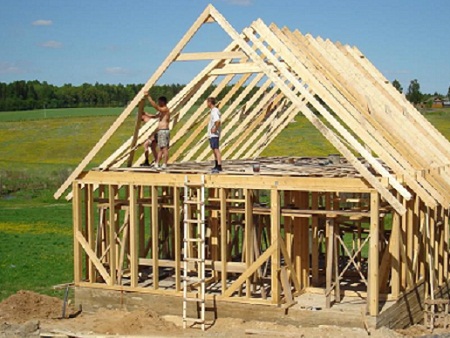
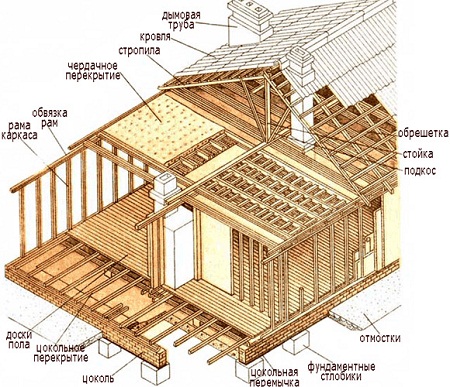
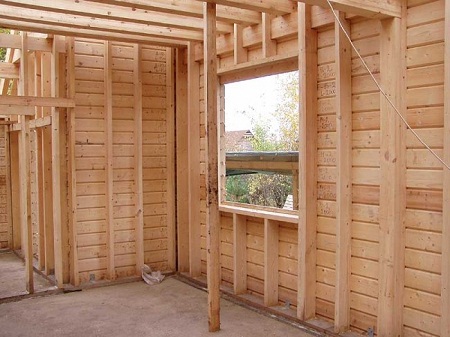
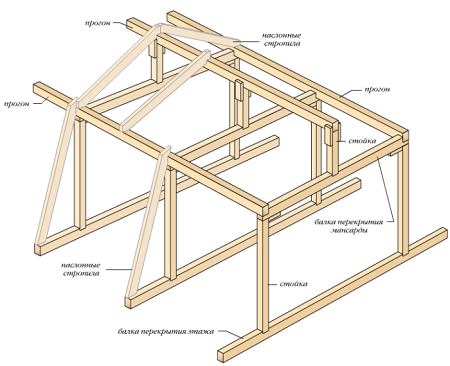
The optimal option for building a skeleton of a bath is the use of ready frames from racks, crossbars and straps. The recommended distance between the posts is 0,6 m, it is most convenient for laying the heat-insulating material and the cladding. In the intervals above the window apertures, the joints of walls and partitions will require the installation of additional racks. These moments can cause the need to change the step of the racks.
For the lower strapping use a bar with a section of 100x100 mm. Its connection in the corners is performed in a quarter and knocked down with nails. A bar of the same cross-section is used for the construction of the upper strapping, in order to give the carcass rigidity at the corners, 8 braces are set.
To avoid bias, the corner posts and the lower trim are installed on the reinforcement embedded in the foundation.
How to properly make a skin skeleton bath
The construction of a skeleton bath by their own hands will necessarily require the performance of insulation and skinning of the frame. For siding outside the walls you can use siding or lining. Under the lining should be laid a layer of waterproofing material:
- parchment,
- foil film,
- roofing felt or roofing felt.
If we consider that the sauna will be used for water and steam procedures, the creation of conditions for maximum heat preservation inside the premises will be an important point. Therefore, heat-saving materials for installation should be chosen high-quality. It can be:
- mineral wool in the form of plates or mats,
- isofomium - metallized with lavsan and foamed polyethylene foam,
- fiberglass slabs,
- other equally effective modern materials.
Laying such materials can be performed even by a person who does not have special construction training. To insulate the frame house, heat insulation pits 50 mm thick are used, they are laid between the posts, then fixed with racks, which are nailed with rubber washers to the outer skin.
As a waterproofing material, a polyethylene film can be used. After it is fastened, you can proceed with the installation of interior trim, which can be used as a lining made of recommended wood species or a planed board made of hardwood.
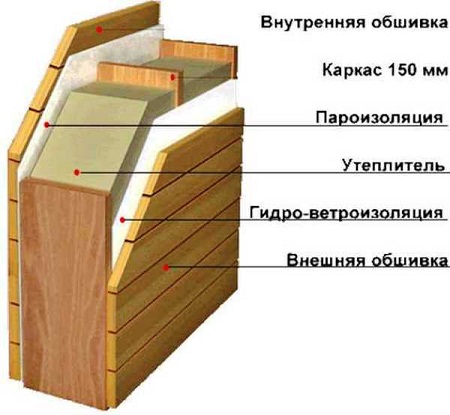
As a result of painstaking assembly, a wall consists of layers:
- outer skin,
- waterproofing,
- heater,
- polyethylene film,
- inner lining,
- an air layer of 5 cm in thickness is also mandatory.
How to make a roof for a skeleton bath
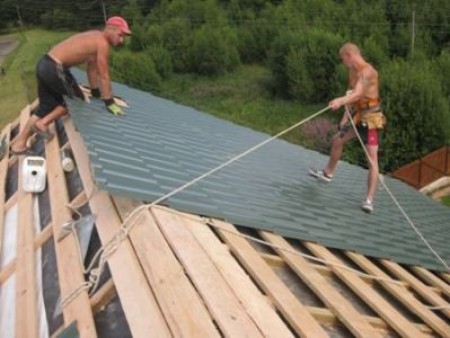
The roof of a bath differs in no way from the roof of any structure, it consists of rafters, reinforced battens and roofing material. The rafters can be inclined or suspended, the crate, depending on the roofing material used, can be made solid or sparse, as a roofing layer using sheet, piece or roll materials.
For the construction of rafters use thick bars (100x150 mm) or boards (40x150 mm).
For the construction of a continuous crate, sawn timber with a thickness of 20-30 mm or a plywood of 10-15 cm thick is used. The clearance between the elements of the battens can not be more than 3 cm, it is allowed in case of installing a piece roof, in the others - gaps are not allowed.
For a sparse lath, 24x40 mm slats are used, this option is used only for laying sheet materials. If asbestos cement slate is to be used for roofing works, the sawn timber is taken with a large section - from 30x50 mm, the step between their laying can be a maximum of 0.4 m.
When constructing the roof, it will be necessary to provide a place for the exit of the flue pipe, it is equipped with a special metal skirt. To exclude the possibility of ignition, the gaps remaining between the roof and the walls of the chimney are cemented. If a layer of heat-insulating material is included in the roof structure, then two skirts are installed, the first one is on top of the battens, the second - on the level of the lower edge of the rafters, incombustible materials - slag or expanded clay are placed between them, or glasswool is placed between them.
For the construction of the roof can be used:
- tile, natural ceramic or polymer-composite, such as shingles, shingles, tiles,
- roll materials, bitumen or roofing felt, lay it in 3-4 layers, it is not recommended to apply the sizing.
How to make a ceiling in a skeleton bath
Firstly, it should be noted that the overlapping of the bath can be done:
under the roof, i.e. one-sided, consisting in the installation of a base of beams 10x10 mm thick, joining the frame and laying the rafters, covering the side fragments and the facade part of the frame with a layer of heat-insulating material;
under the attic, i.е. bolochnoe, with the installation of the frame on the sleepers, narozhnikam or club, with a distance between the beams of about 60 cm.
To warm the ceiling, you must choose hot summer days. If construction is made in rainy weather, then first make a roof, then - heat insulation. There are a lot of ways to assemble the thermal insulation system of the ceiling, but suitable for the bath room will be one that will not only keep the heat, but will withstand the effects of high temperature and high humidity.
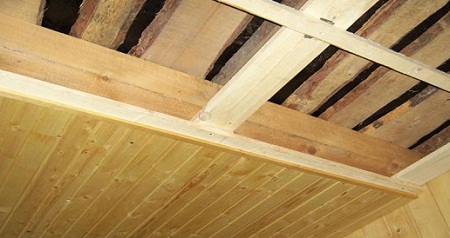
According to the design, the bath ceilings can be suspended, filed or laid.
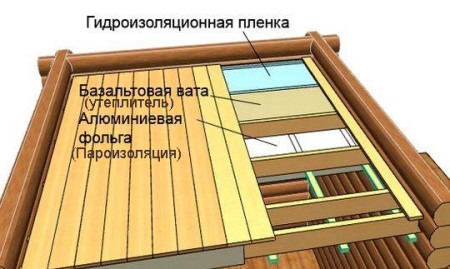
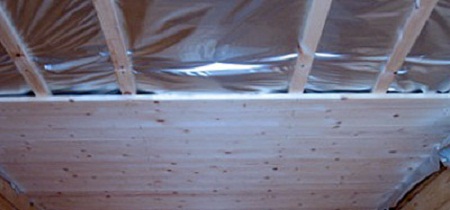
Installation of a false ceiling begins with a packing of a bar of section 30х40 mm on the bottom edges of a beam or rafters. It is assembled with a grooved board, the remaining space is filled with layers of steam and waterproofing, then with a heat insulation material, then layers of steam and waterproofing are laid again. On top of the overlap, a roofing layer is assembled or the running board is laid using a grooved material with a thickness of 35 to 50 mm.
When arranging the false ceiling, a punctured board is sewn along the bottom of beams or rafters.
Filling of the resulting space is carried out in the same way as in the construction of a false ceiling. On top of the resulting overlap, the running board is laid, using a grooved material with a thickness of 30 to 50 mm.
For the equipment of an uncracked roof, it is possible to apply a floor type of ceiling, for this, rafters or beams are covered with sheet-shaped boards, then a layer of vapor barrier is applied (two-layer foil or technical polyethylene film).
Installation of the air duct, attic hatch and chimney is performed between the beams and rafters, so as to maintain the integrity of the structure. If such an option fails to implement, then at the intersection of the ceiling with the above details remove the excess beam, between the neighboring bars with bolts fix the same timber with a metal clip. The ends of the missing fragment of the beam lead to the middle of the crossbar.
We equip the floor in the bath
The layout of the skeleton bath will also require you to decide on the variant of the floors: they will be flooded or laid on lags or beams. The main problem in the construction of beautiful, warm wooden floors is the impossibility of processing wood with paint and varnish materials, untreated wood will sooner or later rot under the influence of moisture and high temperature. When the floorboards dry up, there usually appear cracks, which leads to the appearance of drafts - in fact it was already mentioned that a natural-ventilated foundation should be built under the bathhouse.
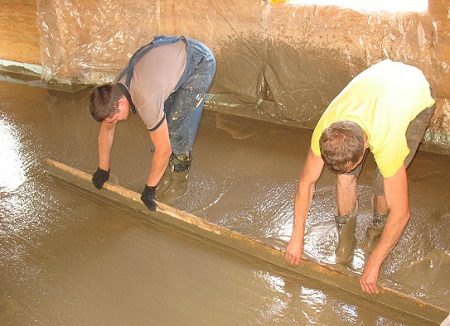
The grouting of the floor with cement mortar is carried out according to the principle similar to the construction of floors in the pool - in accordance with the rules for waterproofing and technologies for the disposal of used water. Pouring the floor should provide a slope, allowing unhindered drainage of water. Naturally, in advance it will be necessary to determine the optimum places for placing the drains and to bring pipes of the required diameter to them.
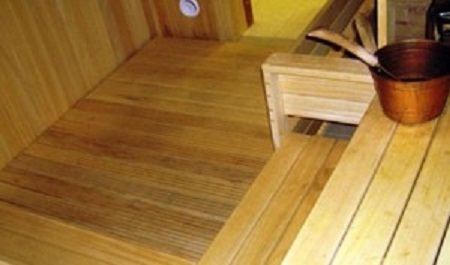
For convenience, on top of the cement screed lay collapsible flooring, using for it a non-punctured board. Gaps between the boards can reach 1 cm - so the process of drying them will pass more actively, and the probability of development of putrefactive processes will decrease. The number of sections of such demountable floor can be any, it is desirable only that when stacked they do not warp and they could be lifted. As far as possible, after the bath day, the section of the floor should be taken out onto the street and dried well.
Before flooring, all of their wooden parts can be treated with special impregnations on an oil base, designed for rooms of steam rooms.
After installing the sauna stove, the bath house will be ready for operation - the frame construction does not require waiting for time to shrink and shrink walls.


