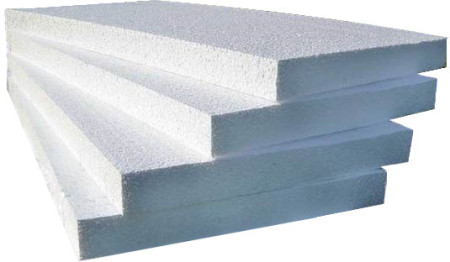
To build a truly warm and cozy home, it must be properly insulated. And you need to insulate not only the walls, but also the roof, as well as the ceiling. One of the best options is to create a "pie", which consists of a thermal insulation material, a layer of vapor barrier and waterproofing film. With such insulation, mineral wool is usually used, but there is also a well-known and more affordable alternative - a conventional foam plastic. With polystyrene it is much easier to work, and in terms of its thermal insulation characteristics it is not inferior to mineral wool, being, moreover, hygroscopic material. What advantages and disadvantages of this material, how to insulate the ceiling with polystyrene - this will be discussed in this publication.
Content
Advantages of foam plastic as thermal insulation material
The method of insulation of the ceiling in a private house depends on the type of roof. If the attic is used as a living room, the foam is laid between the rafters. When the attic space is non-residential, it is better to insulate the floor.
Is it possible to insulate the ceiling with foam plastic in a city apartment? Certainly. But in this case, the laying of the insulation is possible only inside the room, and the heat-insulating layer "steals" 13-15 centimeters of height. As already mentioned, the foam plastic is hygroscopic, so there is no need to lay steam and waterproofing materials. However, if you insulate, for example, the ceiling in a wooden house, then it is desirable to lay the vapor barrier film, or carefully treat all joints and crevices between the foam plates using a mounting foam or sealant.
Mineral cotton wool eventually shrinks, which can lead to the appearance of so-called "cold bridges". Polyfoam is devoid of this defect, and throughout its lifetime does not lose its properties. For insulation of the ceiling, it is sufficient to use plates of foam plastic with a thickness of not more than 5-6 centimeters. This is especially true for apartments with a small ceiling height.
Technical characteristics of the material
• The foam has a very low thermal conductivity of 0.037-0.041 W / mK, and it retains its structure under strong temperature changes.
• The foam is resistant to mold and fungus.
• If the foam is placed in water for a long time, it will absorb only 0.5-1.5% of the volume.
• The material has good sound insulation properties due to low dynamic rigidity.
Disadvantages of foam plastic
Short service life. It is approximately 10-20 years - if during installation all the conditions of the insulation technology are met. If it is violated, the service life of the foam is significantly reduced.
Polyfoam can not be insulated with a house if it does not have good ventilation, since the foam is not a vapor-permeable material. This means that inside the house there will be increased humidity, condensation will appear. In this regard, there is an excellent environment for the reproduction of various kinds of fungi and mold, which is especially dangerous for people suffering from respiratory diseases. Therefore, when warming the house with foam plastic, you need to take care of the installation of quality supply and exhaust ventilation in advance.
Buying polystyrene, it is necessary to demand from the seller a certificate of quality, because in the modern market there is a lot of poor quality material, made by handicraft.
Calculation of material for insulation
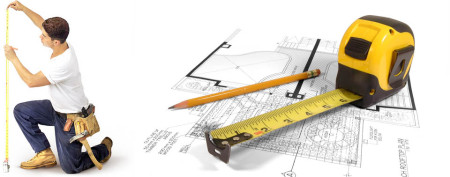
It is not necessary to estimate the amount of material, as they say, "by eye". Professional builders always calculate the required amount of material with the utmost precision to avoid unnecessary expenses and waste of time. To calculate the area of the ceiling, you need to measure its width and length. The obtained data should be multiplied. For example, the length of the ceiling is 6 meters, width - 4. We multiply: 6x4 = 24 square meters.
To create a thermal insulation layer, a foam of different thickness and density is used.
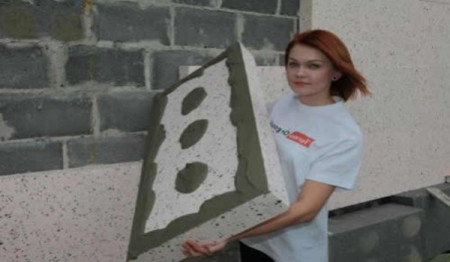
The thickness of the foam to insulate the ceiling must be at least 5 centimeters. In this case, a material having a density from PSBS-15 to PSBS-35 is selected. For reliable fixation of foam plastic sheets on the ceiling, plastic dowels- "fungi" and special glue mixtures are used, which are quite expensive. For the sake of economy, the use of conventional cement based adhesives is acceptable.
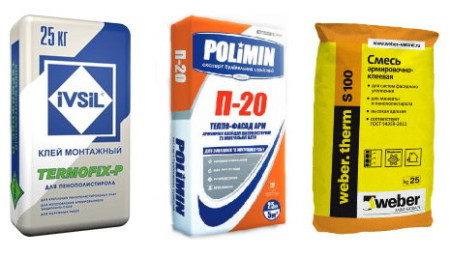
Varieties of adhesive mixtures for foam
When choosing an adhesive, you must take into account several points:
On the package there should be an inscription that the mixture is intended for expanded polystyrene plates.
Depending on the manufacturer, the adhesive mixtures are divided into two types: "for gluing the slabs" and "for gluing the slabs and the protective layer". The first type of glutinous mixtures is much less expensive, but it is suitable only for fixing heat insulation plates and sealing seams. The second kind, although it costs more, but with its help you can fasten the reinforcing mesh and use it as an equalizing layer for further surface finishing.
Glutinous mixtures from different manufacturers are not recommended.
The expense of glue directly depends on how much an equal surface to which it is necessary to attach a heater. On average, the consumption of glue mixture is 5-6 kilograms per 1 square meter. The same amount will be spent on gluing the reinforcing layer and leveling the surface. All manufacturers print on the package the right proportions for mixing, but in the process of work there can be some nuances:
Sometimes it so happens that you need to make the glue somewhat thicker than indicated by the manufacturer. The finished mixture must have a consistency such that it does not spread on the spatula and retain its original shape.
To glue the reinforcing mesh, the mixture can be made somewhat lighter, so the mesh will be better pressed into the glue. For the final leveling layer, the glue can be diluted even more vigorously - to the consistency of liquid sour cream.
Thermal insulation of foam by own hands
wireframe insulation
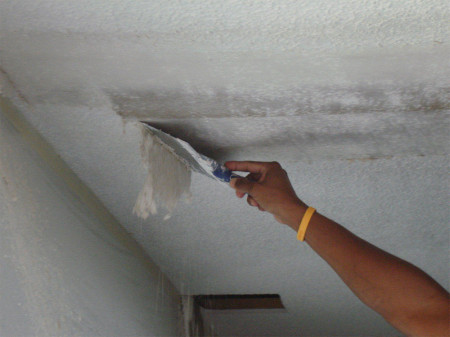
First, you need to properly prepare the surface for fixing the foam sheets. Removes the old finish - wallpaper, paint, whitewash, etc. Then the ceiling is thoroughly cleaned from dirt and dust. If there are noticeable irregularities, they are removed, the grooves are closed with a primer and putty. On the treated surface it is desirable to apply antiseptic.
Important point: all work on the installation of electrical equipment is carried out before the installation of insulation.
In the process of work it is very important to observe a certain temperature regime - from +5 to 30 degrees Celsius maximum. At this temperature, the foam will adhere well to the surface.
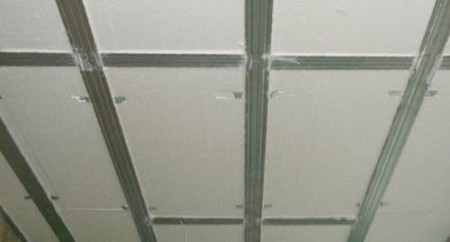
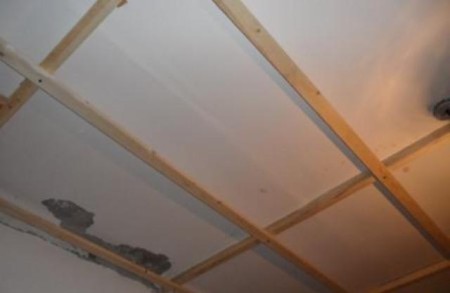
The type of frame for installation is chosen, based on its financial capabilities, the level of humidity in the room, which needs to be insulated. To install the frame, you can use wooden bars or a metal profile.
The sheets of polystyrene are cut precisely to the size of the cells of the frame, since the foam, as mentioned above, does not change its volume and shape with time.
First of all, install longitudinal profiles, at a distance of 50 centimeters from each other. All the details are attached to the dowels, controlling the fastening of each part of the frame by means of a level. After this, the cross profiles are set with the same step - 50 centimeters. The longitudinal and transverse profiles are fixed with self-tapping screws.
Polyfoam to the surface is fixed to the glue and plastic dowels - "umbrellas". All the seams between the sheets must be treated with sealant or foam to ensure the insulation of the thermal insulation layer.
If the frame is made of wooden blocks, a vapor-proof film is attached between the foam layer and the finish coat to protect against condensation.
As a finishing material for insulated ceiling, plasterboard can be used. For its fastening one more skeleton from a metal profile to which sheets of gypsum cardboard is fixed by self-tapes is necessary.
fastening of foam on glue
If the budget for repairs is limited, and time, as they say, is pressing, one of the most suitable options for the insulation of the ceiling is the fastening of sheets of foam plastic to the glue without a crate. With such insulation with foam plastic technology is somewhat simpler than the above. In addition, for greater savings, you can buy a glue mix for ceramic tiles instead of a specially designed glue for foam, although without extreme need to do so is not recommended - although the glue for the tile is good at fixing the foam to the ceiling surface, it is better to use specially designed for this glue mixtures. But if you still need it, together with glue, not intended directly for fixing the foam, it is necessary to use plastic dowels - "fungi".
It often happens that the ceiling, especially in old buildings, is whitewashed with a solution of lime, which is almost impossible to completely remove. In this case, a glue solution is applied to the surface of the ceiling and waiting for its complete drying. After that, you can start to glue the foam.
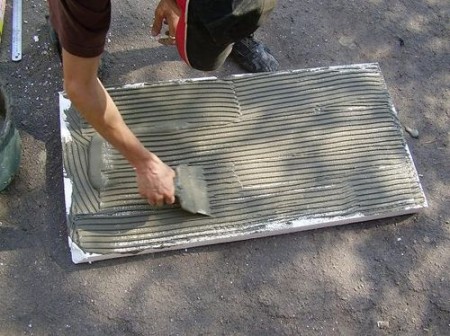
On the foamed plastic sheet, the glue is applied pointwise or with a notched trowel to the entire surface, after which the sheet is pressed firmly against the surface and held for several minutes for better fixation. Thus, cover the entire area of the ceiling.
After the glue has completely dried, the plastic foam is additionally fixed with plastic dowels.
Sometimes, instead of polystyrene, polystyrene is used to insulate the ceiling. In this case, its surface must be made more rough for better adhesion. To do this, you can make longitudinal and transverse furrows on the back of the sheet with a clerical knife, but it is better to use a needle roller for gypsum board or an ordinary metal brush.
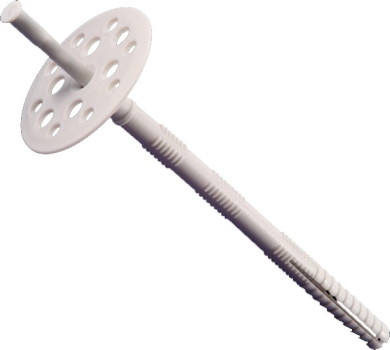
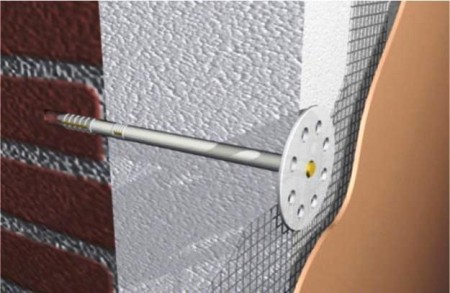
A plastic dowel for additional fixing of the foam consists of a sleeve, into which a nail is hammered, and a wide bonnet. For foam plastic, dowels with a plastic nail are used, which will not contribute to the appearance of cold bridges.
For the dowel-nail a hole is pre-drilled, which should be approximately one to two centimeters deeper than the length of the plug. Calculate the depth of the hole is very simple. To do this, you need to summarize the thickness of the foam sheet, the thickness of the finish finish, the vapor barrier and plus five centimeters of the recess into the ceiling. So, at a thickness of a sheet of a foam plastic in 5 centimeters it turns out approximately 5 + 1 + 5 + 2 = 13 centimeters.
On one sheet of foam plastic I strike 5 anchors - 4 in places of connection of sheets and one in the middle. So ensure a smooth and tight fitting of the insulation to the surface.
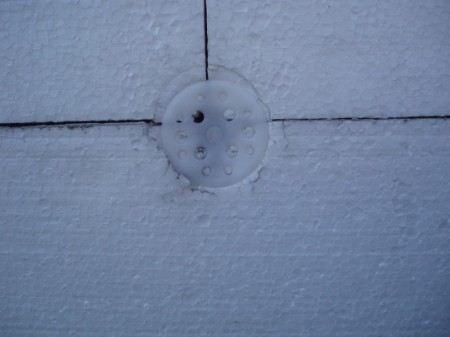
The dowel cap must be flush with the surface of the sheet. After this, the nail is clogged, and the cap is embedded in the foam for several millimeters. This is necessary so that the dowels do not interfere with the application of the finishing lining.
If the nail does not get to be completely clogged, the protruding part is cut with wire cutters.
An important point: sheets of foam on the ceiling must be fixed strictly in staggered order. If in some places the joints of the sheets stick out, they are leveled with the help of a float for foam.
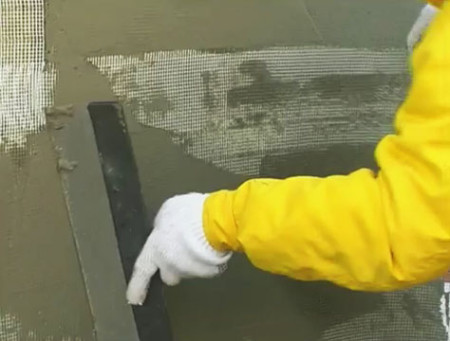
Before applying the finish, make a reinforcing layer. To do this, apply a glue solution to the surface of the heater, into which the fiberglass mesh is heated, then do not touch the surface until it dries completely, a second layer of the solution is applied, which must also dry completely, and only then proceed to finish the surface.
To sum up: the foam plastic as a heater proved to be quite good: it is inexpensive, easy to handle, very light, it can be bought in any building material store. This is one of the most inexpensive and affordable insulation materials, which, however, has several significant drawbacks, which were described above.


