Ceiling and floor skirting boards are fixed at the end of the repair, this is the finishing stage of the finishing works. To glue the plinth of the plinth to a level surface everyone will be able to, but it is not right for everyone to correctly and beautifully cut the corner of the plinth. Modern skirting boards made of polyurethane foam and expanded polystyrene are easy to join into corners, and cutting them is very easy. How to cut the angle of the ceiling skirting, what tools to use at the same time - these and other questions will be answered within the framework of this publication.
Content
Ceiling plinth, corners: features and methods of forming
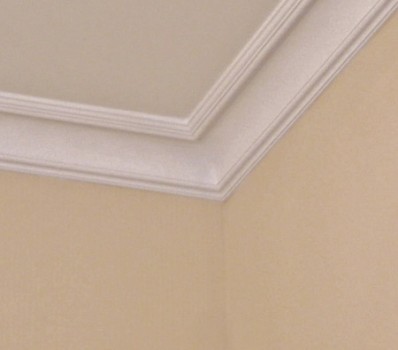
Angles, as is known, are internal and external. With the design of external corners, just the main difficulties arise, since the wrongly cut outer corner of the ceiling skirting is very noticeable. This task can be solved in several ways.
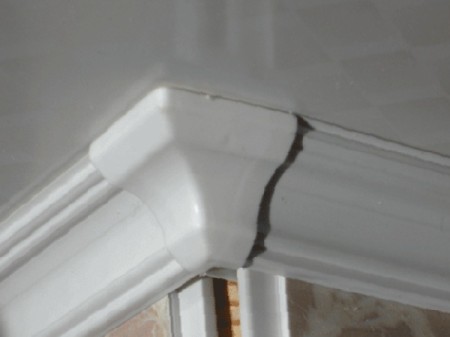
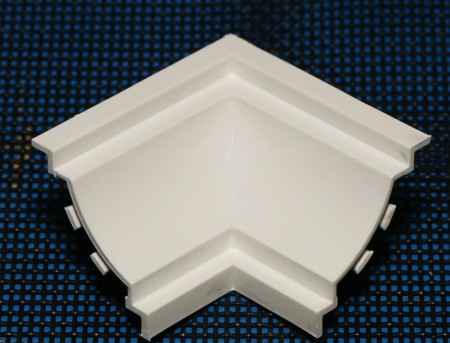
For example, you can buy special accessories for ceiling skirting boards. In this case, you do not have to cut anything at all - the plinth of the plinth needs only to be adjusted to the length of the wall. Fittings for ceiling skirting are internal and external corners.
In the corner insert the ends of the plinths of the plinth, after which they glue the plinth to the ceiling. This is the easiest way, requiring neither experience nor skills - quite a bit of patience and accuracy.
The second, more complex version, requires, in addition to accuracy, knowledge of even the theoretical part of the question. It consists in trimming the edges of the plinth at a precise and even angle. In this way, the edges of the baseboard are firmly and evenly attached to each other. In order to cut the edge of the plinth at the right angle, you can use a chair - a special template tool. If you do not have a chair at hand, then you have to cut off the plinth on the markings. Below we consider both methods.
ceiling skirting: how to make a corner with the help of a chair
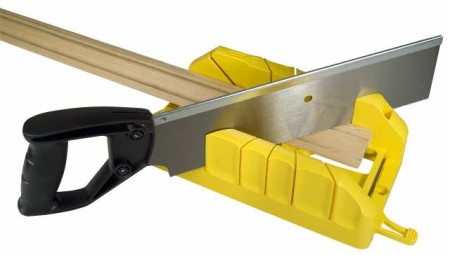
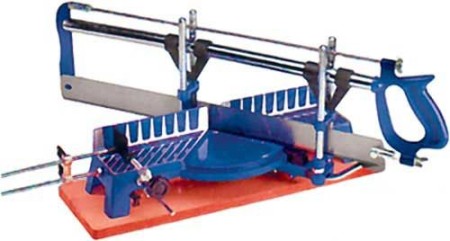
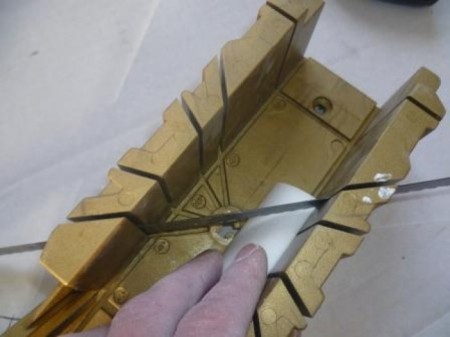
The chair will greatly facilitate the task if the person does not have the necessary experience. Appearance and design of the chair can be different, but the purpose of the tool is one. The chair is widely used by carpenters, carpenters and finishers to smoothly and quickly cut the part at the right angle. On sale there are several variations of the instrument, for example, the turning chair, but for the baseboard the simplest in the form of a wooden tray with slots for hacksaws in the walls.
With the help of such a chair, it is possible to cut parts at an angle of 45 and 90 °. You can make a simple chair with your own hands, it's not difficult at all.
With the help of a more complex design, angles of 90, 45, and 60 ° can be made, and saw material both vertically and with a 45 ° tilt of the saw blade. Professionals use a turning stool in which the saw blade is fixed at any angle with respect to the part.
A simple chair is effective only if the room has even angles (90 °). The swivel chair can be used for any angle value.
If the room has only straight angles, then with the help of the most simple chair, you can quickly cut the ceiling skirting at an angle of 45 °. To do this, a strip of plinth is inserted into the stool, the saw blade of the metal is wound into the cutting slot at 45 °, after which the part is cut off.
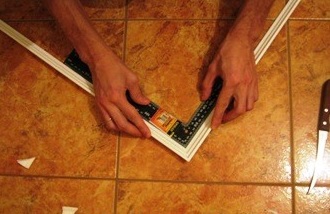
Then the second bar is inserted into the stool, which you need to dock with the first one. The hacksaw is inserted in the opposite direction - into opposite slots at an angle of 45 °, and the part is cut off.
If a right angle is formed when the cut edges are joined, then everything is done correctly and the plinth can be glued.
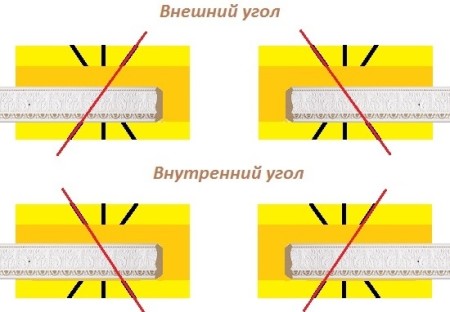
When cutting a ceiling skirting with a stool, the procedure depends on what angle you want to make - external or internal.
Outside corner of the ceiling skirting:
Plank, which will be located to the left of the corner, is applied to the wall of the chair from the back with the back side up. The hacksaw is inserted into the near left or far right groove of the chair. The bar, which will be placed to the right of the corner, is placed in the chair in the same way, only the blade of the hacksaw is inserted into the far left or near right groove.
Inner corner of the ceiling skirting:
The bar, located to the left of the corner, is applied to the near side of the chair with the back side up. The hacksaw is inserted into the near right groove.
The right lath of the skirting board is inserted in the same way in the stool, only the saw blade should be in the near left groove or the far right.
skirting ceiling: how to cut corners without using a chair
If the chair for some reason to use no opportunity, and glued ceiling skirting is necessary, the corners on the ends can be done in a different way. Experienced masters use the marking method, which further cuts the material.
From the tools you will need the following:
• Ruler.
• Knife clerical.
• Corner.
First of all, the size of the corners in the room is measured. This is done using a tool such as a corner, which is applied to the ceiling in the corner part of the room. The indicator should be equal to 90 ° or so. If the indicator is more or less, then the corners in the room are uneven, and the ceiling skirting will be more difficult to qualitatively fit them.
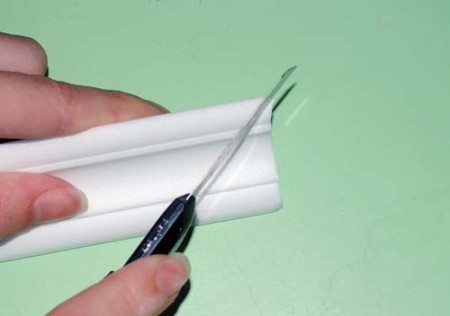
To the plank of the ceiling skirting board at an angle of 45 ° we apply a ruler and carefully cut the angle of the ceiling skirting with a stationery knife. It is advisable to cut off excess parts with one strong movement.
If the plinth is made of solid materials - wood or plastic, then the cut line is first marked with a pencil, then they are threaded using a hacksaw on metal or electric jigsaw.
Before gluing the treated slats of the ceiling skirting to the surface, it is necessary to check whether the angle is correctly made. To do this, the two slats are connected to each other on a flat surface, and the angle is measured with the corner.
If the angle is not straight, measure its degree, the obtained value is divided exactly in half, thus obtaining the desired degree for marking the rubber of the skirting board. For example, if the angle is 70 °, then the plinth must be cut at 35 °.
If the joint is not dense enough, the edges of the slices are gently pruned or sanded with sandpaper until the desired result is obtained, and then the joint is checked again.
How to properly glue the ceiling plinth
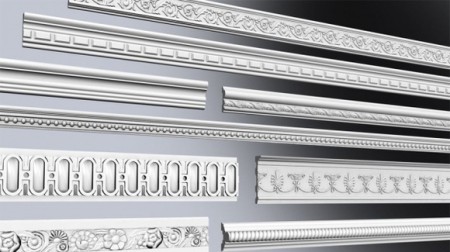
Manufacturers produce a ceiling skirting of different texture with different thicknesses and widths. The plinth can be convex and concave. The standard plank of the ceiling skirting has a length of 2 meters. When choosing a skirting board, each is guided by his personal preferences and financial possibilities, but there are several nuances that need to be considered when sticking a skirting board on the ceiling.
If the ceiling in the room is low, it is better to choose a narrow baseboard-baguette, since a wide plinth visually makes the ceiling even lower. For a room, pasted wallpaper, which is decorated with floral ornament, a simple smooth skirting board without a pattern is good. Under the monophonic walls you need to choose a plinth with texture and pattern.
Regardless of which type of ceiling skirting will be preferred, you need to correctly calculate the required amount of material. To do this, the length of the perimeter of the room should be divided by the length of one strip of plinth and add two of three bars.
To fix the ceiling skirting you will need:
• Knife.
• A pencil.
• Sponge.
• Adhesive mixture.
• Ceiling baseboard.
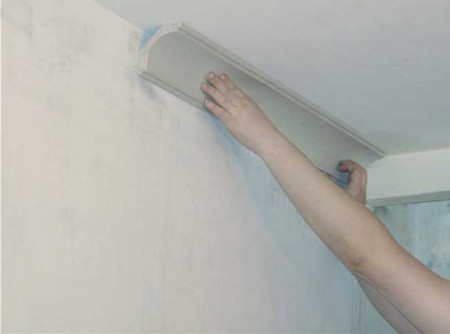
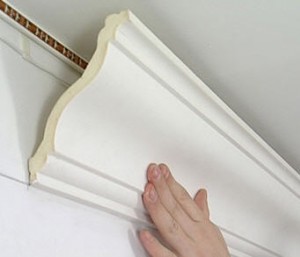
The skirting board is glued with one side to the wall, and the other to the ceiling.
The surface of the walls and the ceiling is not always perfectly flat, so you do not need to press the plinth strongly, otherwise it will repeat all irregularities. After the plinth is glued, the voids under the irregularities can be filled with filler or sealant.
Ceiling skirting begins to glue from the corner of the wall, which is located opposite the front door. As for the glue, then, of course, it is best to use polymer glue compositions specially designed for ceiling skirting. But such glue has one drawback - plinth should be pressed to the surface for a long time so that the glue has time to "grab".
Most often, glue "torque-installation", "master glue", or make a mixture of glue PVA and putty.
White ceiling skirting can be painted, if there is such a need. For this, the already glued material is shpaklyuyut, in the corners and the joints of the plinth plinth scraped with fine sandpaper and primed. After that, you can apply the paint. All the above preparatory work before painting is necessary in order that the paint does not roll off the surface. Paint is most often selected for the color of walls or ceiling.


