The construction of housing from wood is a very ancient tradition of Russian architecture. Even now, when there is not the slightest shortage of building materials, many developers prefer wood to natural, eco-friendly material that creates an inexpressible warmth and comfort in the house. Residents of cities, erecting unpretentious summer cottages, often opt for wood, as the most accessible and easy-to-use building material. However, for permanent and temporary housing, electricity is needed. The rules of laying electrical wiring in wooden buildings have a number of features, which we will discuss in the framework of this article.
Content
Step One - Design
At this stage, the way in which wiring will be installed, as well as the location of all necessary elements - switches, lighting devices, flaps, sockets, etc., will be determined. The project should be carefully and carefully thought out, since the safety of living in a wooden house depends on the method of wiring installation and all its elements. For the drafting of the project, especially in the absence of any experience in this area, it is strongly recommended to invite a professional from the wiring organization home. He will inspect the entire building and note the optimal location of all lighting fixtures, sockets, switches, etc., and also will tell you how best to make the installation of electrical wiring in the house.
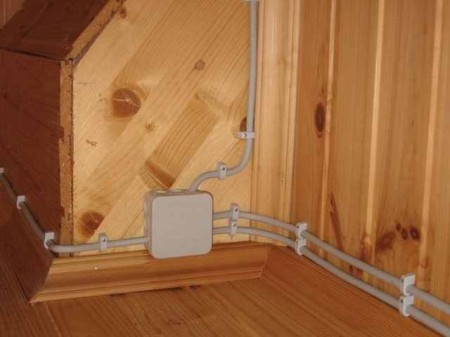
In wooden houses, it is allowed to lay wiring in a skirting board containing a cable duct, in PVC (PVC) boxes, rigid and corrugated PVC pipes, metal hoses and metal pipes.
Installation of external wiring
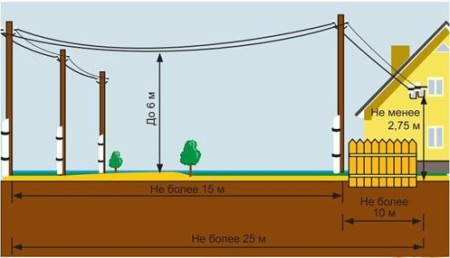
After all the documentation is ready, including the project, they proceed directly to the installation. First of all, it is necessary to bring the cable from the power line to the house. Cable to the house is pulled either through the air, or laid under the ground. The first method is the fastest and least expensive.
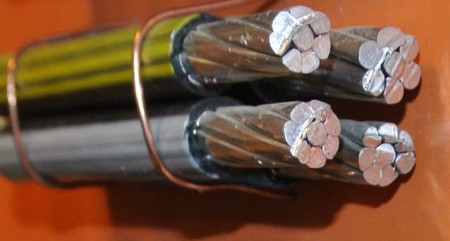
A self-supporting cable is used, the cross section of which depends on the power consumption and the number of phases. The laying of cables under the ground, with all the high cost and labor, has a number of advantages.
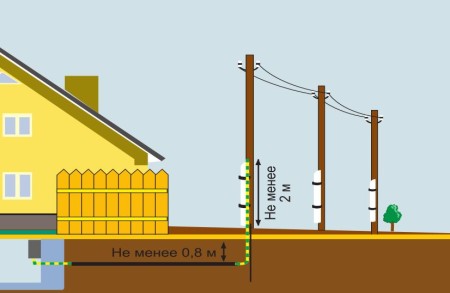
First, the cable does not spoil the appearance of the building. The service life of the cable increases, since it is impossible to damage it underground (if the cable was laid according to all requirements). For underground laying, use copper copper cables.
Installation of the switchboard
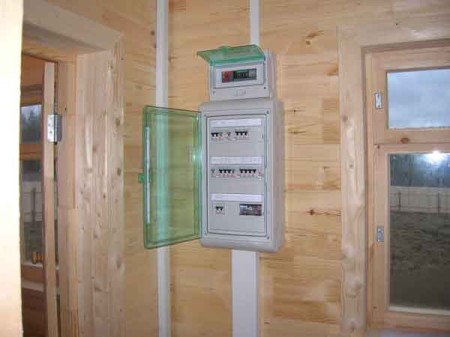
After the cable is brought to the house, it is launched through a hole made in the wall of the wall into which the metal sleeve is inserted. The wiring in a wooden house is made through an input distribution switchboard. It must be installed in such a place that access to the shield is not limited to anything. Shield can not be installed in rooms where there is high humidity. Inside the switchboard there are automatic safety switches. It is strongly recommended to use only high-quality products from well-known and proven manufacturers - it's unacceptable to save on your own safety!
Installation of wiring inside the house made of wood
The first thing to remember is the negligent attitude to the installation of wiring in a wooden house - one of the main causes of the fire. For wooden buildings, there are two ways of laying the wiring - open and hidden.
open method
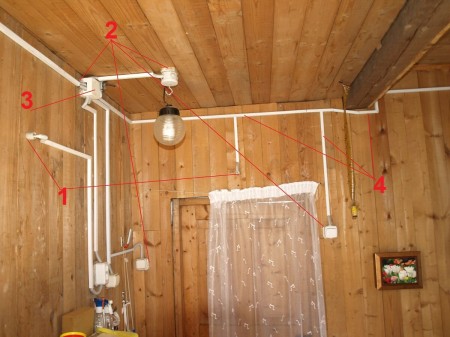
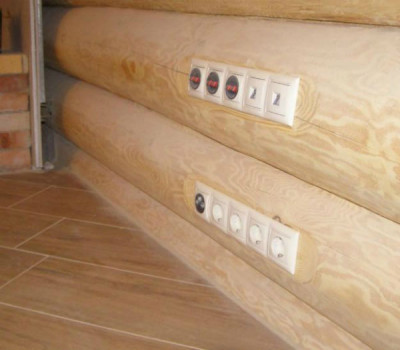
As you can see from the name, in this version, the wires are allowed to run through the walls. This is the safest method of laying electrical wiring in buildings made of wood, and the cheapest. The wire is laid on the walls, ceiling and other elements of the building. You can hide it in different ways: you can decorate it like a retro wire or put it in a box or corrugated PVC tube. The box can be selected in any color, up to the imitation of a tree. Most often they are used in houses where the walls are either lined with lining or made of round logs - that is, on a flat surface.
Another way of outdoor wire installation is the so-called retro style. At the same time, a cable that looks like a pulled out cord is attached to the wall using ceramic insulators.
Such open wiring in a wooden house is highly secure, since the retro-wiring cable has several layers of insulation, and there is a gap between the wooden surface and the cable.
concealed wiring in a wooden house
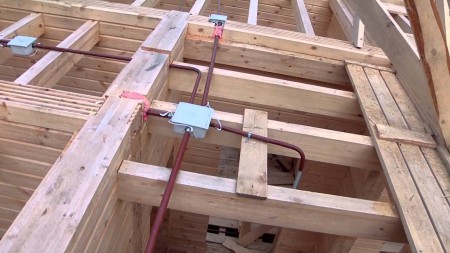
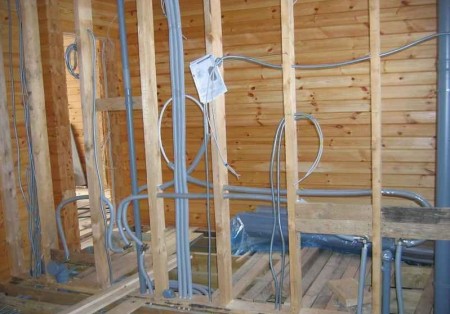
This is an expensive and labor-intensive method of wiring installation. In addition, in case of a fault, there is no direct access to the wires, since they are hidden inside the walls. But, nevertheless, a lot of developers prefer a hidden method, because they do not want to spoil the interior with wires and switchboards. Concealed wiring is most often installed in the process of building the walls of the house. The wire is hidden in a galvanized or paint-covered metal tube.
Tracing to lighting devices, outlets and switches is done in special holes. Speaking in general, the laying of wiring by a hidden method is a very expensive and time-consuming process, and it is justified only from the point of view of aesthetics. When installing concealed wiring, special materials are used to provide maximum protection against fire. So, in the ceilings of the house the cable is pulled in a pipe made of non-combustible plastic. It should be taken into account that during the further work and operation of the house, the pipe and cable should not be mechanically affected. Wires for electrical wiring in a wooden house inside the walls are also laid in grounded metal hoses or metal pipes, which must necessarily be painted.
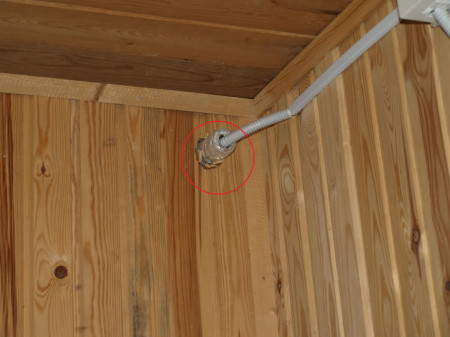
Since wooden houses shrink, this must be taken into account when laying the concealed wiring, so that the logs do not damage it. For this, the passage of the cable in the walls is necessarily done through the metal sleeve. Since both methods described above have their pros and cons, their combination is often used.
layout of posting items
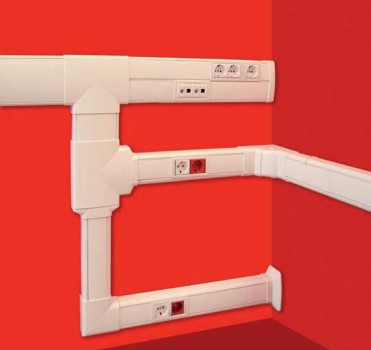
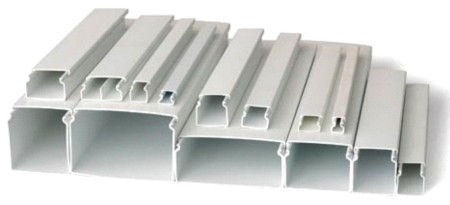
After the project is ready, proceed to marking the cable routes and points of location of outlets, switches, lamps, etc. Marking must be done carefully, carefully and accurately, so that later you do not have to correct or alter it. The layout should be done so that in the future the wires do not interfere with the installation of furniture and household appliances. Quite good looks wiring, laid in the cable channels.
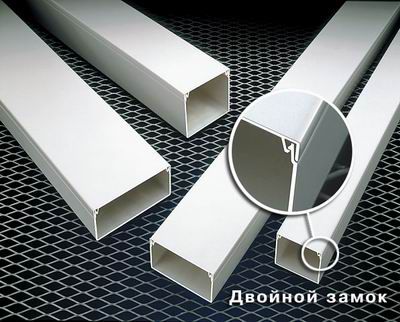
For cable channels, you need to immediately buy the right number of adapters, plugs and tees. The price of these parts is quite high, however, it is not recommended to save on them, as it is unlikely to be able to fit a box tightly together. When selecting channels, you first need to pay attention to the thickness of the walls and locks. So, if you mount the wires in a miniature box with thin walls and a double lock, then very often during operation, when you open the lid, the lock breaks.
After this, to add the cable to the channel, you will need to buy new parts and perform the wiring and cable-channel reassembly. To open the lid and not damage the double lock, you need to use a special tool, but electricians often neglect this. Optimal option - a box with a technologically sustained profile geometry, equipped with a single lock and having thick walls.
installation of switches and sockets in a house made of wood
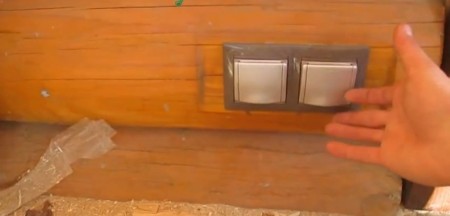
when the entire wiring diagram has been studied and the marking of cable routes has been made, proceed to the installation of outlets and switches. All electrical fittings must have a metal base for fixing to walls and ceiling, since the installation of electrical equipment on a metal base is the most fire-safe method. Once the installation of the equipment is completed, proceed to install the cable boxes. It should be borne in mind that no matter how good an electrician's eye is, it is still necessary to use the building level.
passage through walls and ceilings
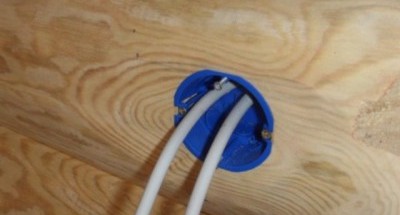
All cable passes through the wooden surfaces are carried out only through the metal sleeve (pass-through sleeve). First drill a hole in the wall or overlap, the sleeve is launched into it, so that both ends protrude by at least 1 cm beyond the edges. The metal sleeves have plastic inserts at the edges so that the wire is not damaged during installation. Next, the cable duct is mounted so that the end of the sleeve enters the box.
Cable for wooden house - selection criteria
To power a private wooden house, it is recommended to buy a cable with the index "NG" (non-flammable) and the designation "LS" (reduced smoke emission).
The wire must meet all fire safety requirements and have all the necessary quality certificates. The cross-section of the wire depends directly on the power of the electrical equipment in the house. Most often, designers indicate for lighting cable 3 to 1.5 mm, and for outlets - 3 to 2.5 mm. For an electric stove you need a cable with a cross section of at least 6 mm. Save on the cable, choosing, for example, cheaper aluminum instead of copper, is strongly discouraged. The rosette lines must be calculated in such a way that the minimum number of outlets is in one group. If, for example, the cable from the flap is routed to a group of four outlets, then nothing else can be connected to this cable.
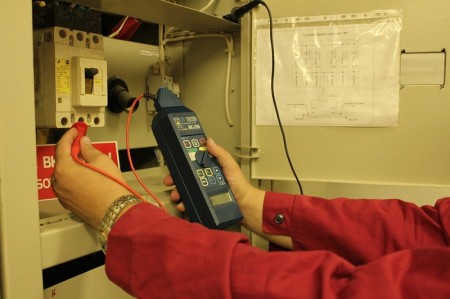
After the wiring is completed, the insulation resistance is measured. This is necessary to check if the insulation of the cables is damaged during installation. For security reasons, such operations should be carried out at least once every three years.
In conclusion, it should be noted that one of the main mistakes of inexperienced masters is the delusion that the wiring in the wooden house should be the same as in the brick one. This error is extremely dangerous, since all materials for electrical wiring in a wooden house must be distinguished by a high degree of fire safety. We hope that the above material will help to avoid some of the most serious errors in the installation of electrical wiring in a wooden house. Especially it concerns those masters who decided to make electrical wiring in a wooden house with their own hands.


